
The Hive 5 & Cortex HowTo

Credit: Some of the screenshots in this article have been taken from Official documentation from Strangebee, some are my own custom screenshots to make the writing of this article easier.
Let's start with a little background, The Hive and Cortex have been around for a few years, more detailed information can be read about the platform here : https://thehive-project.org/ & https://www.strangebee.com/
In a nutshell The Hive is scalable 3-in-1 open source and free Security Incident Response Platform designed to make life easier for SOCs, CSIRTs, CERTs and any information security practitioner dealing with security incidents that need to be investigated and acted upon swiftly. It is the perfect companion to MISP. You can synchronize it with one or multiple MISP instances to start investigations out of MISP events. You can also export an investigation's results as a MISP event to help your peers detect and react to attacks you've dealt with. Additionally, when TheHive is used in conjunction with Cortex, security analysts and researchers can easily analyze tens if not hundred of observables.
The Cortex integration is the main feature I love, and use all the time. Similarly to the IntelOwl platform, another great tool. You can setup dozens of analyzers with API keys, to check an Observable easily and at scale all at once. Enter a Domain, IP, Hash, Email etc. Cortex will go out and gather data and let you know if there is a hit for malicious activity, and then integrate these results into a case and other platforms like The Hive. MISP integration we will not be tacking in this article, but it is another Open Source platform, similar to OpenCTI, which I wrote an article not long ago on how to setup that.
Now that a little history and background info is out of the way, next are some important things that have changed recently with The Hive.
The Hive 4.x the latest version on GitHub, is opensource and has no limitations on users, organizations etc. When Strangebee developed and released The Hive 5.0 recently, they still have a base free offering, but have introduced some limitations over the older versions of the Hive. That being said, It still has enough functionality to work great for smaller outfits, especially if you share users and consolidate and use just one Organization. Here are the new limitations of The Hive version 5 we will be installing in this article.
Max Number of users - 2 (Read users are free) Only users with write permissions are included in this limitation.
Max Number of Organizations - 1
Max Number of Cortex Servers - 1
Max number of MISP servers - 1
As stated above, this still works well, as most small outfits will only have their 1 Organization, 1 Cortex Server and or 1 MISP server integrations setup. If you desire more users or features, a license can be purchased. Since the new Hive 5 has a newly designed and polished interface and new features, I would recommend going with the Hive 5. The Hive 4 is still a useful and able platform, so if you are looking to have no limitations, you may want to explore going with 4 instead of 5. So let's get started.
We will be using a much different approach installing The Hive and Cortex vs the OpenCTI HowTo I wrote using Portainer. We will be leveraging Strangbee's excellent installer.sh script for Both the Hive and Cortex installations.
Requirements:
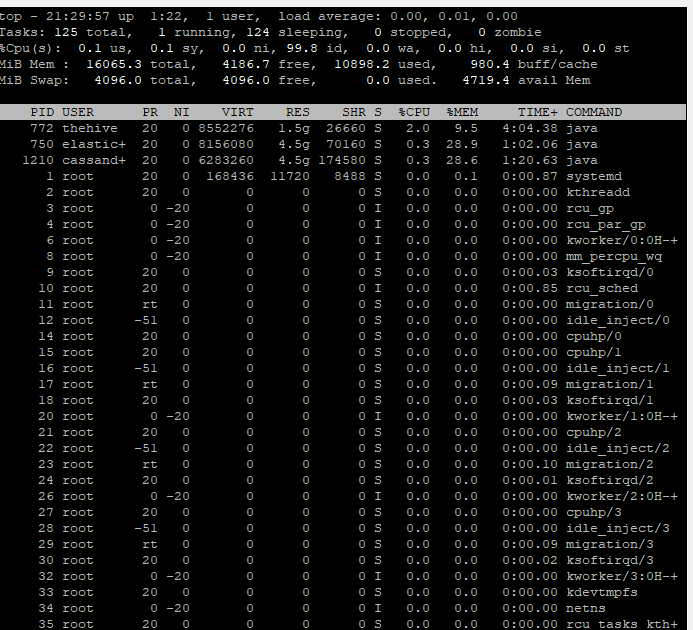
The Hive and Cortex will each need their own dedicated VM, one for The Hive install and one for Cortex install. Each VM must have a min of 4vcpu and 16GB of RAM, or the install script will not detect this and not continue. You can drop the memory and vcpu after installation, but I would not recommend this. The designers put this requirement in the script, as there are many components like Elastic that take a lot of resources, so if you do chose to drop the amount of resources after installation, be warned, it may not function well or have other issues. Running a quick TOP command, shows that with the server doing nothing and just being loaded, it has already taken a majority of the free memory. For learning purposes you could probably get away with dropping both VM's down to 12GB in a pinch if absolutely necessary.
Onward, so you will want to spin up Ubuntu 20.04 server VM's, both with the requirements above. I have some other notes and links in my other article on how to do this. This script is only tested and certified to work with Ubuntu 20.04 release, and a few other distributions. So make sure you use the 20.04 release. Set a static IP address for both VM instances, perform all updates and install openssh server. These can be done with the following commands after first booting the VM's.
sudo apt update && sudo apt upgrade -y
sudo apt install openssh-server
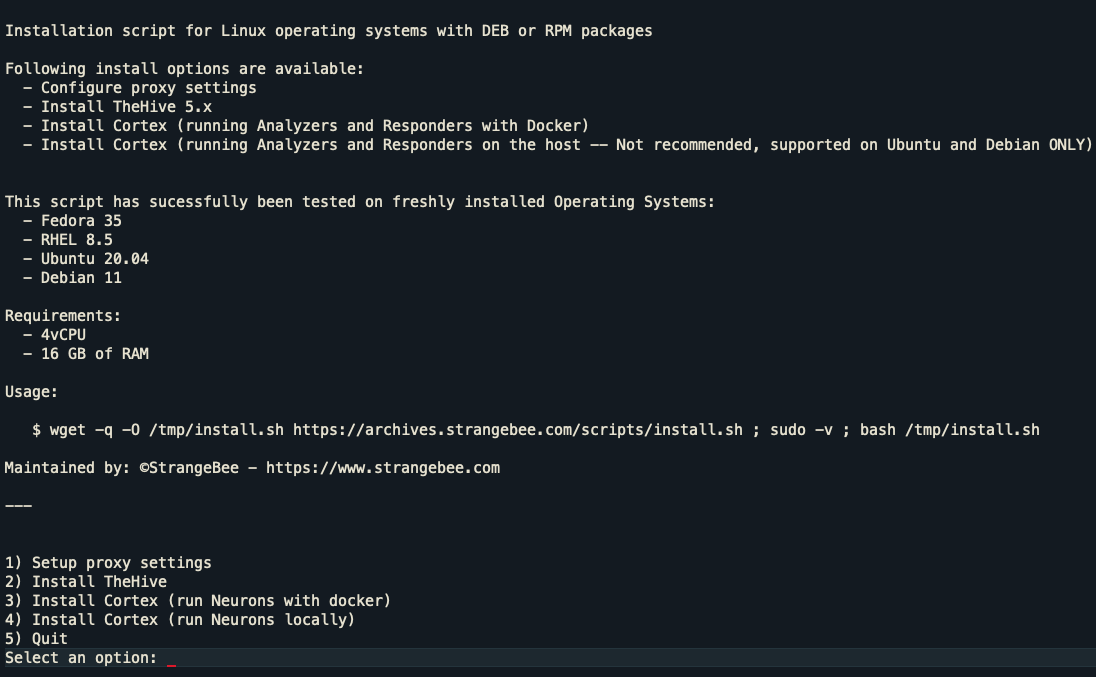
Now SSH into the first VM static IP, and login. We will be running the following command on both VM's one at a time, and selecting options for install.
wget -q -O /tmp/install.sh https://archives.strangebee.com/scripts/install.sh ; sudo -v ; bash /tmp/install.sh
You will then get prompted on the VM where we are installing the hive, select option 2 - Install The Hive
This will complete after time and will be fully pre-configured and ready to go.
Repeat the same command above on the other VM where you will be installing Cortex, but select option 3 - Install Cortex (Run Neurons with Docker)
Same thing with Cortex, everything will be pre-configured and ready to go.
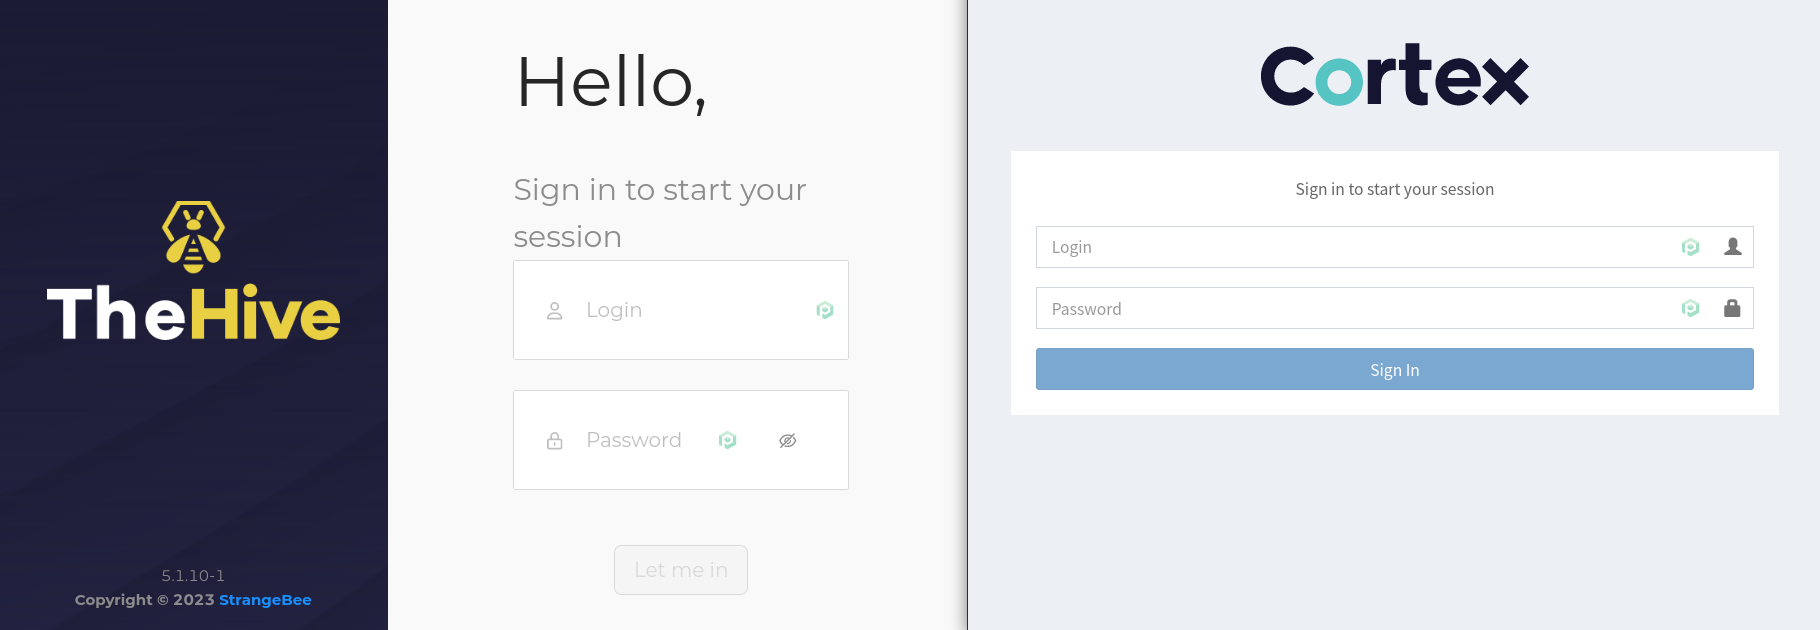
Here is the information on how to connect via the respective Web UI's from here on out.
The Hive can be reached at "STATICIPOFHIVESERVER:9000"
Cortex can be reached at "STATICIPOFCORTEXSERVER:9001"
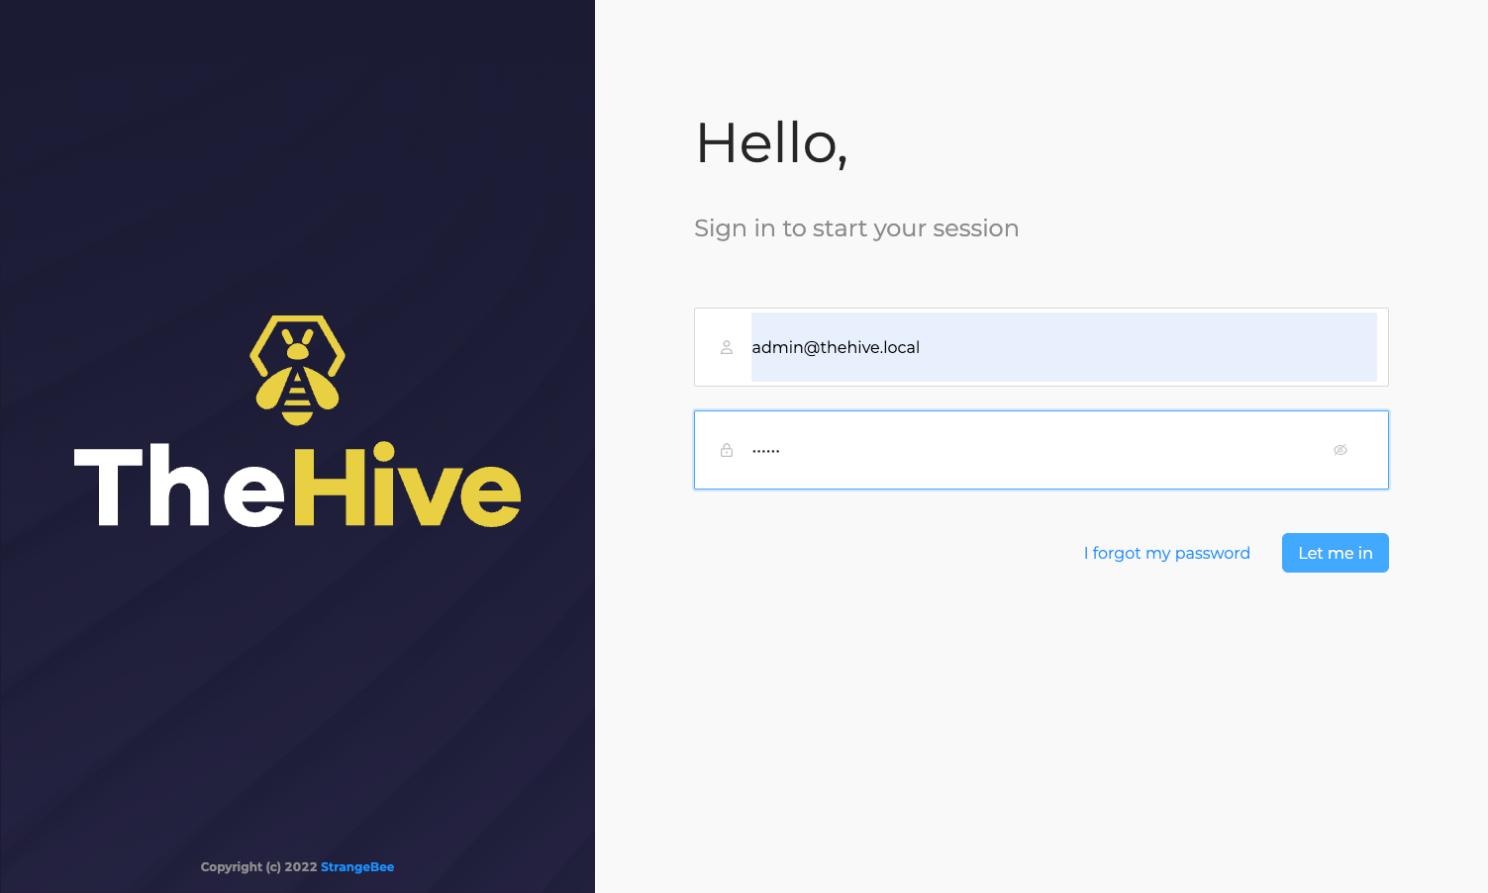
We will be starting with doing some basic Hive configuration setup. Navigate to the HIVE URL above and login with stock credentials:
user - admin@thehive.local password - secret
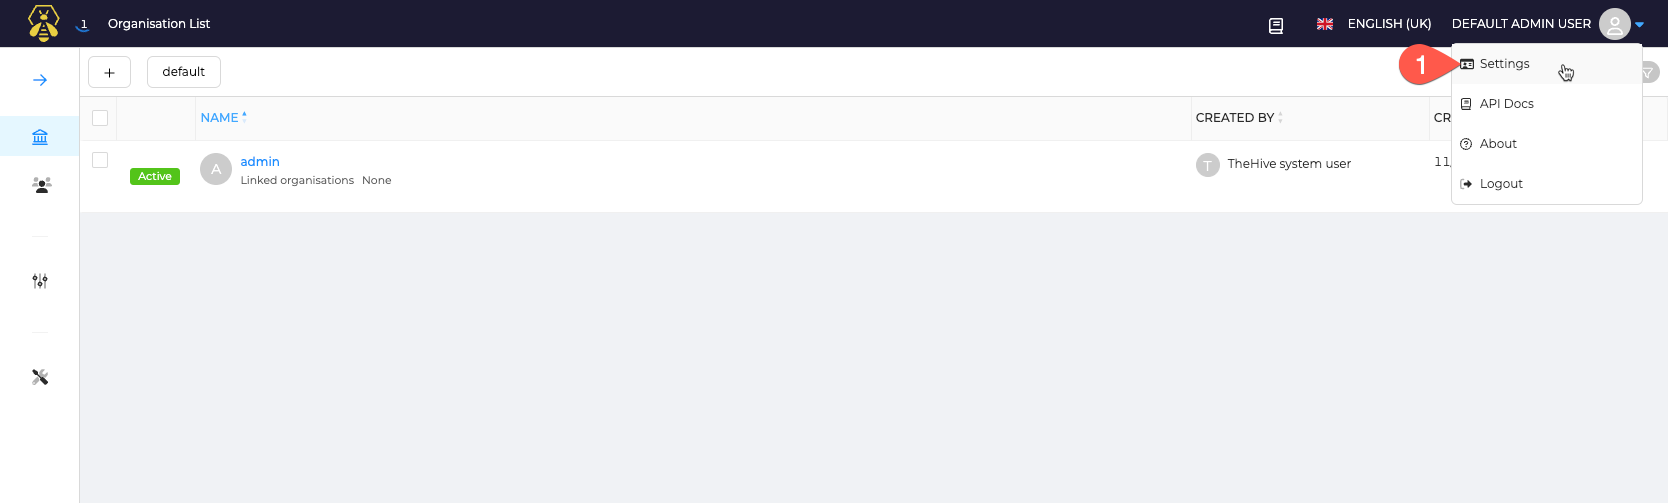
First change Admin Password by going to User settings:
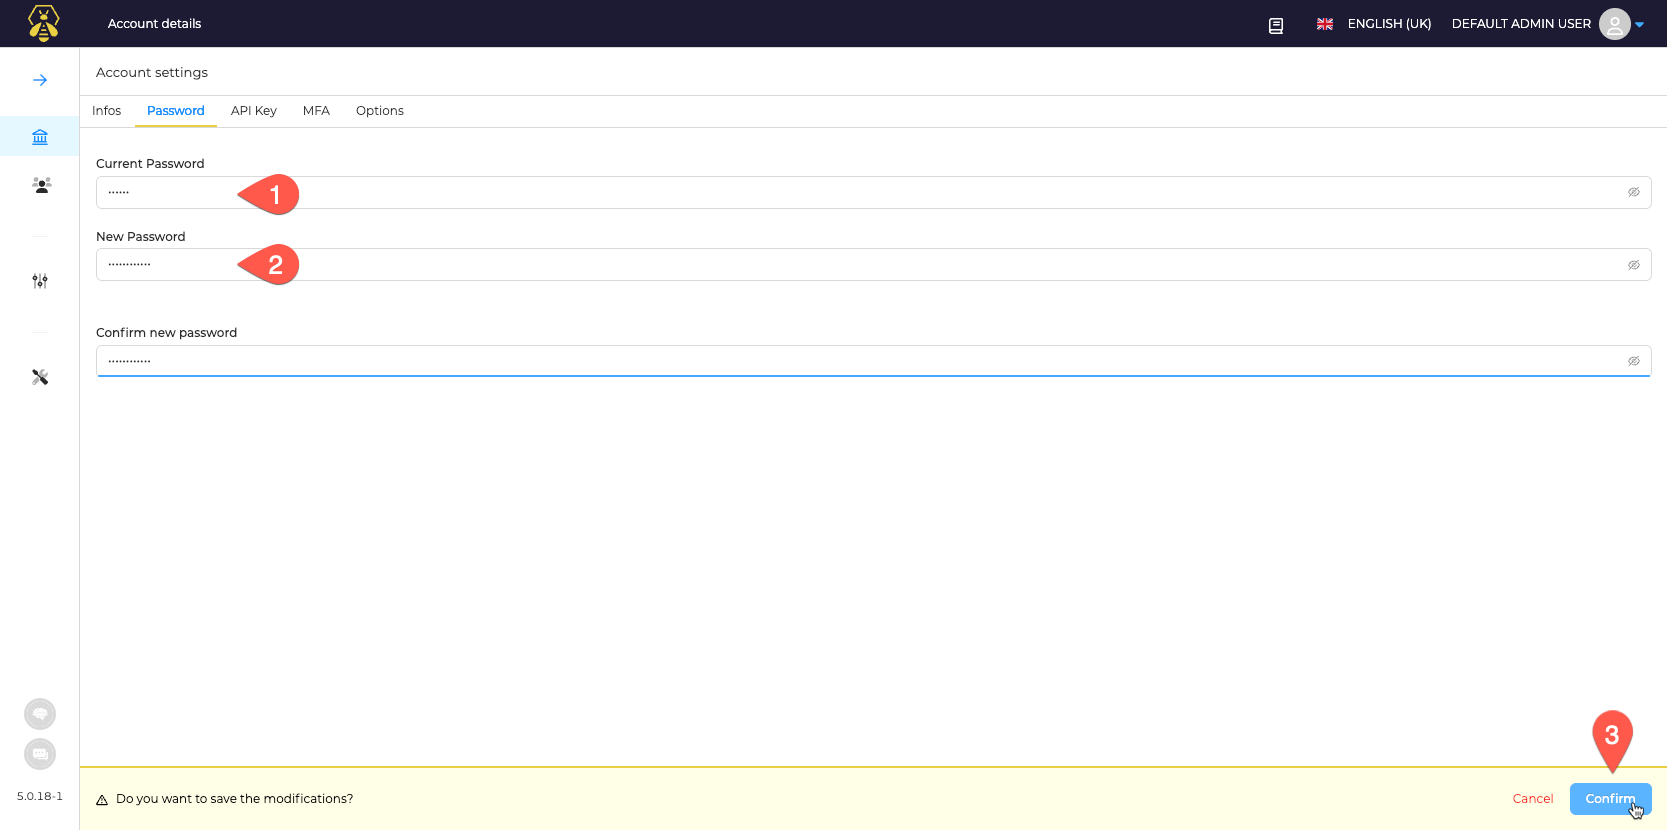
Change the default password
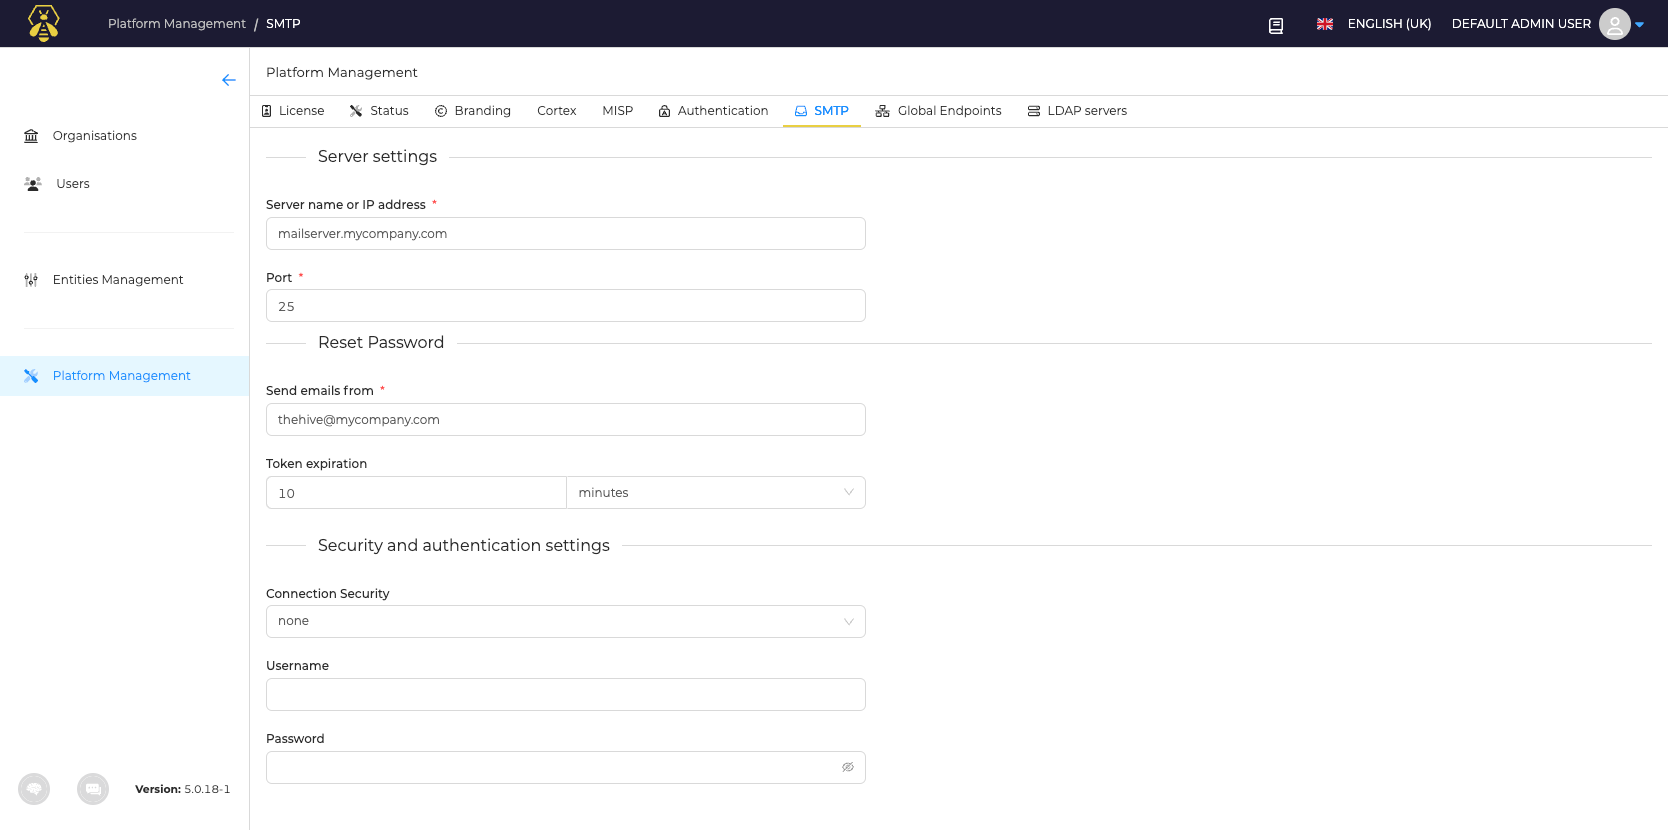
Next Configure an SMTP Server you wish to use
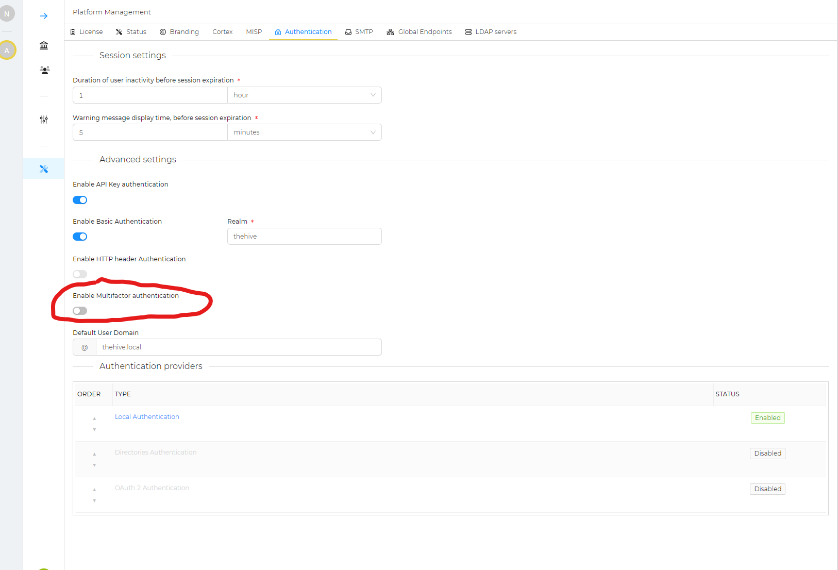
Important, before we create our 2nd User if so desired, turn off MFA globally, as this will prevent the second user from signing in if MFA isn't pre-configured for that user. Given this will likely be an internal instance, go ahead and disable MFA as shown. To reduce any issues with login with additional users.
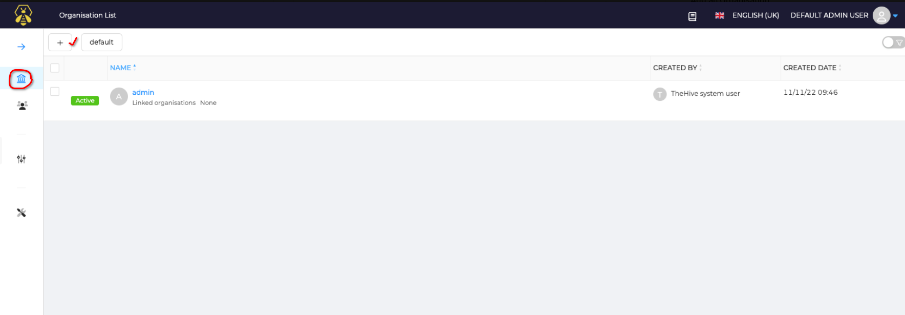
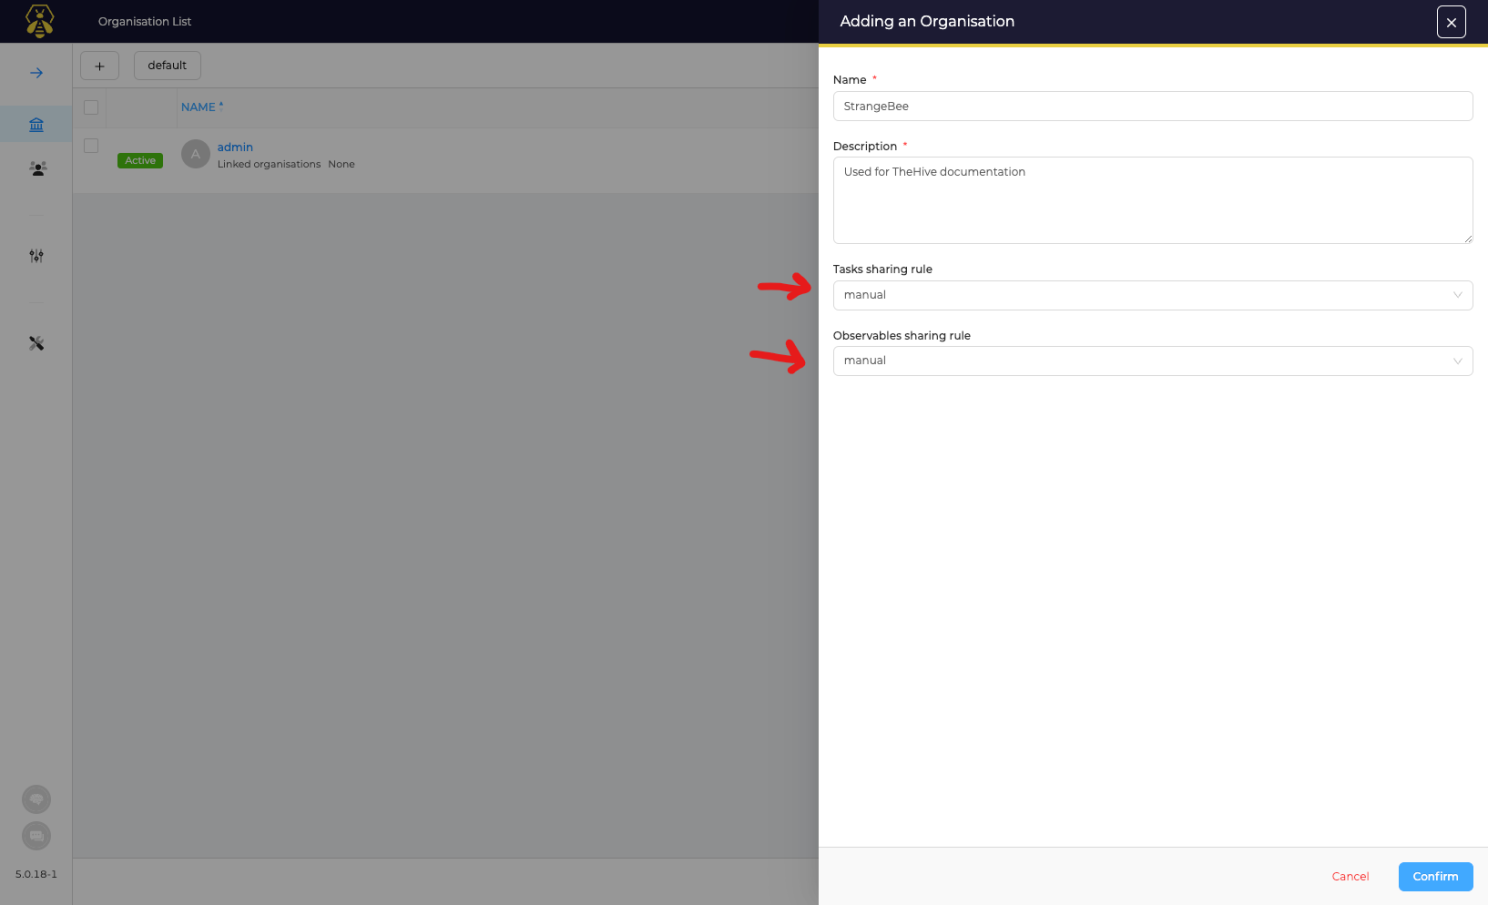
Lets create our Main Organization, Click on the + in organizations view.
Next select dropdown boxes next to arrows where it shows "manual" by default, and select "auto share", just makes things easier.
Now the next part can be done in one of two ways, you can use the admin user as the main user and LINK that user to the new organization we created, or create a new user, and link that new user, or both.
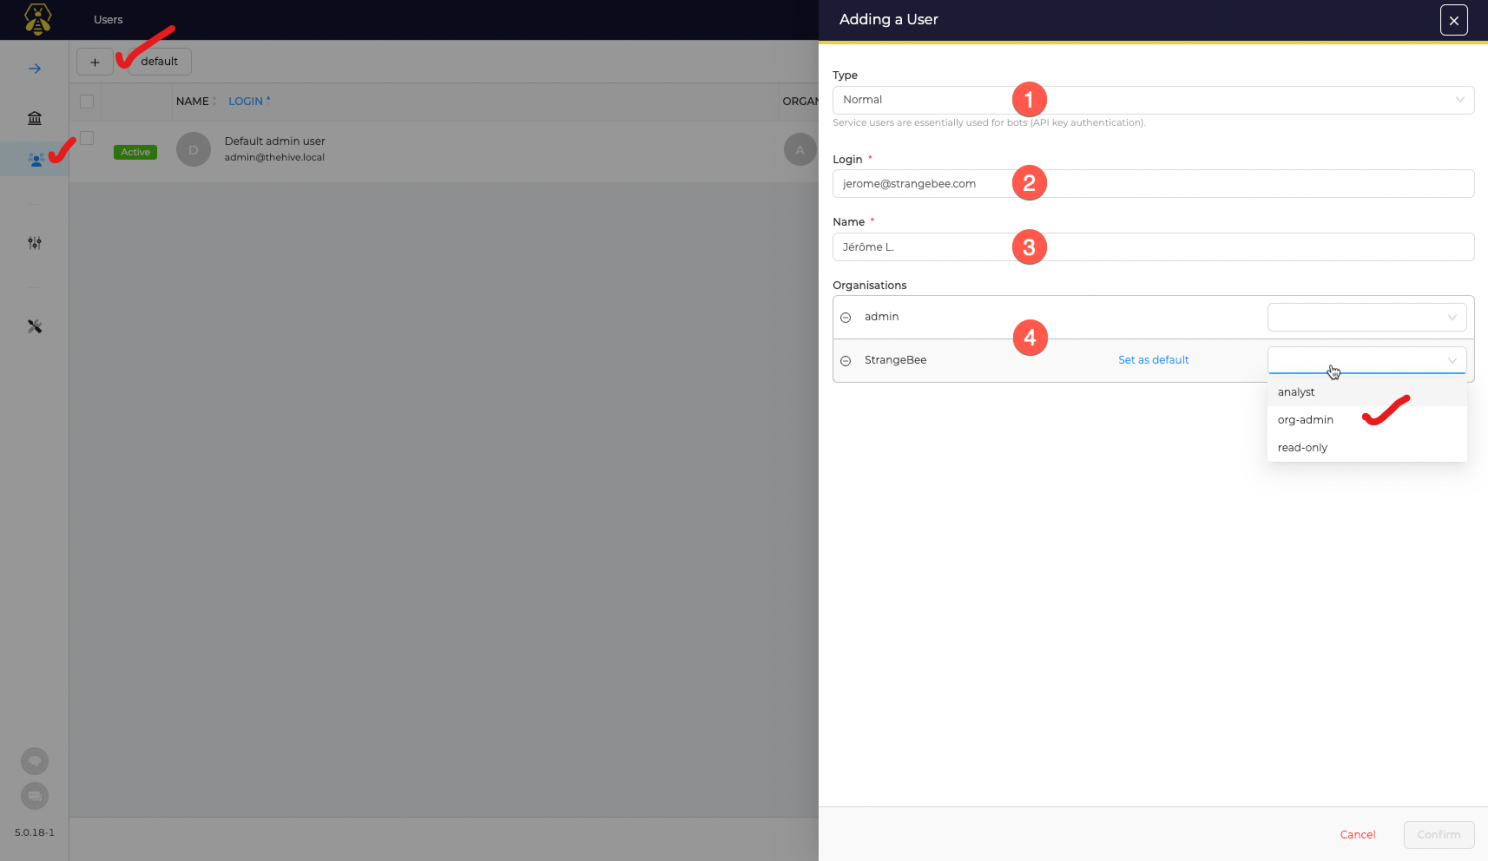
Regardless, Analyzer configuration options are not available on the stock admin user's in Hive/Cortex. So click users on the left under main admin profile, click + sign up top, and fill in as shown below.
You can select "org-admin" for this new user on the 2nd created organization we just created.
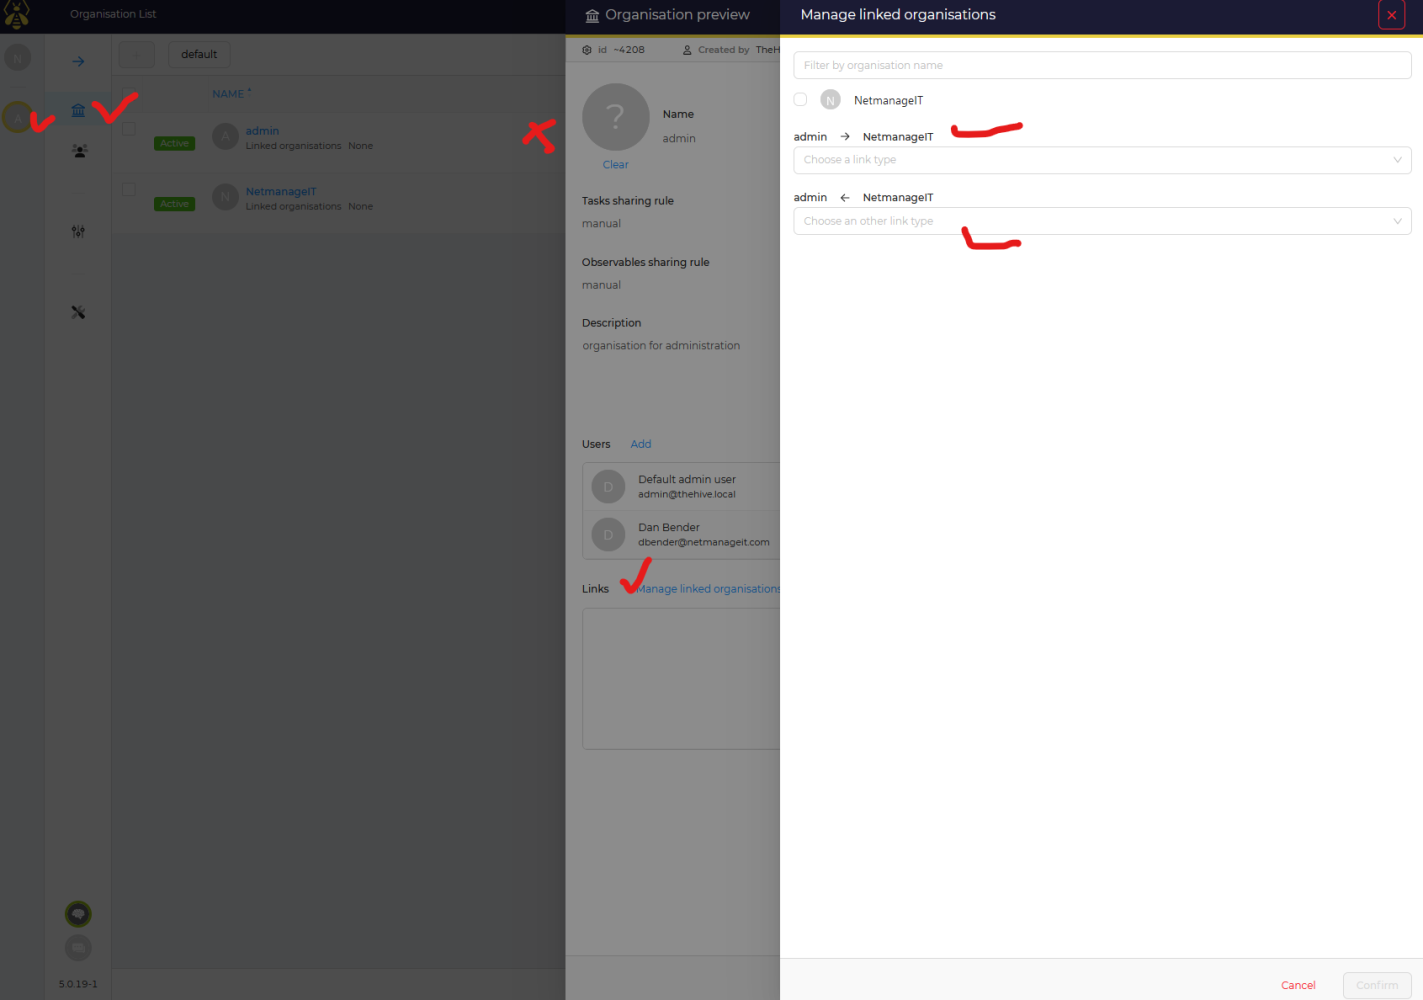
If you want to link your main admin user to the new organization, login with your second user, make sure your admin user profile is selection bottom left first checkmark.
Then select Organizations, 2nd checkmark
Red X is where the "PREVIEW" will pop up when hovered over, to get the other windows to pop up on the right.
Click "Manage Linked Organizations", then click two drop boxes to select levels of linkage between new Organization and default admin user.
NOTE: If this is not done, the new Organization will not be visible to the default admin user and you MUST sign in with 2nd user to see the new organization.
I know, its a bit confusing how they did this, but its really meant for tight security and control between multiple organizations and users when the platform is scaled. In this small setup, it seems counterproductive, but it is what it is.
Play around, you will soon smoothly be flying around the interface.
Onward. 2nd Part of install (Cortex Setup)
Be patient, we are almost done, then we can start using The Hive and start creating cases and scanning Observables with the Analyzers. Normally there is a lot of pre-configuration steps, including setting up a secret key, this is all done with the Install.sh script for us!
Connect to Cortex at Http://STATICIPCORTEXSERVER:9001 , It will ask to update your database.

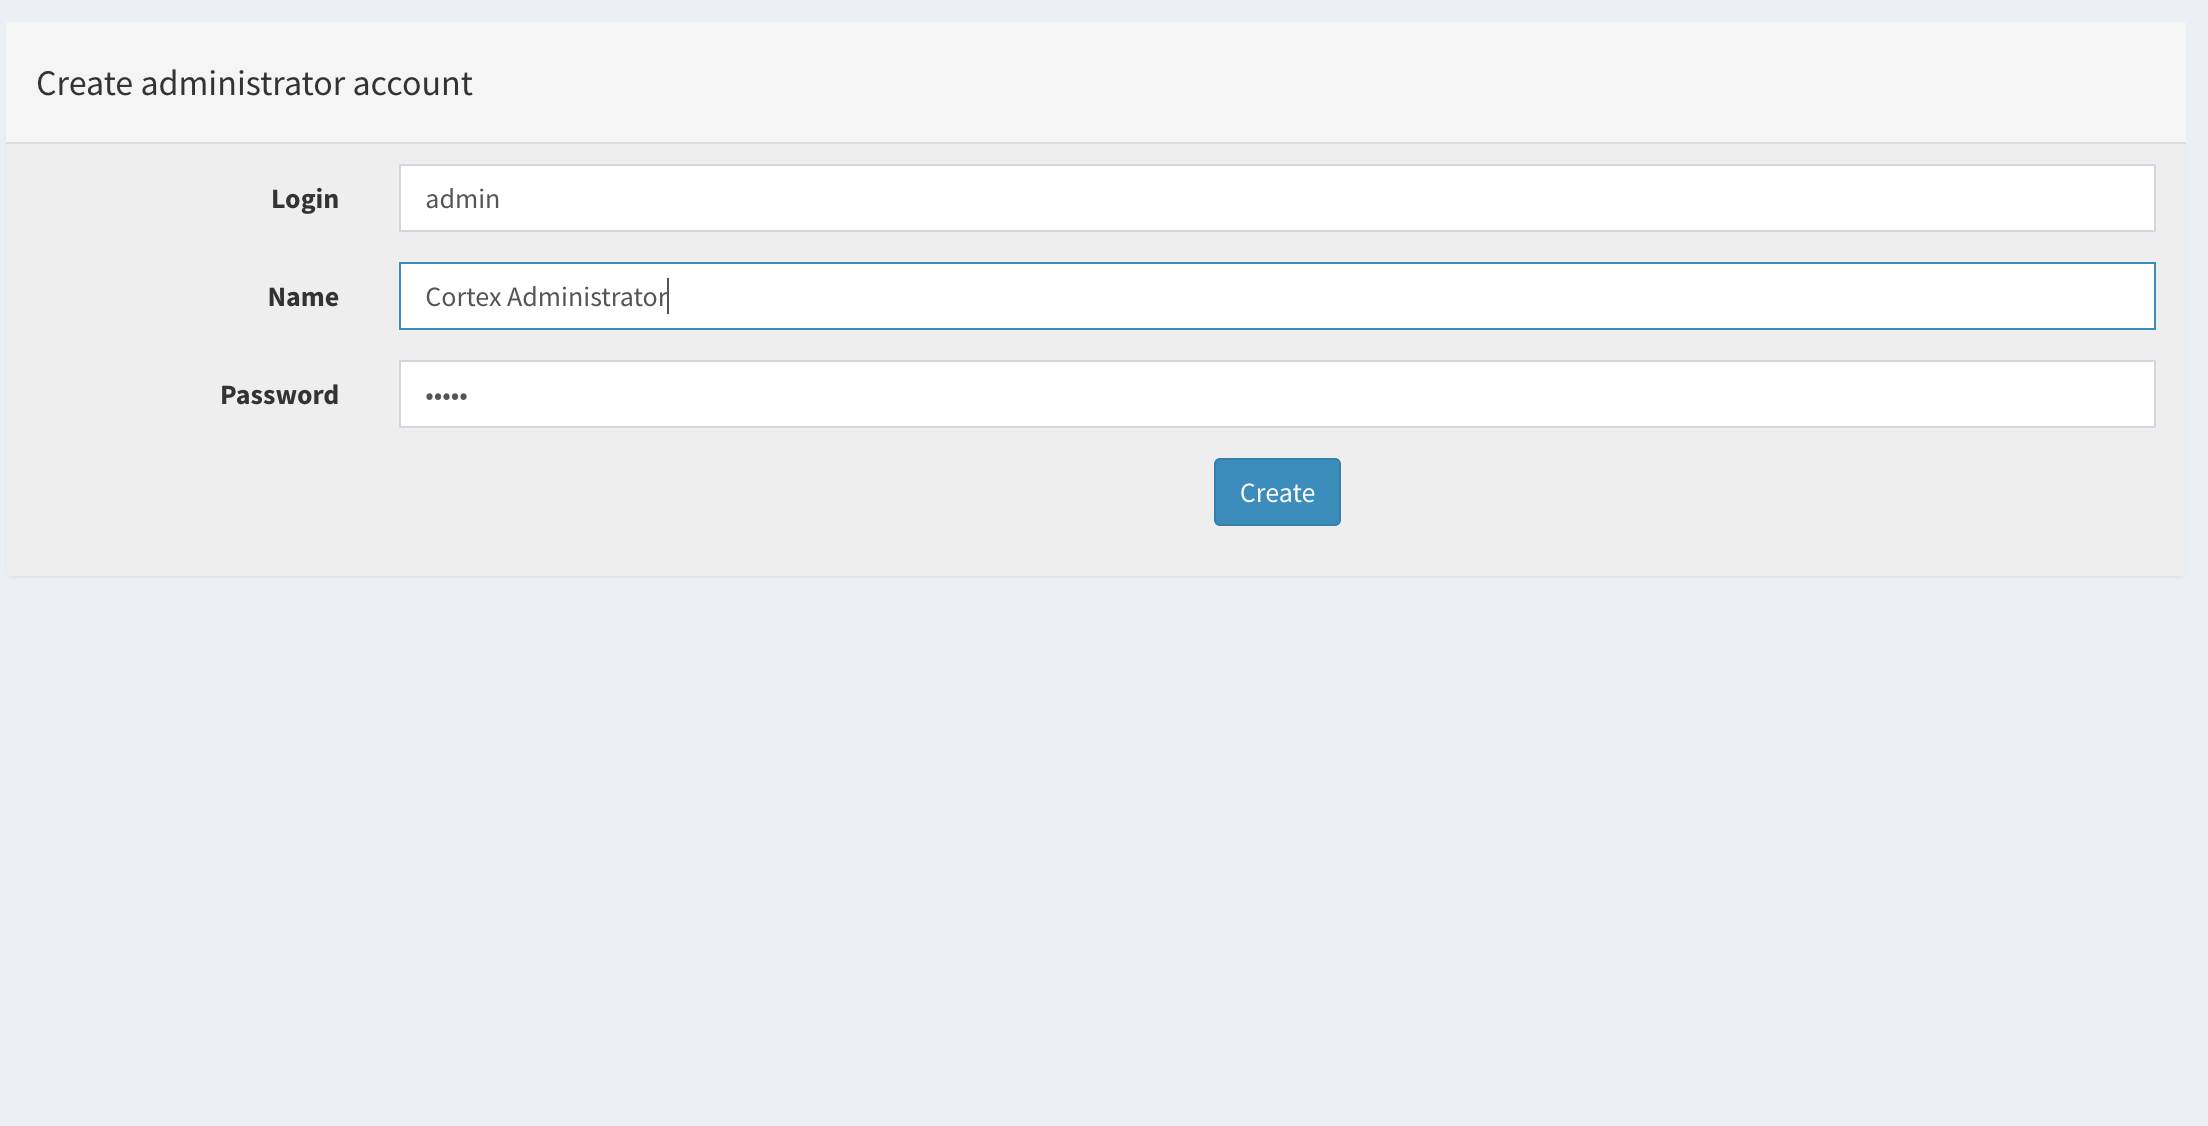
Create your Super Admin account
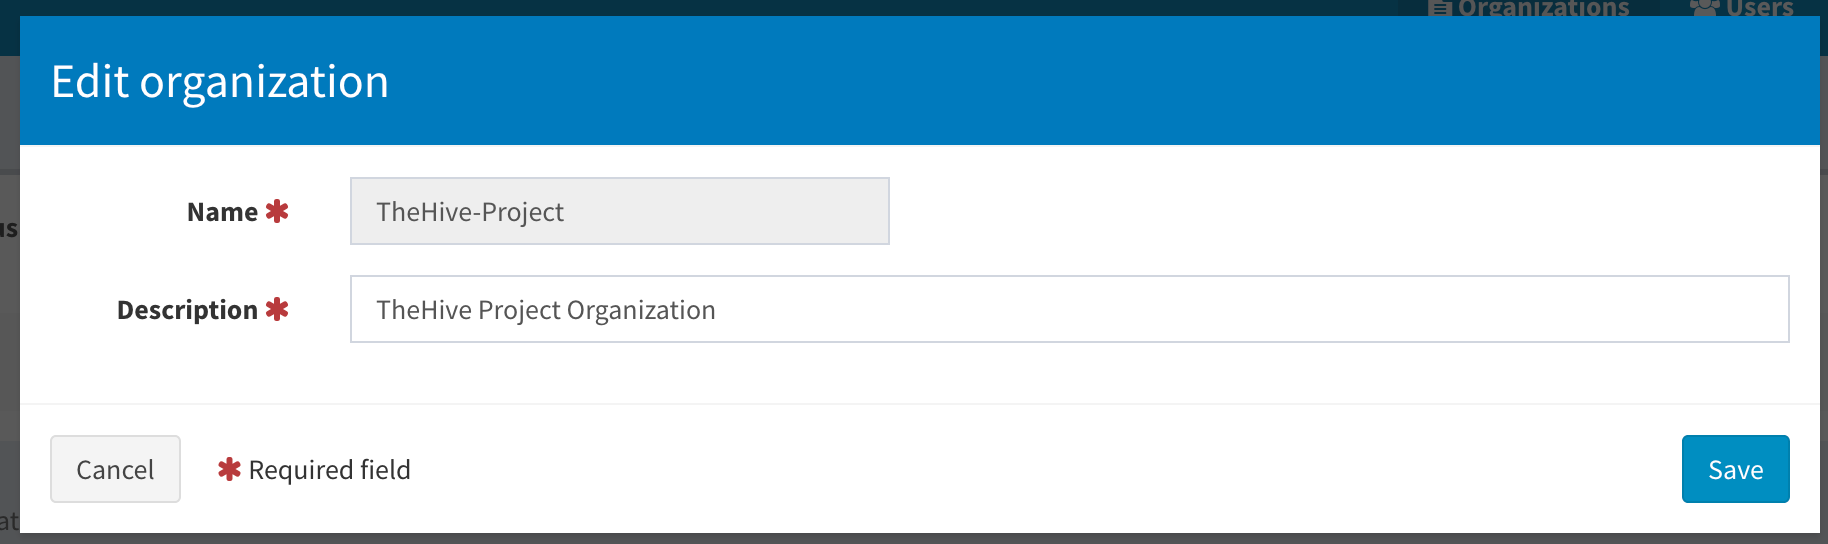
There will be a default Cortex Org created for you. Note, you cannot configure analyzers with this default organization as noted above. So you need to create an additional main organization. Click the Add Organization button.
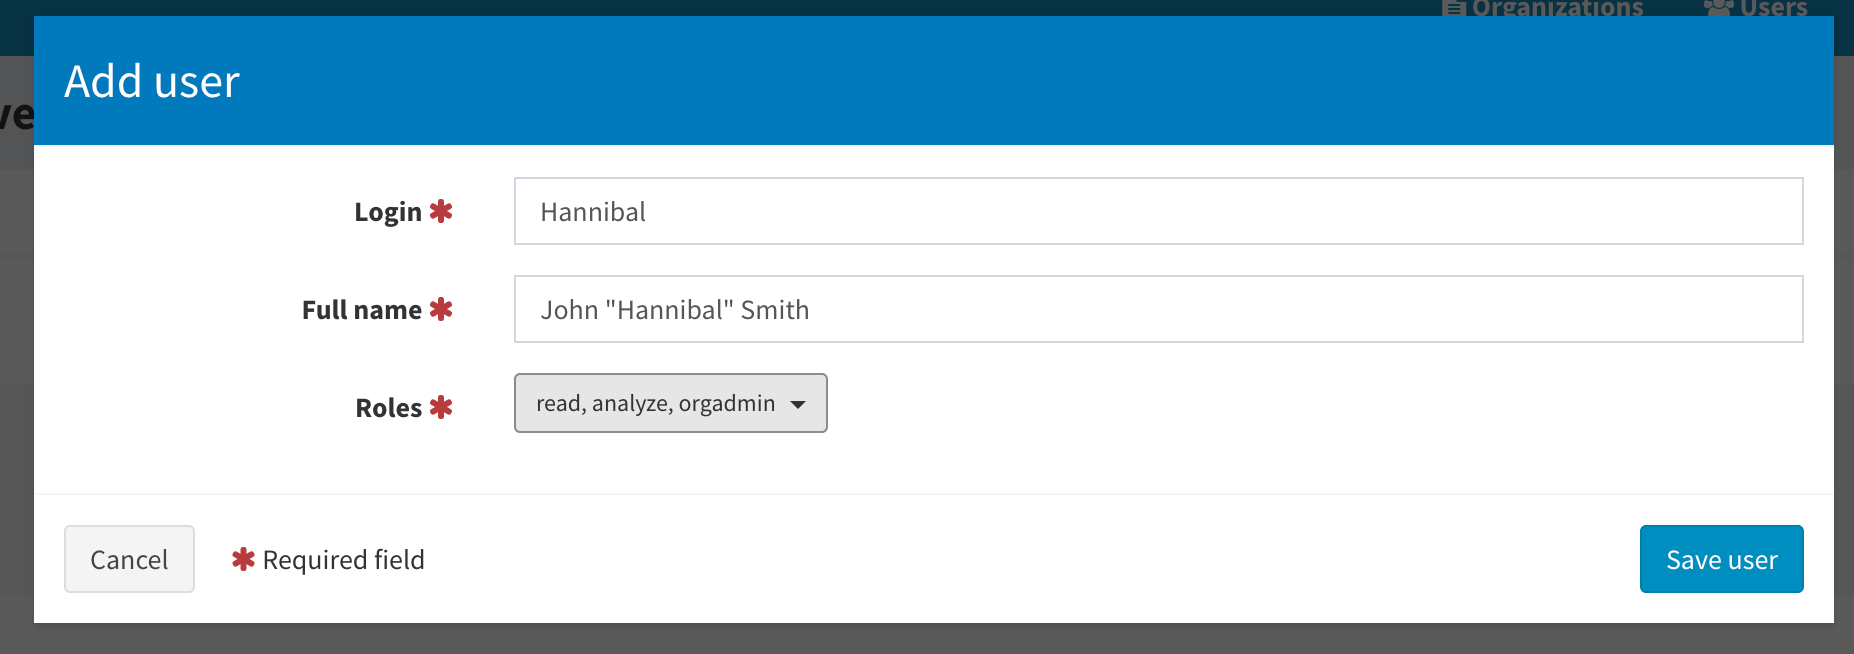
Now create the new organization admin account with orgAdmin role permissions
Once this is done, log out and then login with the new 2nd user you created.
To enable the analyzers you want, get API keys for the services that need them, and enable the ones you want that do not need them for this organization. Once enabled and configured in Cortex, they will be available for use in The Hive once we complete that part down below.
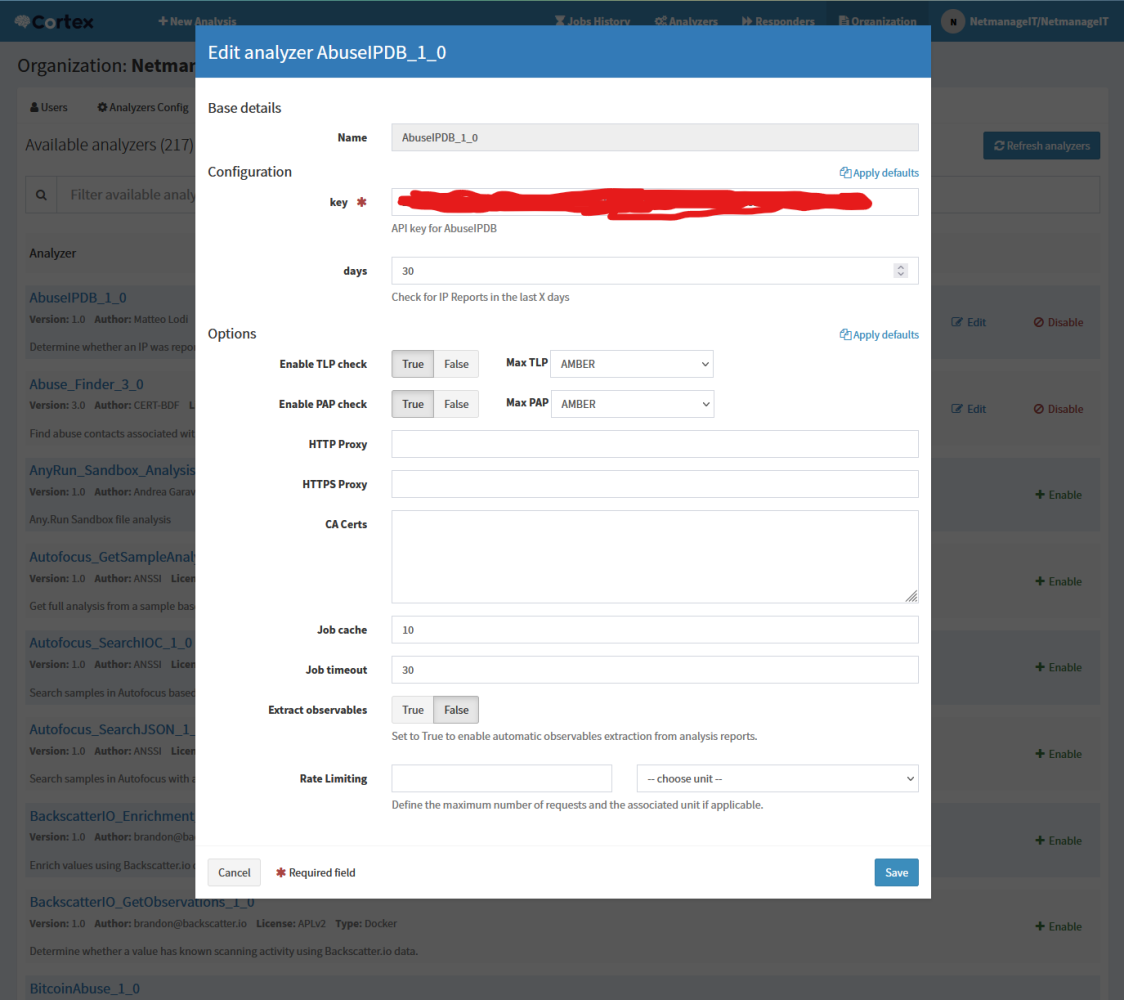
Go to Organization, Configuration, Organization and then Analyzers tab.
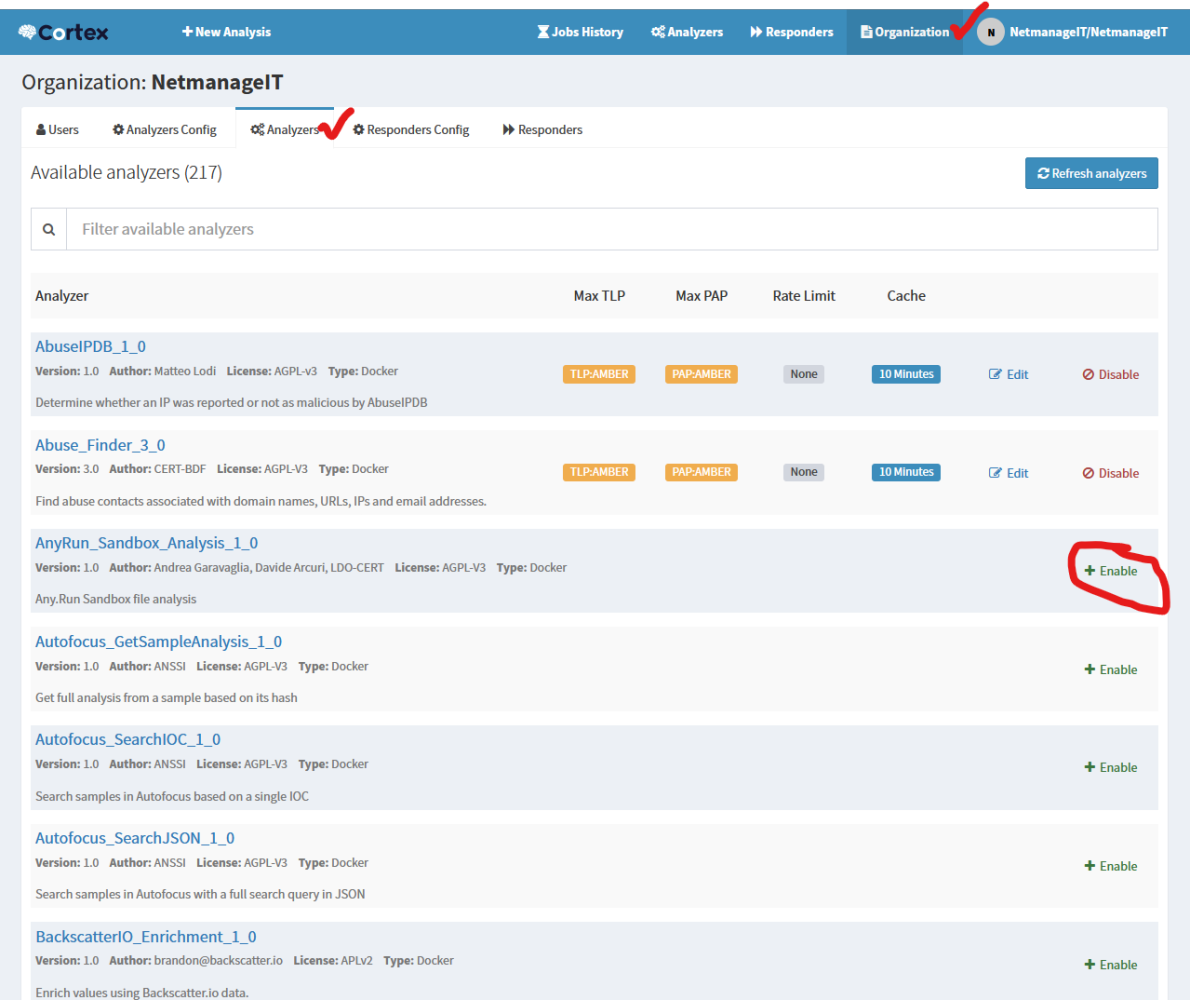
If you click on enable, you will see more information to fill out. Here is the AbuseIPDB example.
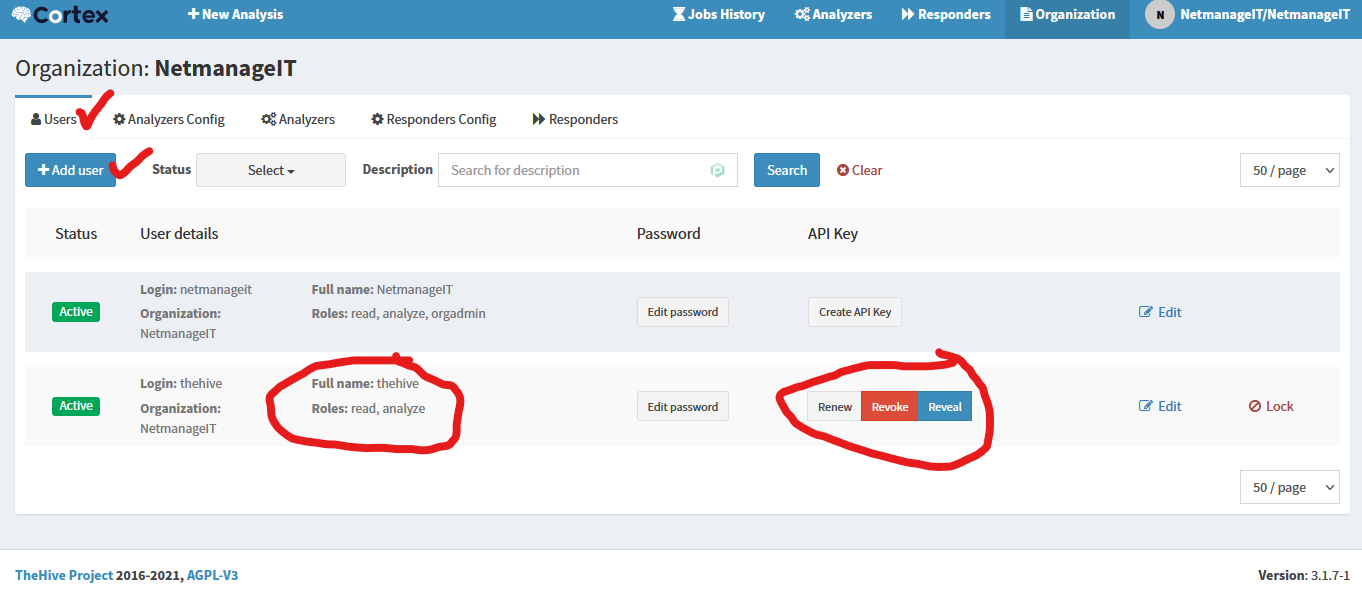
Now to Link the Cortex Server with The Hive Server, create a new user with (Read, Analyze) role and generate an API Key that we will add to The Hive's configuration. There will be a "Create API Key" button to the right of Edit Password/Create Password. Copy this API Key as we will need it in the following steps.
Now go back and sign into The Hive under main 1st admin user.
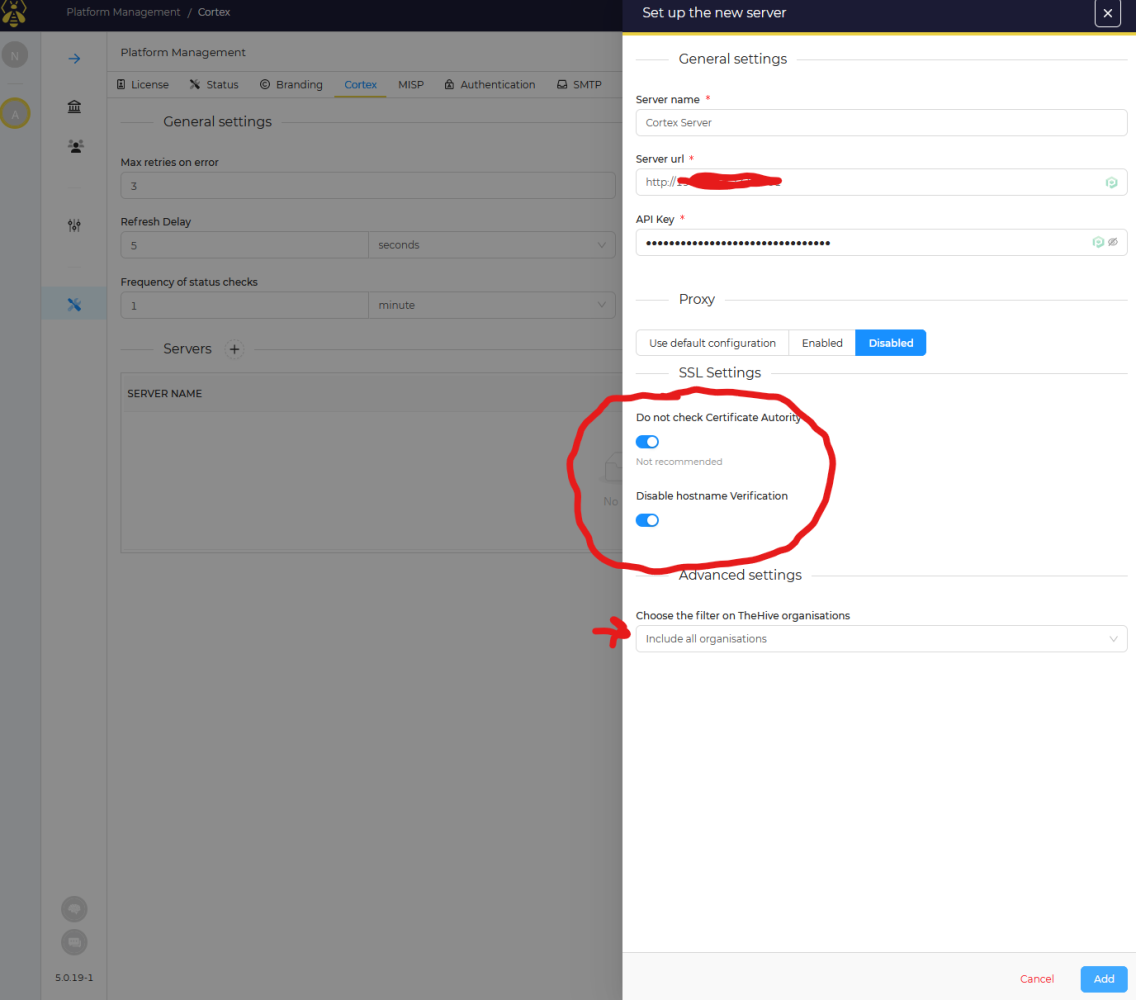
Name your cortex server, then enter your server URL of : HTTP://STATICIPCORTEXSERVER:9001, paste in your API key from your hive user in the previous steps. Make sure "Do Not Check Cert Authority" is enabled, as we do not have SSL configured in this example. As well as "disable hostname verification" enabled. Then choose "Include all organizations" so this cortex server can be used for all orgs.
Ok.... So our core configuration is DONE! Now for a quick example of use to add and scan an observable you want more info on. Let's say you have a phishing email in quarantine, and a user wants you to release it. Now, you have a strong suspicion its malicious and just doesn't smell right, but you want more confirmation. So you gather the email source IP for example, or perhaps email domain. We then add this observable and run all our configured Analyzers against that.
Let us create a quick case.
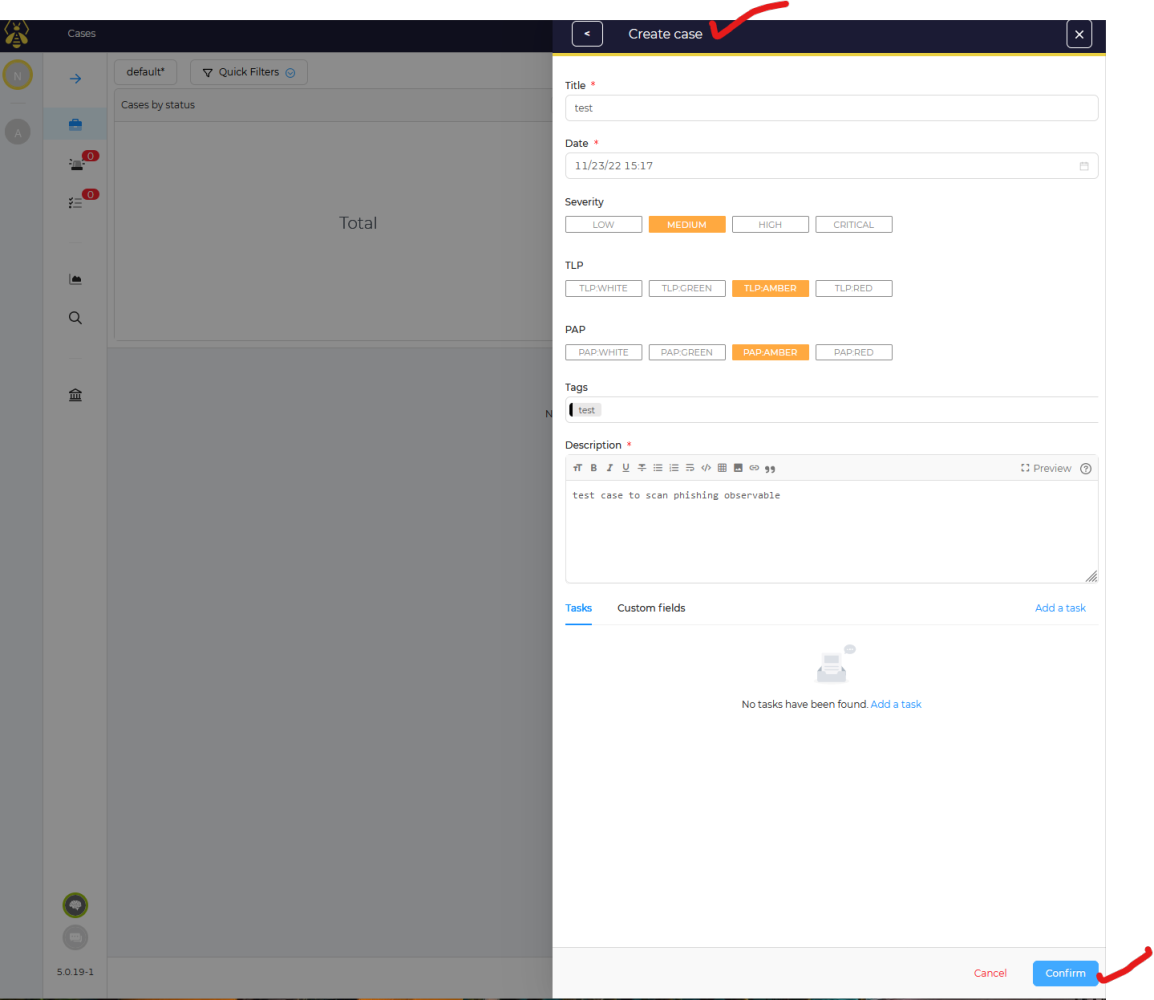
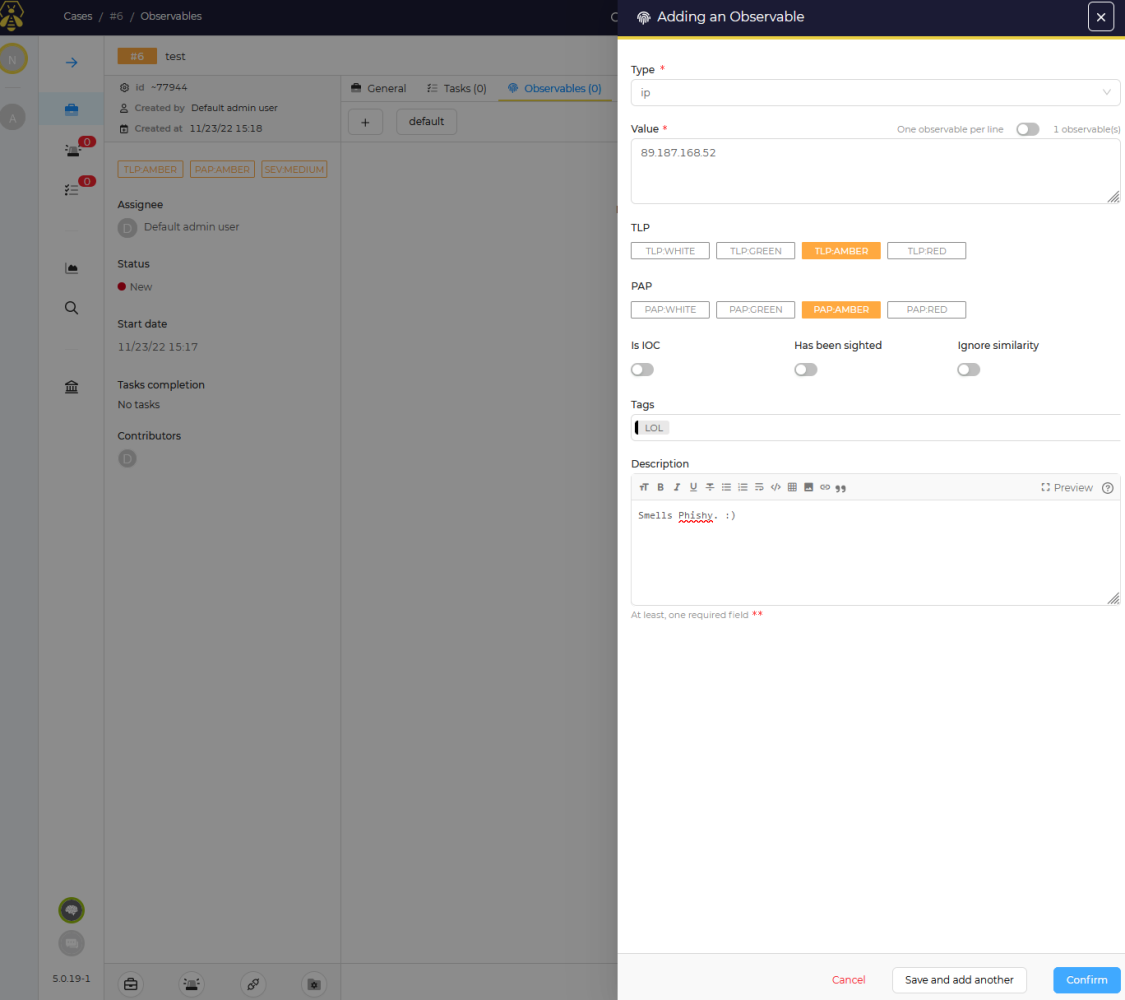
Click on Observable and then + sign to add one. In this example I am going to pick a random example of a real phishing email from a customer of ours, already you can laugh seeing this mail flow Geo-IP map where a VPN out of Europe is the source of the email in question. LOL This is already a dead give away, but lets just see what the analyzers find from the source IP.

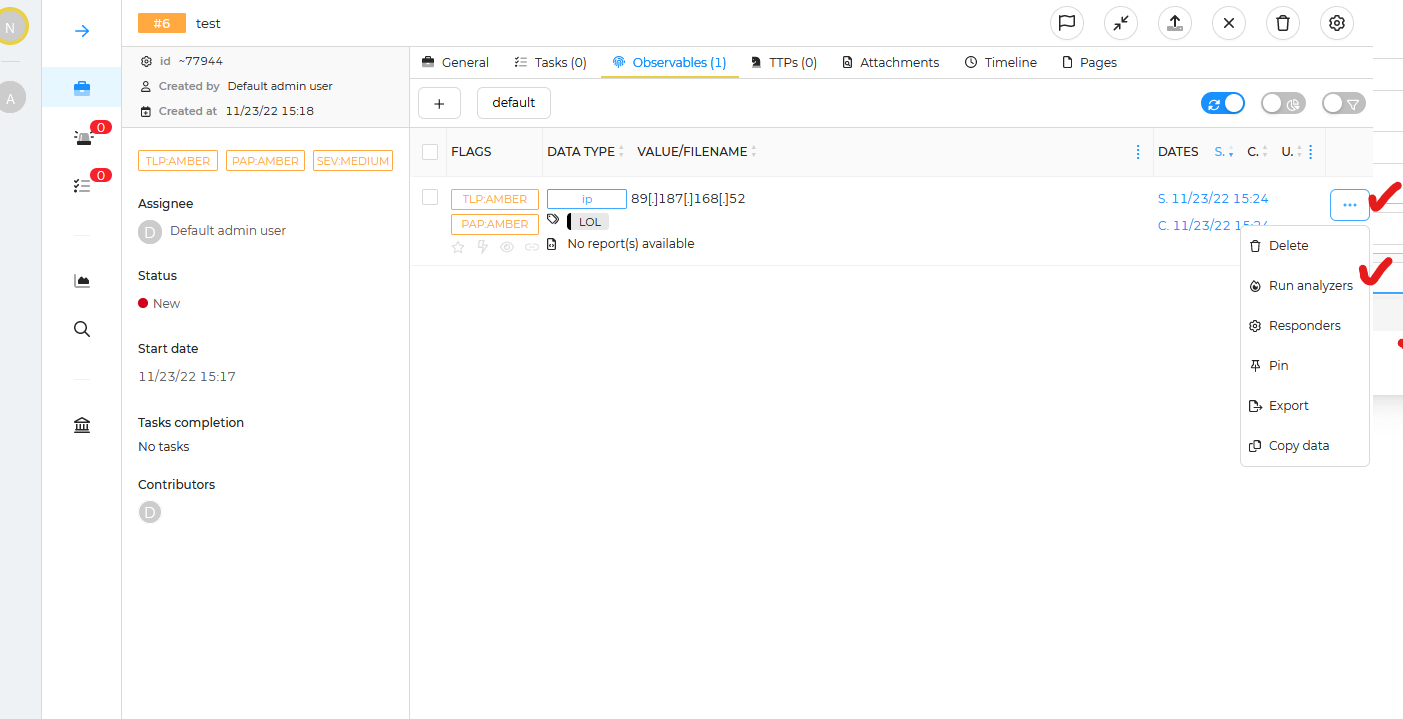
Now we click on the 3 dots to the right, and select "Run analyzers" in sub menu, and select all applicable analyzers available to us.
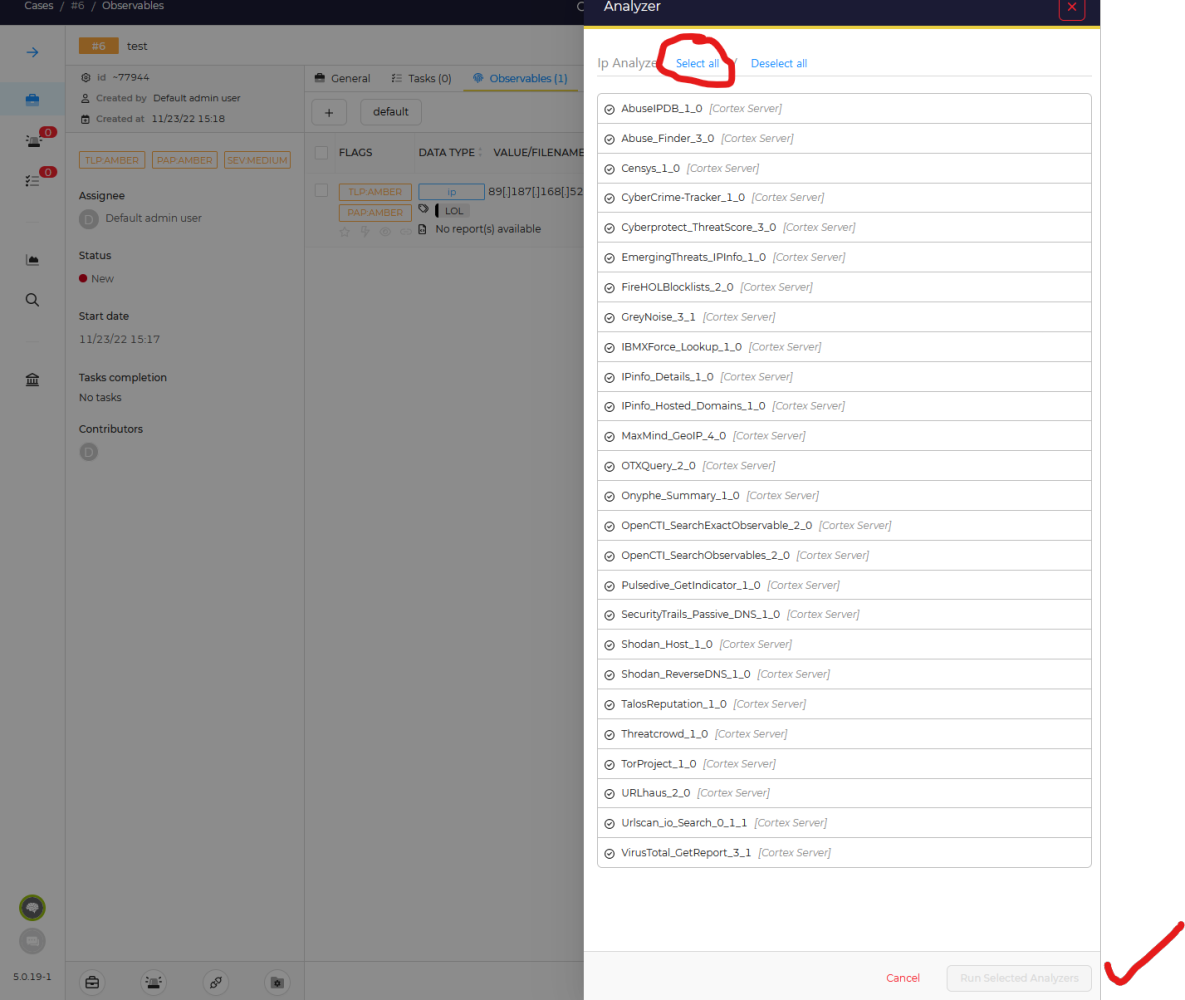
Select all or just the ones you want, then click "Run Selected Analyzers"
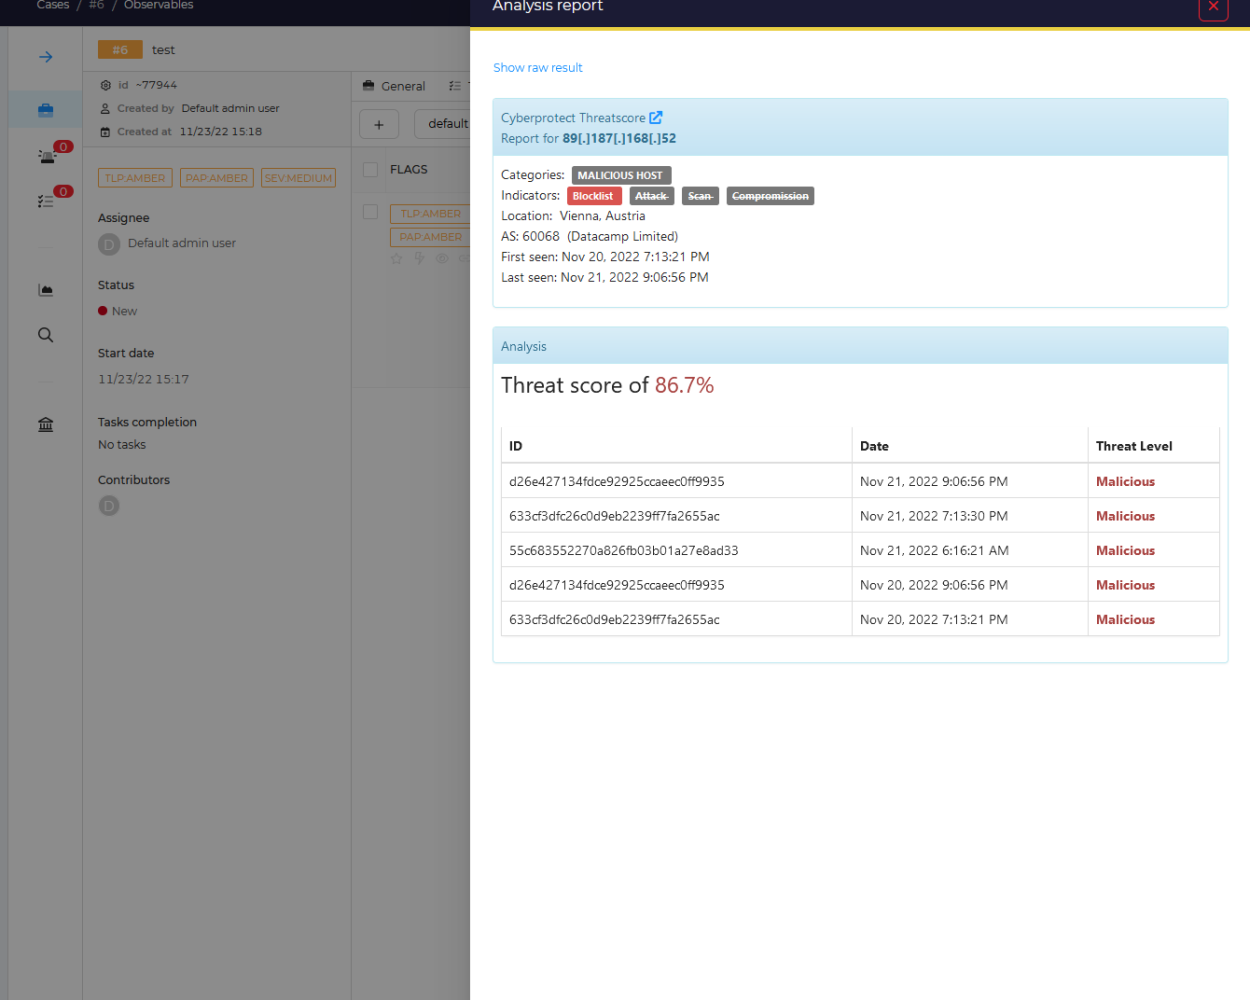
Once the job has been dispatched and run, in a few seconds you will start to see each analyzer report in. Here you can see Onyphe & ThreatScore had obvious hits, some other details such as GreyNoise indicating this IP observed scanning the Internet looking for targets in the last 90days. Some examples will be worse than others depending on the observable, how long its been observed in malicious activity etc. In this example it was taken just a few hours ago. Ones that have a longer history of abuse will certainly light up more analyzers with more historical red flags.
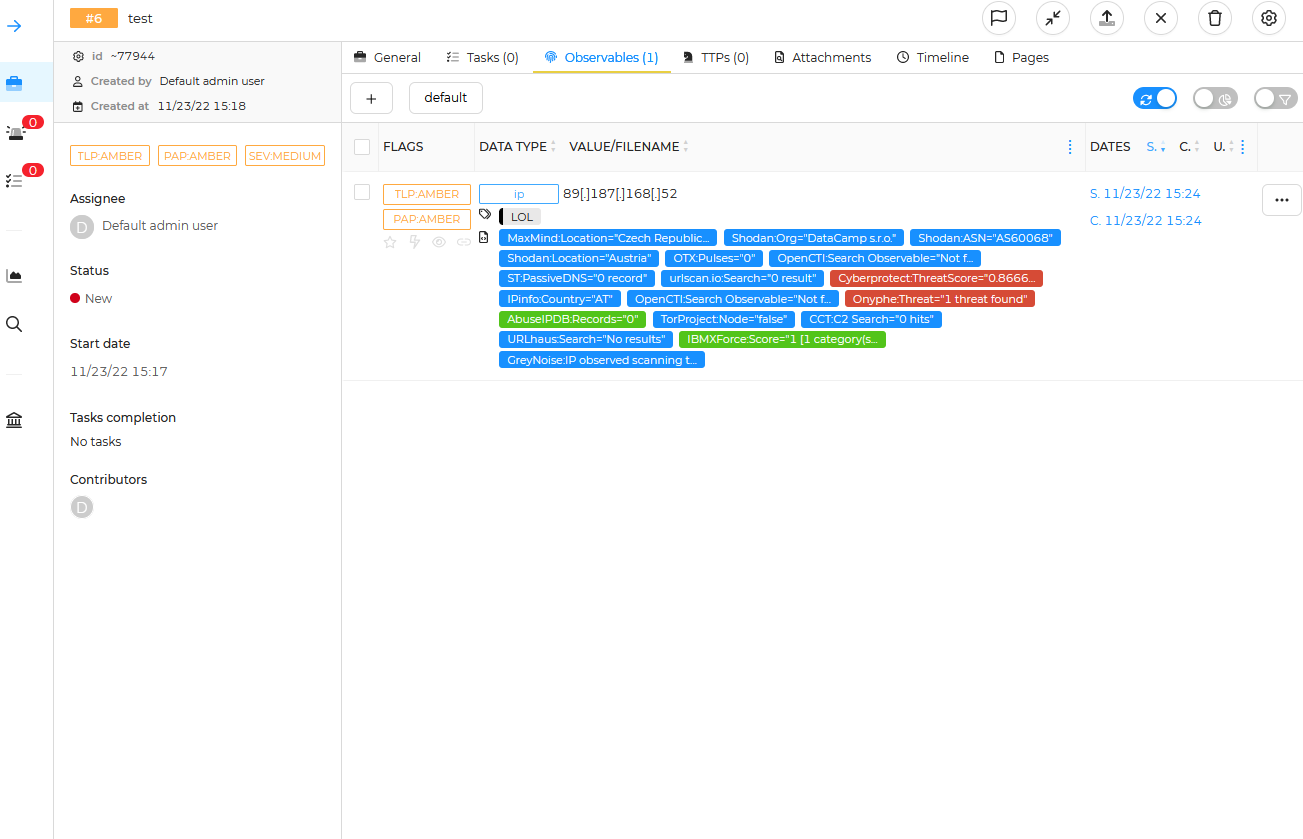
You can then click on any of the boxes above, for further details.
That's it for now! This should get you started. You can get crafty and hook other platforms to send and create Alerts in the Hive, for example Wazuh using their scripting and setup instruction on their site. HowTo link here : https://wazuh.com/blog/using-wazuh-and-thehive-for-threat-protection-and-incident-response/
Or you can use TheHive4py to create Alerts from emails etc. That is outside the scope of this article. Let me know if you have any issues, or if you spot any errors as I cranked through this and its my first rough draft.
Thanks.