
Sn1per. An All in One offensive security framework Howto.


What is Sn1per aka Sniper? Is it touted as the "Ultimate Pentesting Toolkit". Not only does this do vulnerability scanning like OpenVAS does, it also comes with many modules to do much more. From OSINT, information gathering, Attack surface mapping and discovery, and has automated attack testing for the usual stuff, brute force, directory enumeration, exploitation , fuzzing, integrations via API with other indsutry standard tools etc. You can simply view the install.sh script after git clone command, to see all the open source tools it uses/installs, and there are MANY!
Now You gotta love the name, noticed the "1" in place of the "i" in the name. This product is made by a guy named xer0dayz. Has the old school "leet speak" OG feel to it. :) We will be installing the community edition, which is command line, but very easy to install and use! Note that there is a profession edition, which comes with more features and a nice Web UI to manage and use the platform with.
I think when it comes to Sn1per Professional coming in at $984.00 / year, its a great bargain for what this software can do. Especially when you compare it to other commercial offerings, ie. Nessus etc. If you are an organization who does a lot of vulnerability scanning and Pentesting, this is a great tool!
The community edition does not have the Web UI functionality, nor all the modules the paid version does. That being said, it still has a ton of core value functionality we are after. You can read more about the differences here:
https://sn1persecurity.com/wordpress/sn1per-community-vs-professional-whats-the-difference/
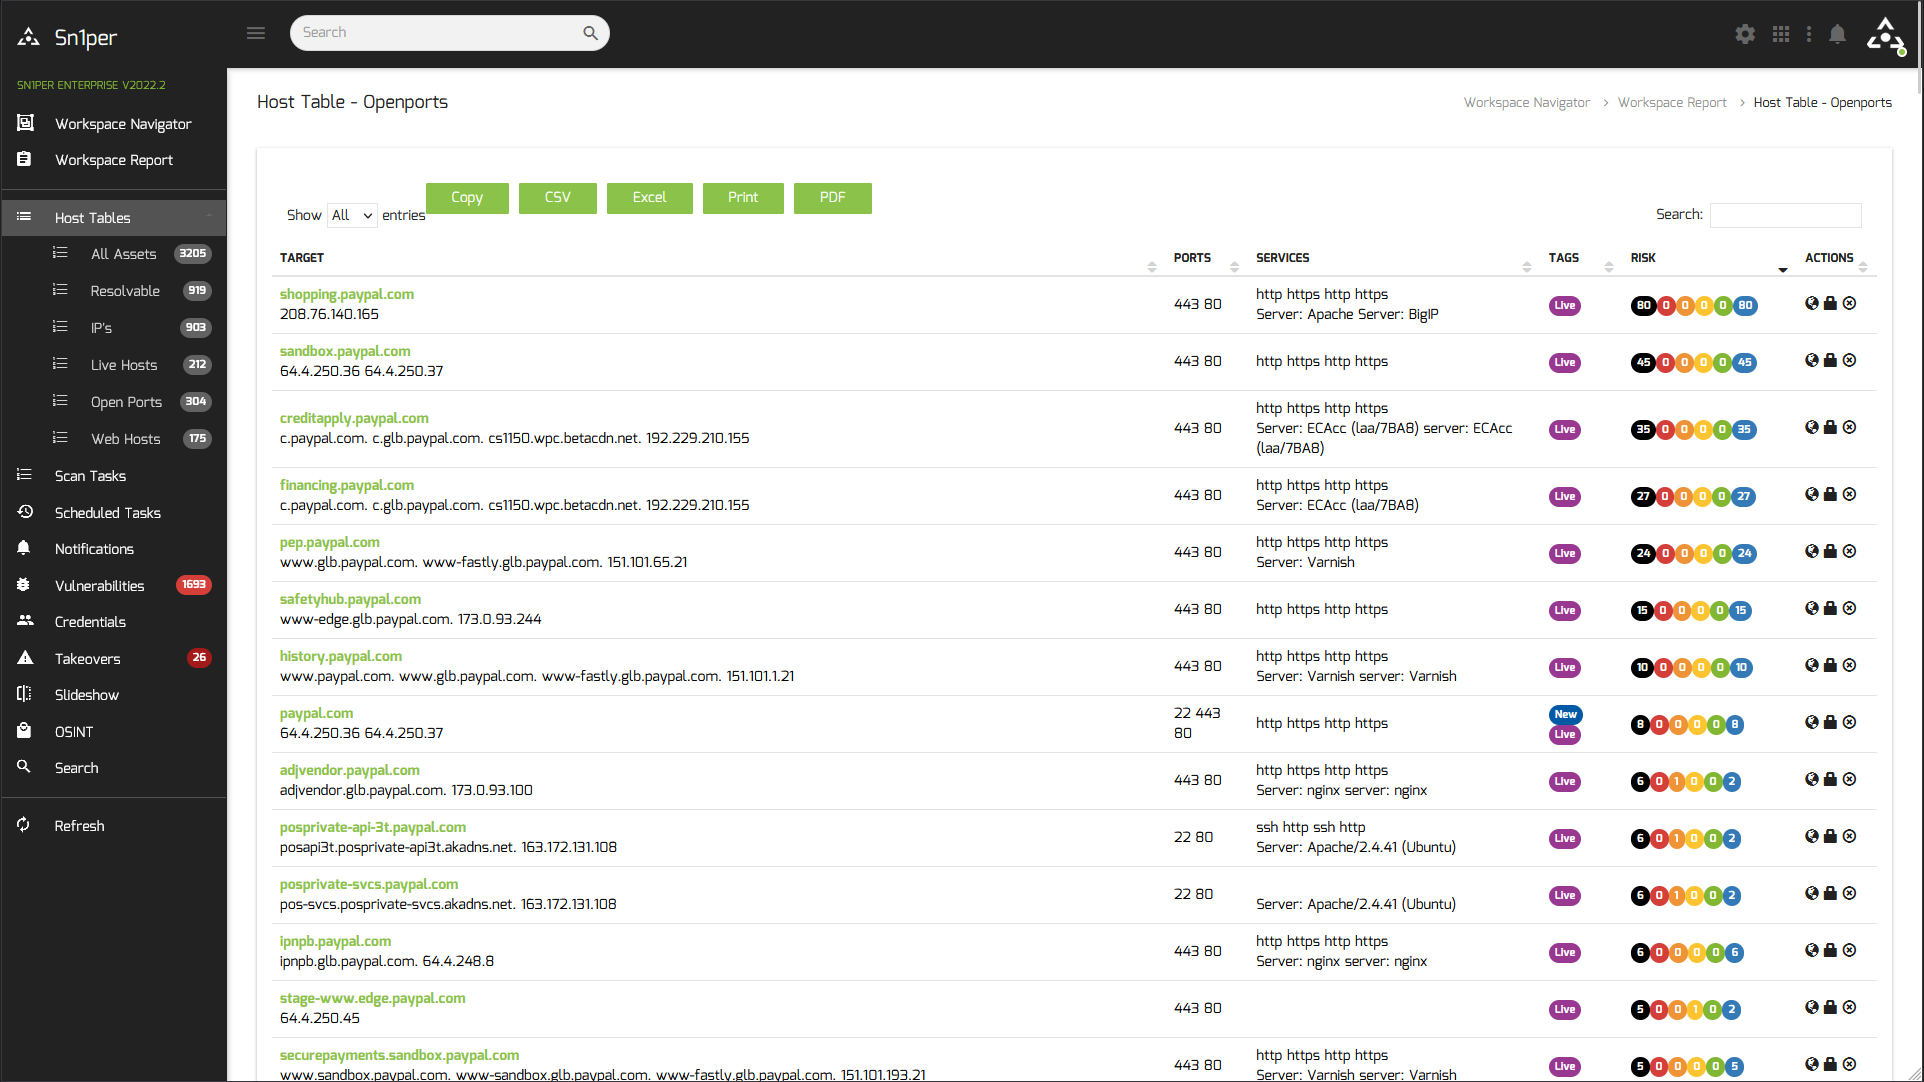
Sn1per Professional Web Interface Screenshot below
NOTE: Those of you who have followed my OpenVAS article, Sn1per community edition can be installed on the same Linux VM where OpenVAS resides without any conflicts. So you can get more use out of one VPS server for those who want to go this route.
So lets get to it.
Here the simple commands for Kali, Ubuntu, Debian, Parrot install:
git clone https://github.com/1N3/Sn1per
cd Sn1per
bash install.sh
The install script should/will install all dependencies, and when finished you will now be able to issue the sniper command anywhere in the shell. Notice the spelling change, after installation the command is "sniper" not "sn1per", probably done for ease of use.
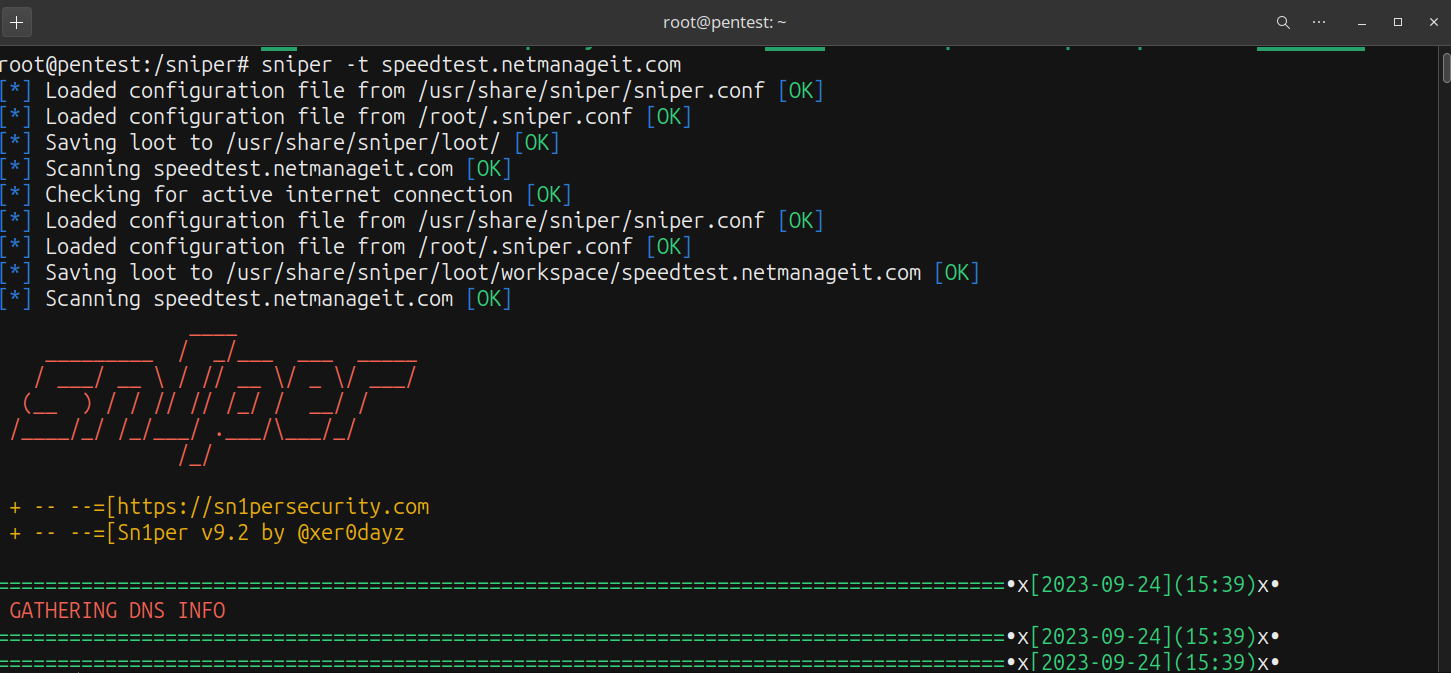
In our example we will be using our speedtest.netmanageit.com as a target.
sniper -t speedtest.netmanageit.com
Here are a list of other usage options you can do as well.
[*] NORMAL MODE
sniper -t <TARGET>

[*] NORMAL MODE + OSINT + RECON
sniper -t <TARGET> -o -re

[*] STEALTH MODE + OSINT + RECON
sniper -t <TARGET> -m stealth -o -re

[*] DISCOVER MODE
sniper -t <CIDR> -m discover -w <WORSPACE_ALIAS>

[*] SCAN ONLY SPECIFIC PORT
sniper -t <TARGET> -m port -p <portnum>

[*] FULLPORTONLY SCAN MODE
sniper -t <TARGET> -fp

[*] WEB MODE - PORT 80 + 443 ONLY!
sniper -t <TARGET> -m web

[*] HTTP WEB PORT MODE
sniper -t <TARGET> -m webporthttp -p <port>

[*] HTTPS WEB PORT MODE
sniper -t <TARGET> -m webporthttps -p <port>

[*] HTTP WEBSCAN MODE
sniper -t <TARGET> -m webscan

[*] ENABLE BRUTEFORCE
sniper -t <TARGET> -b

[*] AIRSTRIKE MODE
sniper -f targets.txt -m airstrike

[*] NUKE MODE WITH TARGET LIST, BRUTEFORCE ENABLED, FULLPORTSCAN ENABLED, OSINT ENABLED, RECON ENABLED, WORKSPACE & LOOT ENABLED
sniper -f targets.txt -m nuke -w <WORKSPACE_ALIAS>

[*] MASS PORT SCAN MODE
sniper -f targets.txt -m massportscan

[*] MASS WEB SCAN MODE
sniper -f targets.txt -m massweb

[*] MASS WEBSCAN SCAN MODE
sniper -f targets.txt -m masswebscan

[*] MASS VULN SCAN MODE
sniper -f targets.txt -m massvulnscan

[*] PORT SCAN MODE
sniper -t <TARGET> -m port -p <PORT_NUM>

[*] LIST WORKSPACES
sniper --list

[*] DELETE WORKSPACE
sniper -w <WORKSPACE_ALIAS> -d

[*] DELETE HOST FROM WORKSPACE
sniper -w <WORKSPACE_ALIAS> -t <TARGET> -dh

[*] GET SNIPER SCAN STATUS
sniper --status

[*] LOOT REIMPORT FUNCTION
sniper -w <WORKSPACE_ALIAS> --reimport

[*] LOOT REIMPORTALL FUNCTION
sniper -w <WORKSPACE_ALIAS> --reimportall

[*] LOOT REIMPORT FUNCTION
sniper -w <WORKSPACE_ALIAS> --reload

[*] LOOT EXPORT FUNCTION
sniper -w <WORKSPACE_ALIAS> --export

[*] SCHEDULED SCANS
sniper -w <WORKSPACE_ALIAS> -s daily|weekly|monthly

[*] USE A CUSTOM CONFIG
sniper -c /path/to/sniper.conf -t <TARGET> -w <WORKSPACE_ALIAS>

[*] UPDATE SNIPER
sniper -u|--update
Sniper Syntax Usage Examples
Once the scan of the target is started you will see something similar below.
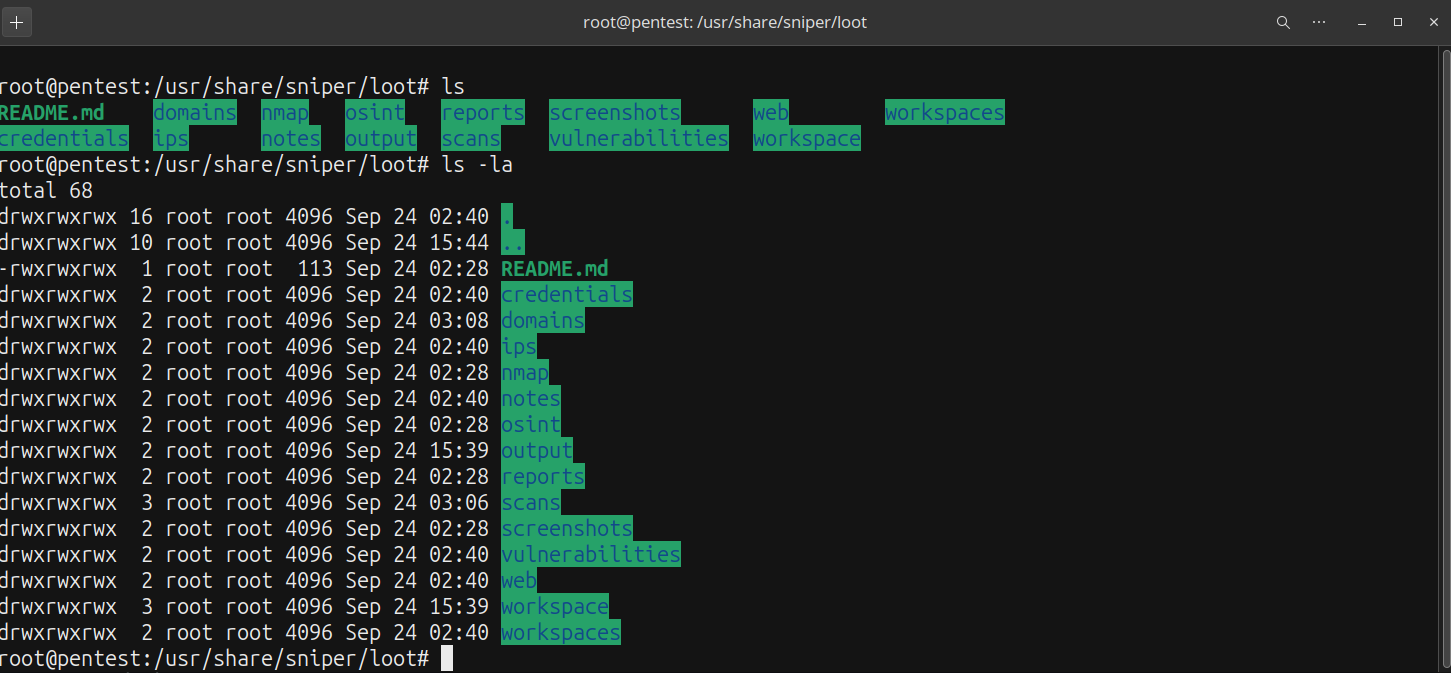
Once its done, it will put all the data it gathered in the "loot" subdirectory which by default is /usr/share/sniper/loot . It breaks up all the data by module / type used in different sub-folders as shown below.
Even without the WebUI, one folder you really will want to pay attention to, is the /usr/share/sniper/loot/workspace/DOMAINTARGETSUBFOLDER/reports. This will have a summary of everything in html files, which you can use to generate your own custom report outside of Sn1per, as we are using the community edition, so the UI "dressed up" report generation features we do not have access to.
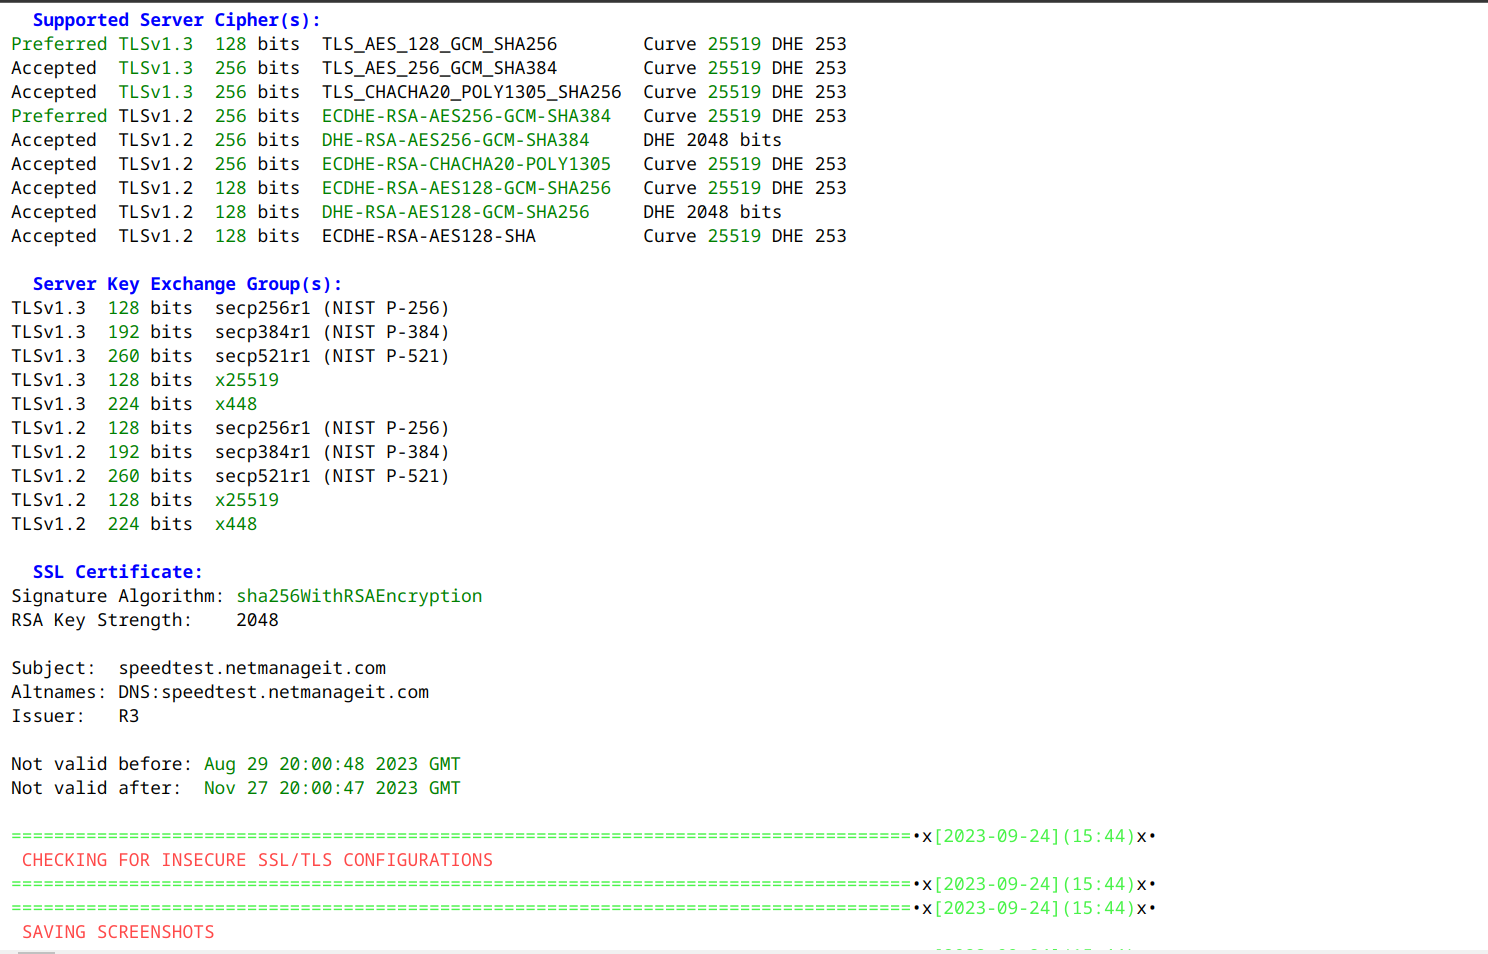
One small section of example html report file below. You can now copy and paste, reformat the data into other formats for a better appearance etc.
That is about it! One useful link for more documentation on integration with all the industry standard tools using API keys is below. This will further enhance the data/results you want to collect.
https://github.com/1N3/Sn1per#integration-guides
Happy testing!
Dan