
OpenVAS Vulnerability Scanner Setup


In this article, I am going to show you how to setup your own dedicated Vulnerability Scanner Platform in a Linux VM with VPN for anonymity.
NOTE: VPN setup is outside the scope of the article, although its very easy, just follow the VPN providers setup instructions for your Linux Distro you install.
What is Greenbone Community Edition or OpenVAS as its known? It is an opensource vulnerability scanner and footprint tool to scan a network target, find open ports, services and vulnerabilities.
OpenVAS was forked from Nessus years ago in 2005 to keep an open source version alive. Nessus/Tenable is one of the premier commercial vulnerability scanners around, and is often considered the golden standard by security engineers and penetration testers. OpenVAS is a very powerful and comparable alternative to the paid Nessus/Tenable commercial offering.
Everyone who cares about security, should test their own infrastructure and cloud resources regularly with a tool like OpenVAS. Never assume your self-hosted assets are 100% secured based on other indicators or take the word of third party SaaS vendors likewise.
So let's get started, at this point I assume you have spun up an Ubuntu 22.04 desktop VM and setup your VPN and performed all OS updates using "sudo apt update" commands. See 2 bullet points below.
Two Preinstall points to mention:
Create a Linux Desktop VM, this is important, as its going to be a self contained VM, and you will be accessing the web interface directly within the VM. The currently supported Distro's are : Ubuntu 22.04, Debian Bullseye, Fedora 35/36 and CentOS 9 Stream. In my case, I am using my favorite go to distro Ubuntu 22.04, 20.04 works as well in my testing.
- A VPN provider of your choice, IPVanish, Nord, ExpressVPN you get the point. This is an important thing to take note of. When scanning and probing targets on the internet, you do not want to be doing it from your business or home WAN IP, as this could get flagged and cause you issues down the line. It also will provide some level of anonymity. Some users may also choose to use a TOR gateway as an alternative, but I prefer and recommend a VPN. It is faster, and a lot of times TOR nodes are blocked by firewalls more often than VPN provider IP blocks are.
DISCLAIMER: It is good practice to always try and get permission to scan targets ahead of time. As scanning and probing can be seen as malicious activity. Using a VPN does offer some protection against any possible negative ramifications in these scenarios, so I advise always making sure the VPN is enabled before scanning.
OK, now to get started. This is a very quick setup and install, thanks to a few commands and an quick install script provided by the nice folks over at Greenbone networks.
Update OS, Install Curl, Python3, Docker and Docker-Compose
sudo apt update -y && sudo apt upgrade -y
sudo apt install curl
sudo apt install python3 python3-pip
Install Docker and Docker Compose
sudo apt install -y ca-certificates curl gnupg lsb-release
sudo mkdir -p /etc/apt/keyrings
curl -fsSL https://download.docker.com/linux/ubuntu/gpg | sudo gpg --dearmor -o /etc/apt/keyrings/docker.gpg
sudo echo "deb [arch=$(dpkg --print-architecture) signed-by=/etc/apt/keyrings/docker.gpg] https://download.docker.com/linux/ubuntu $(lsb_release -cs) stable" | sudo tee /etc/apt/sources.list.d/docker.list > /dev/null
sudo apt update
sudo apt install -y docker-ce docker-ce-cli containerd.io docker-compose-plugin
Give current user Docker permissions
sudo usermod -aG docker $USER && su $USER
Now grab the install script and change permissions to execute in one command
curl -f -O https://greenbone.github.io/docs/latest/_static/setup-and-start-greenbone-community-edition.sh && chmod u+x setup-and-start-greenbone-community-edition.sh
Start the setup and run script
sudo ./setup-and-start-greenbone-community-edition.sh 22.4
Once the install finishes, you can now access the web UI at http://127.0.0.1:9392
Default user and password are both "admin"
After everything is installed and you want to change the admin password, run this command.
docker-compose -f $DOWNLOAD_DIR/docker-compose.yml -p greenbone-community-edition \ exec -u gvmd gvmd gvmd --user=admin --new-password=<password>
Greenbone will need a little time to finish updating and compiling the vulnerability feeds before you can start scanning. You can check this progress under "administration, feed status"
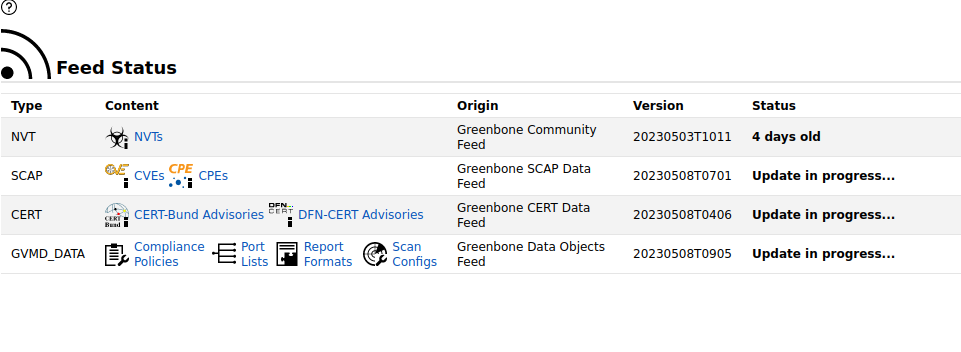
Once you see "Current" in the status for all four main categories, we are now going to setup a target and scan task. Note: Now would be a good time to activate your VPN. :)
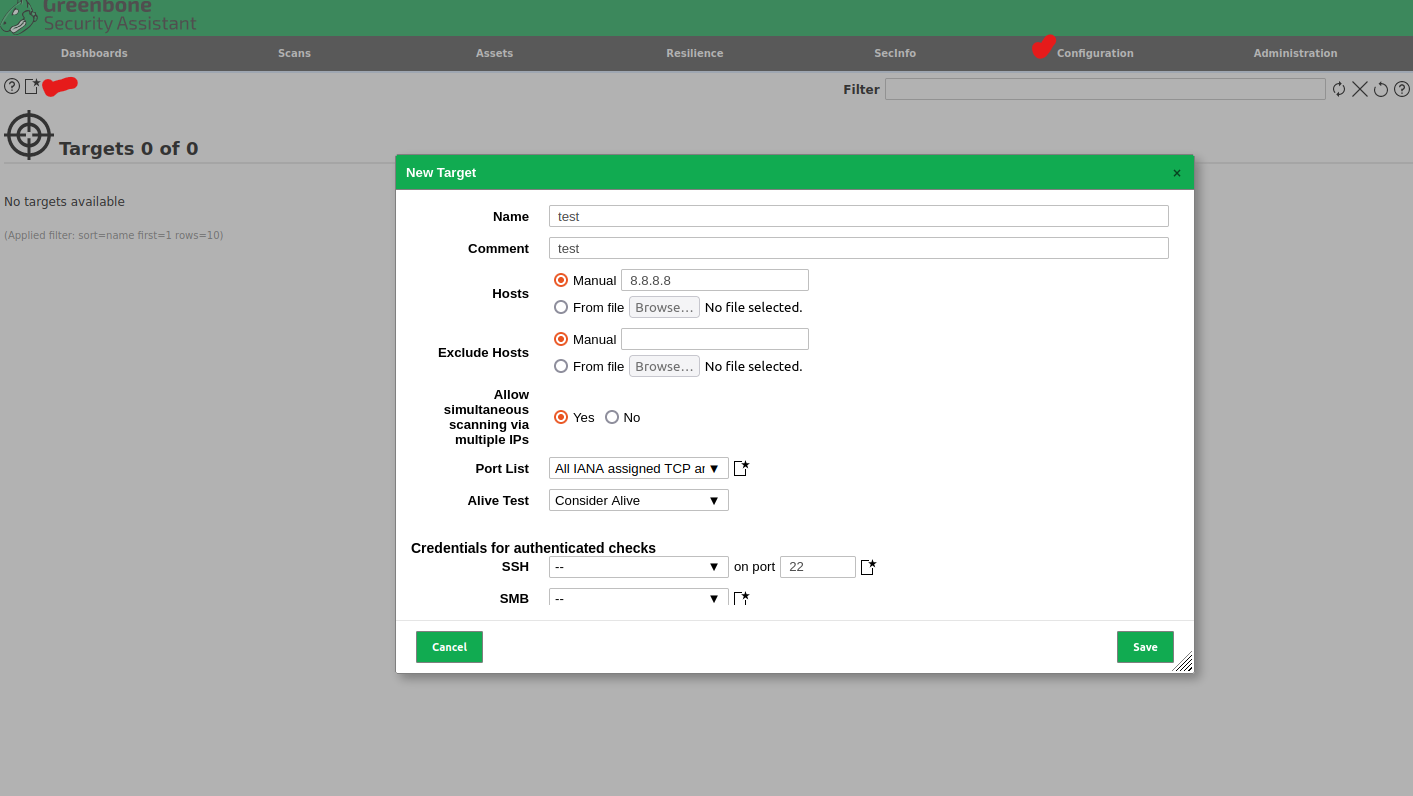
Create your first target by going to "Configuration, Targets'
Create your target name, enter host info IP/Domain name, pick the ports you want to be included in the scan, in this example I am using all IANA TCP/UDP ports.
Important Note: I like to set the "Alive Test" option to "Considered Alive". This is due to alot of firewalls IDS/IPS or WAF can drop the scanning packets with no reply. Due to this, if the "Alive Test" is set to one of the ACK options, the test will fail or be incomplete. So if you know the target is alive and online, this is a good option to ensure the scan doesn't abort prematurely with no data.
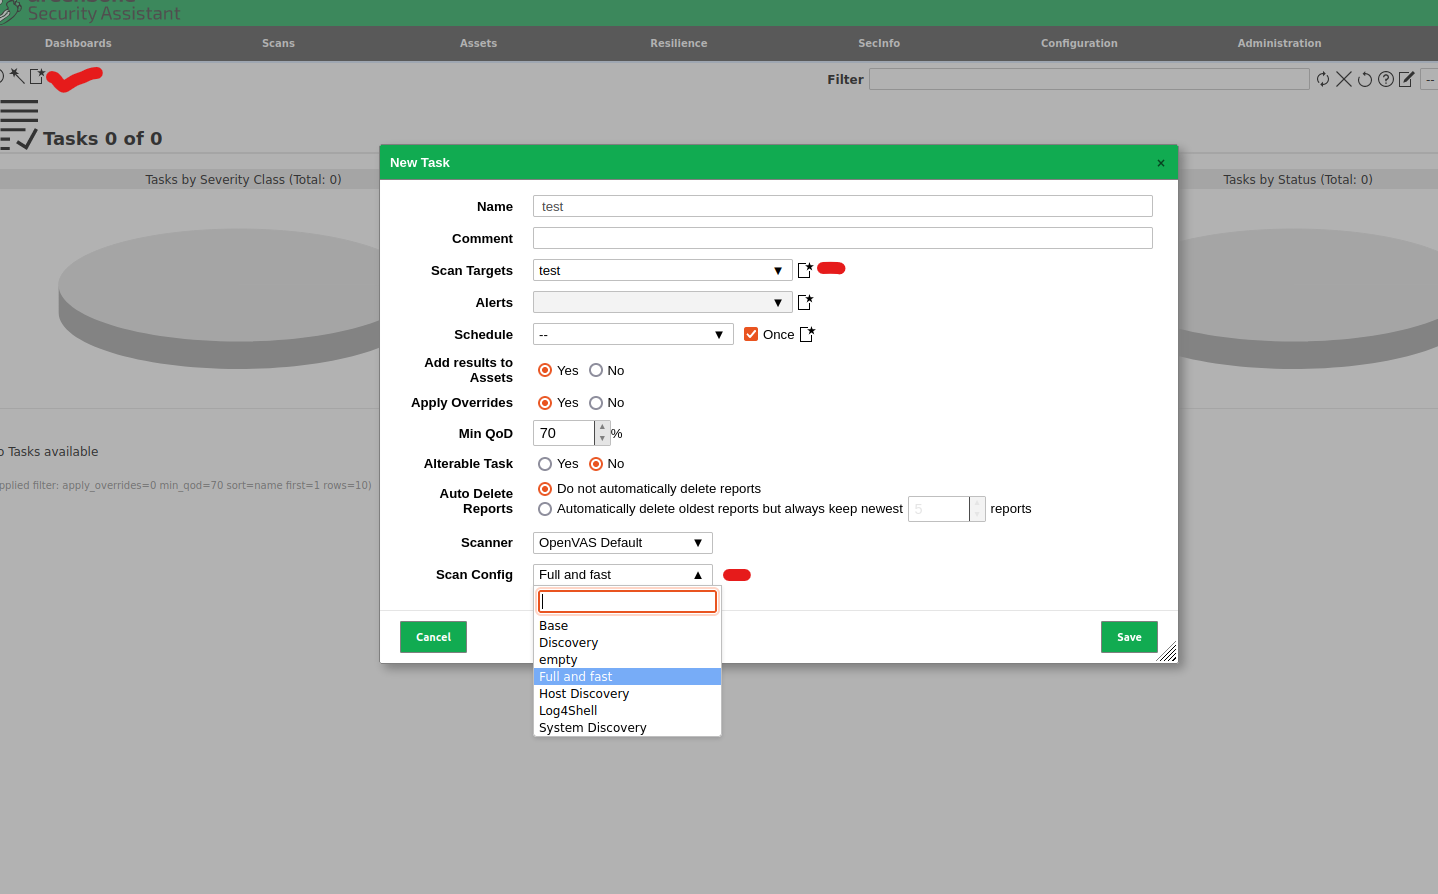
Now go to "Scans, New Task" to create the first scan task.
Now pick the target you just created in the target section, set a schedule for recurring scans of that target, or check the "Once" box for a one time scan.
Scan Config - Full and Fast is typically the most common and good balance and works well in most cases, feel free to play with other options.
Now once that' done, simply hit the Play Button (Right facing Triangle) shown in screenshot to start the scan process. This can take a while, depending on target and scan options, go make a cup of coffee. :)
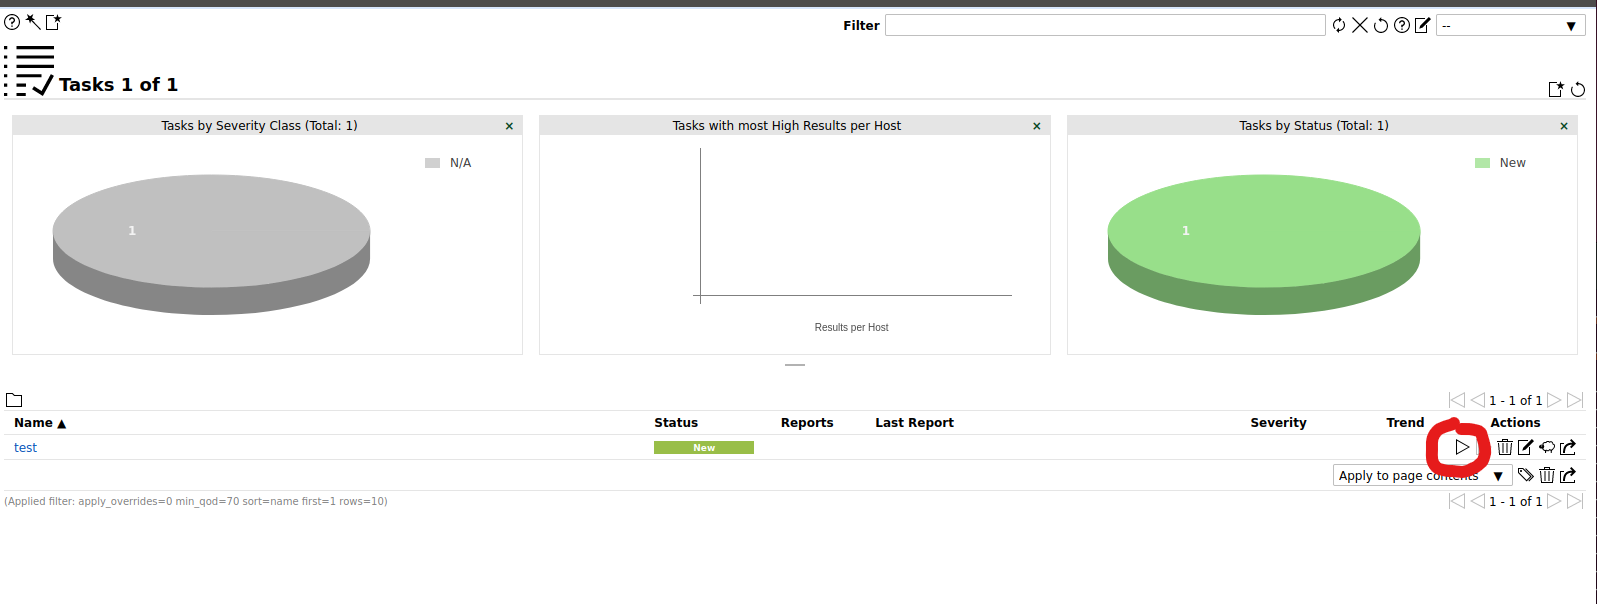
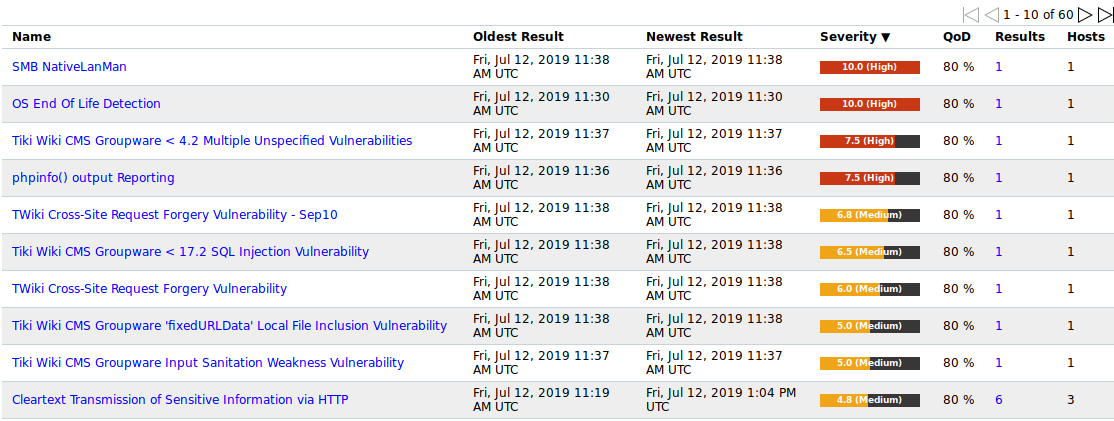
Once the Scan Task finishes, you should see a screen/report of all the findings.
One last important note. To update the OpenVAS/Greenbone Docker containers to a new release, and to perform a Feed Update / Syncronization do the following:
Downloading the Greenbone Community Containers
docker-compose -f $DOWNLOAD_DIR/docker-compose.yml -p greenbone-community-edition pull
Starting the Greenbone Community Containers
docker-compose -f $DOWNLOAD_DIR/docker-compose.yml -p greenbone-community-edition up -d
Downloading the Greenbone Community Edition feed data containers
docker-compose -f $DOWNLOAD_DIR/docker-compose.yml -p greenbone-community-edition pull notus-data vulnerability-tests scap-data dfn-cert-data cert-bund-data report-formats data-objects
To copy the data from the images to the volumes and Start the updated Greenbone Community feed data containers
docker-compose -f $DOWNLOAD_DIR/docker-compose.yml -p greenbone-community-edition up -d notus-data vulnerability-tests scap-data dfn-cert-data cert-bund-data report-formats data-objects
EXAMPLE:
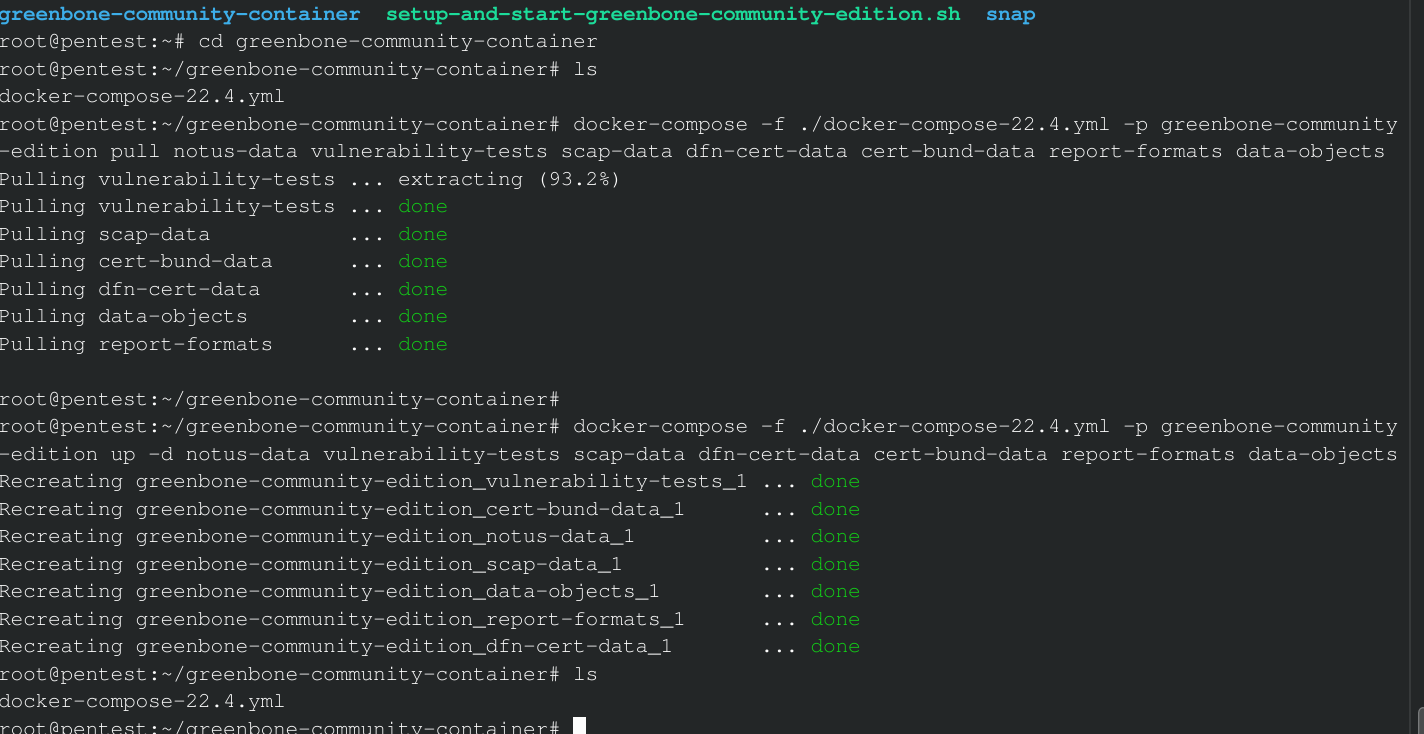
As an example for the above feed update commands, in my case there will be a /greenbone-community-container folder in /root home with a file in it called "docker-compose-22.4.yml". These are the commands I used in order:
cd greenbone-community-container
docker-compose -f ./docker-compose-22.4.yml -p greenbone-community
-edition pull notus-data vulnerability-tests scap-data dfn-cert-data cert-bund-data report-formats data-objects
docker-compose -f ./docker-compose-22.4.yml -p greenbone-community-edition up -d notus-data vulnerability-tests scap-data dfn-cert-data cert-bund-data report-formats data-objects
IMPORTANT: When the feed content has been downloaded, the new data needs to be loaded by the corresponding daemons. This can take a long time, you can check the Feed Status in the same manner explained earlier on in the article.
That's it! You now have a powerful, Free Opensource Vulnerability scanner to test your own servers, customers infrastructure, and are now one step closer to securing your assets!