
Monitoring 365 events with Wazuh with Multiple Tenants.

Preface
I am going to show you how to setup monitoring of 365 events in Wazuh in this blog post. Some important things to know before we get started. This tutorial will assume you are using a newer Wazuh version with the native components installed using wazuh-indexer (opensearch), not older versions that rely on Elastic.
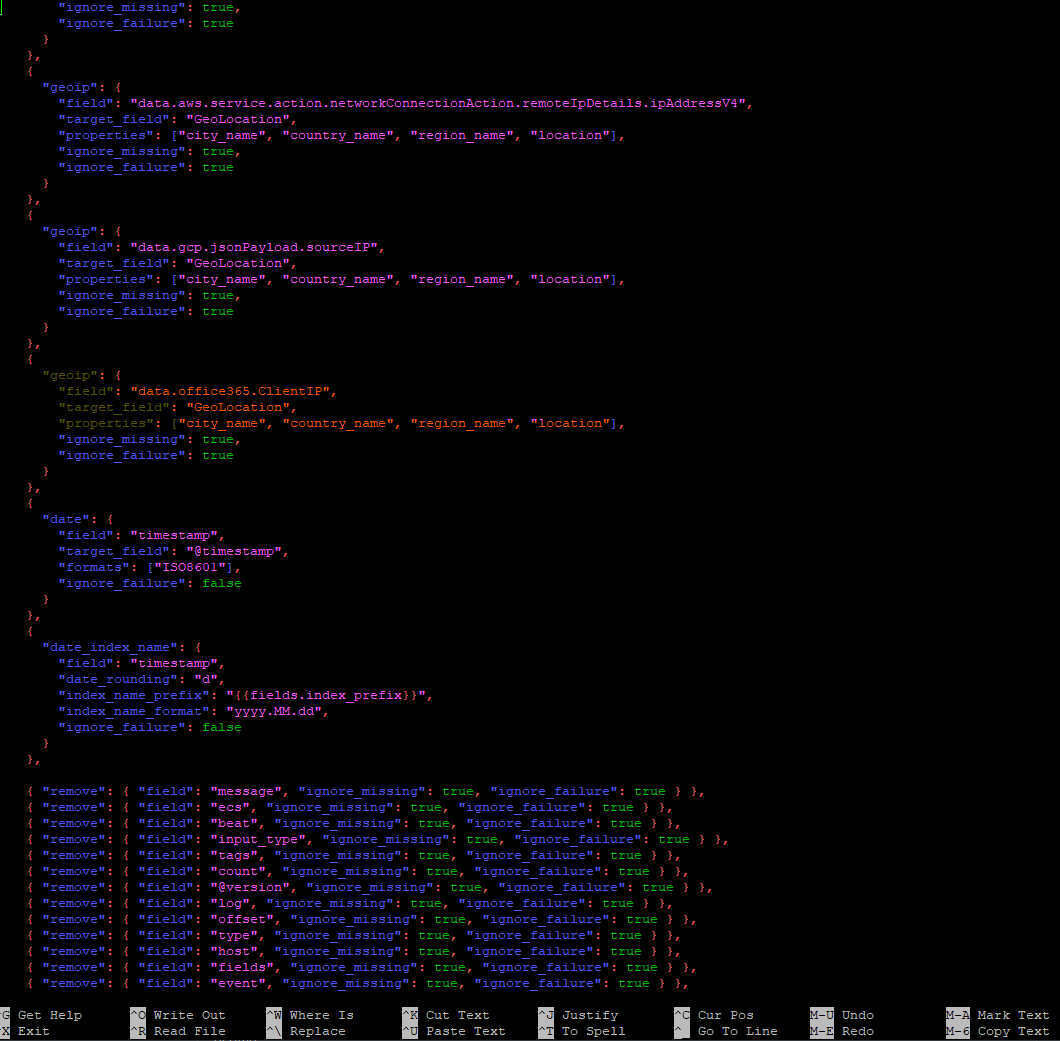
That being said, older versions used and required a little bit more manual config to logstash/filebeat with proper pipeline JSON entries to resolve GeoIP. This would be done editing the /usr/share/filebeat/module/wazuh/alerts/ingest/pipeline.json file. Then reruning pipeline setup command. See example below.
The instructions below are assuming the newer Wazuh Architecture/version is being used, nothing needs to be edited in these files or tweaked. What you need is already configured.
All that is required is a properly setup MaxMind GeoIP Updater client on the Wazuh host server. We will get to that part of the setup later on in the article.
Preparing your Azure/365 App Registrations and Setup
Note: Credit to Wazuh documentation, some screenshots taken from official documentation to make it easier and not having to mark out sensitive data.
Follow these instructions and repeat them for each 365 tenant you want to monitor. You will then store the TENANT_ID, CLIENT_ID and CLIENT_SECRET for each tenant somewhere safe, like a password manager or other encrypted form of the master document to notate all the sensitive data required for setup.
Register your Apps
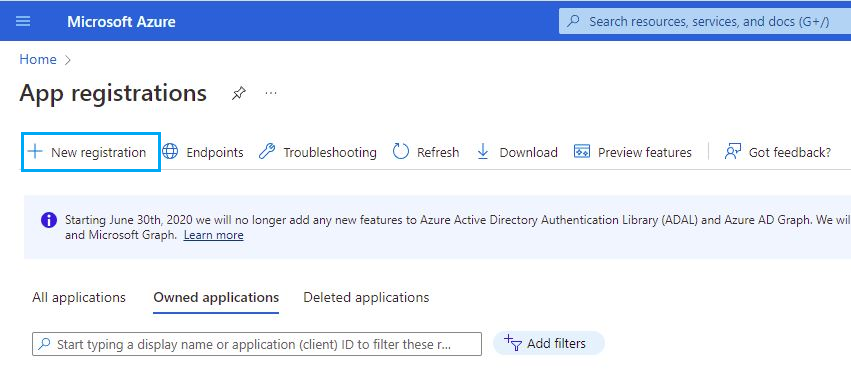
Login to the Microsoft Azure Portal for App registration following the link below.
Click on new registration:
Fill in the name, and click Register
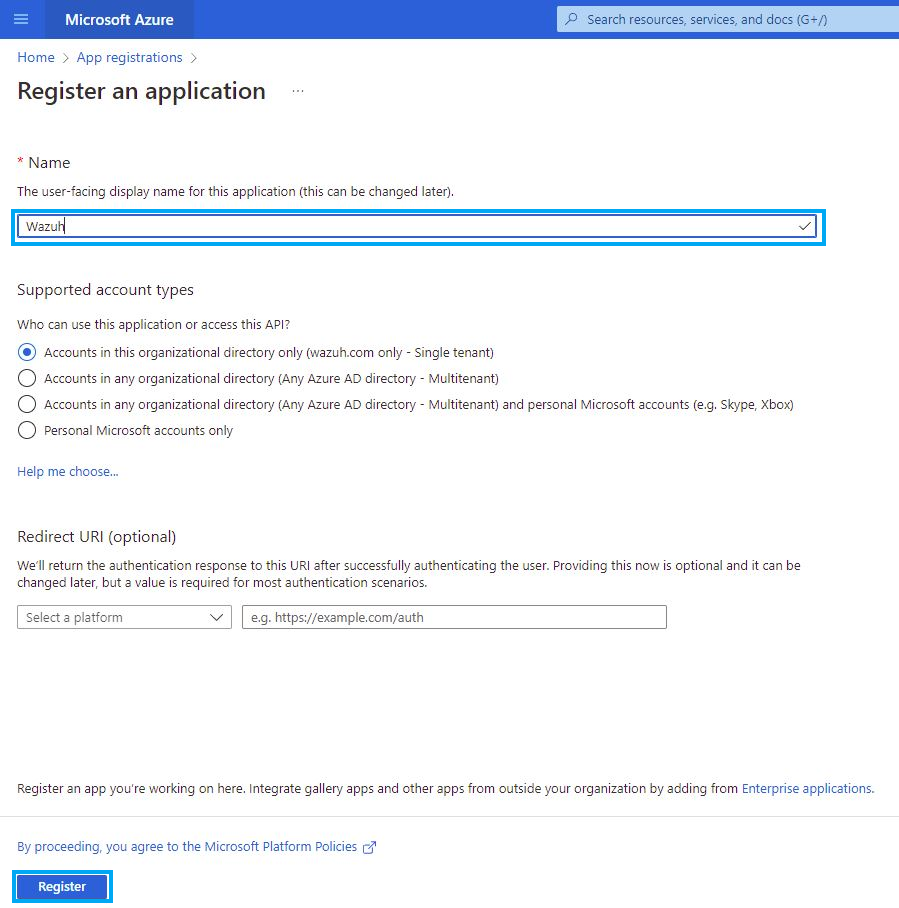
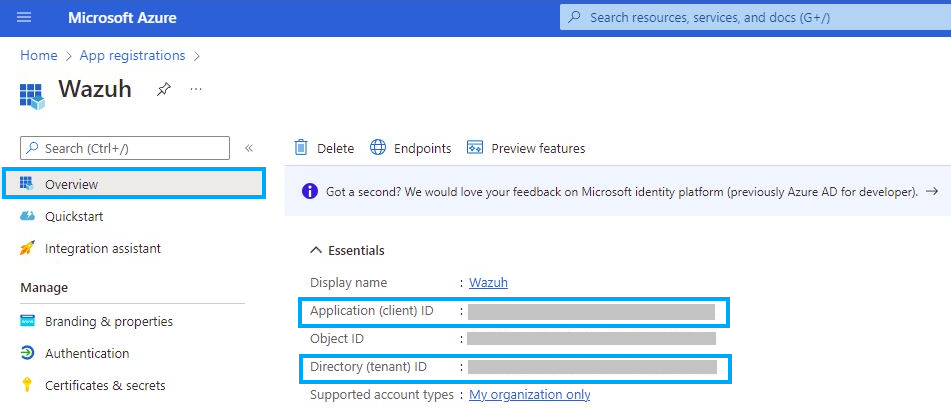
After registering the App, copy and paste the client and tenant ID's in your master secure document / password manager and label them by tenant name/customer etc.
You will now need to generate a secret to go with the Client ID and Tenant ID. Click on Certificates and Secrets and click "New Client Secret"
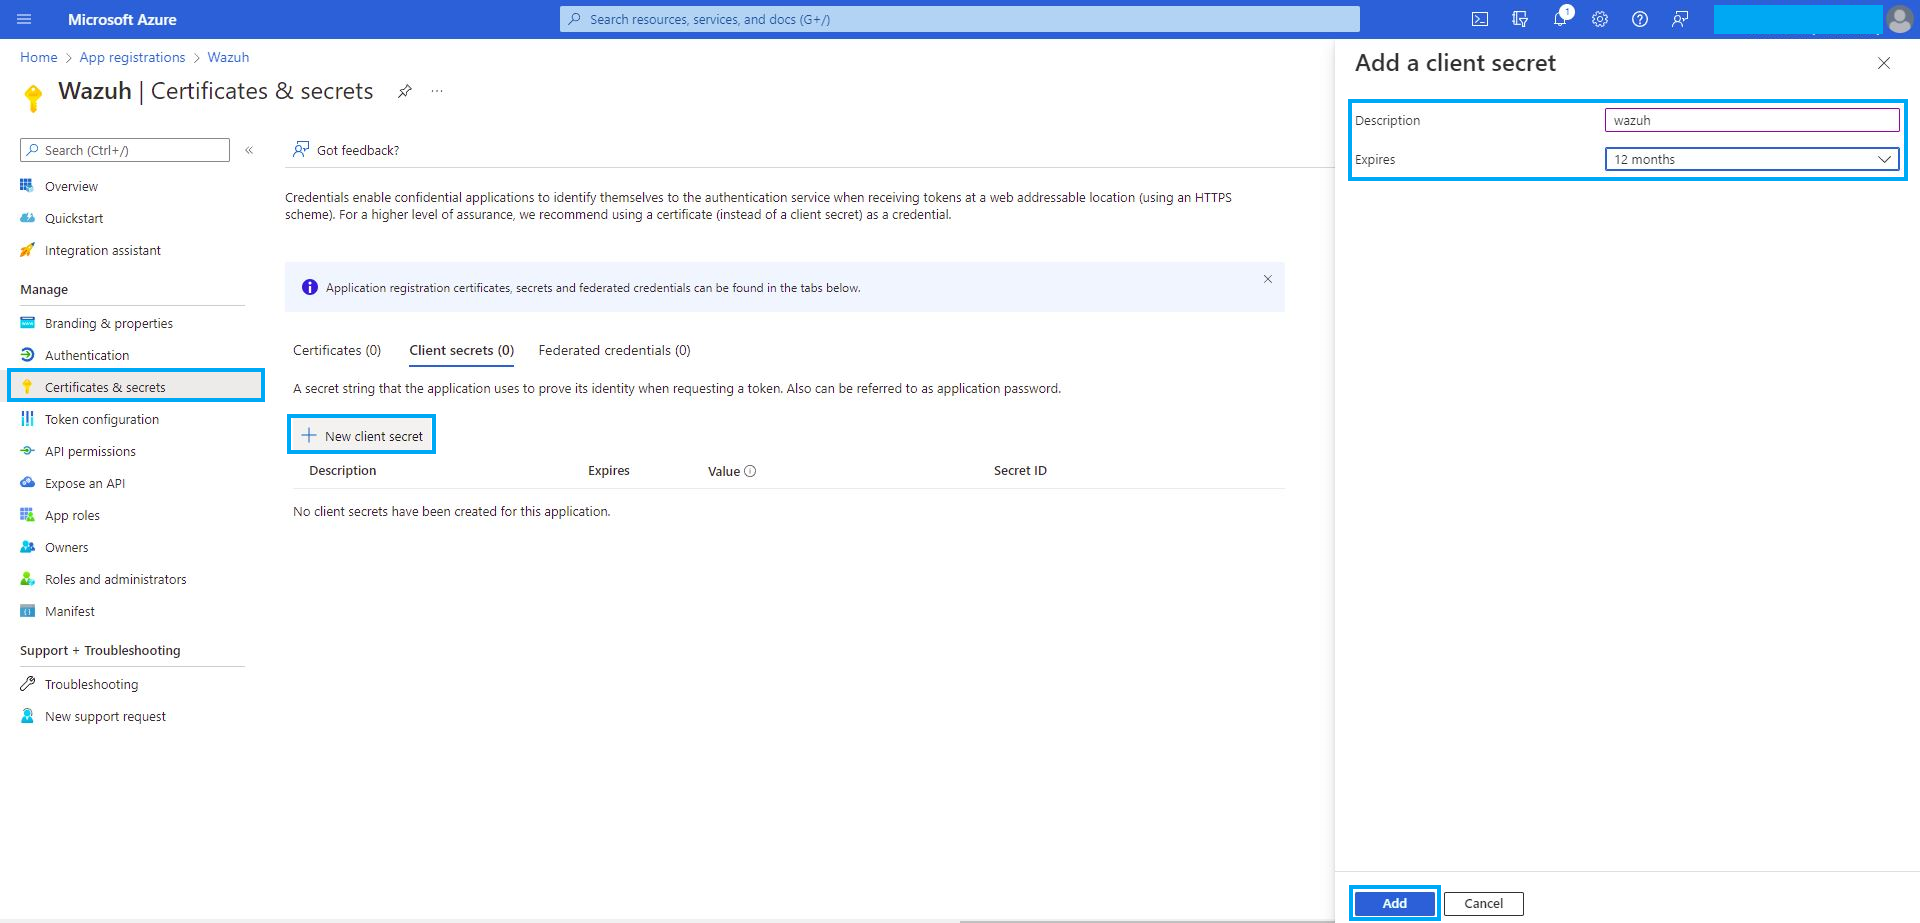
Copy and Paste this value below the Tenant and Client ID's in your documentation.
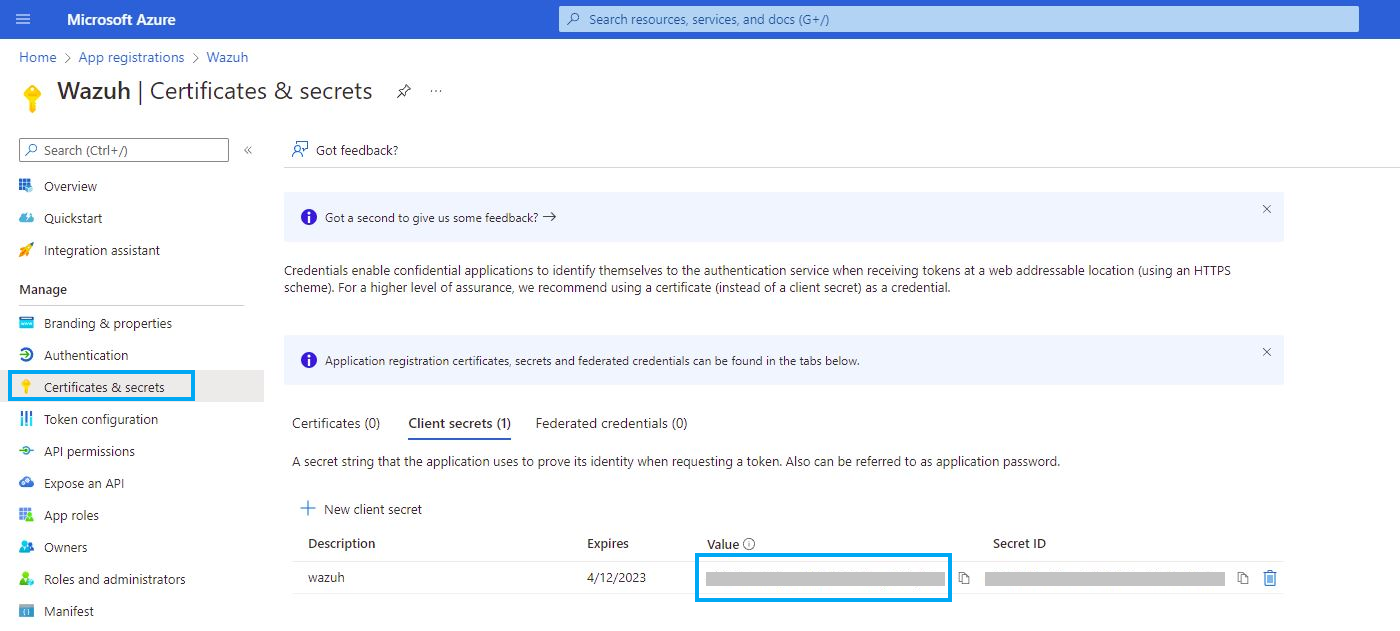
Note, make sure you write it down, as once you click off the screen, it will not let you copy it after the fact.
API Permissions Setup
Go to the API Permissions page and select "Add a permission". Then select the "Office 365 Management APIs" section. Which will bring you to the next screen. You need to click on the top two activity feed Read permissions.
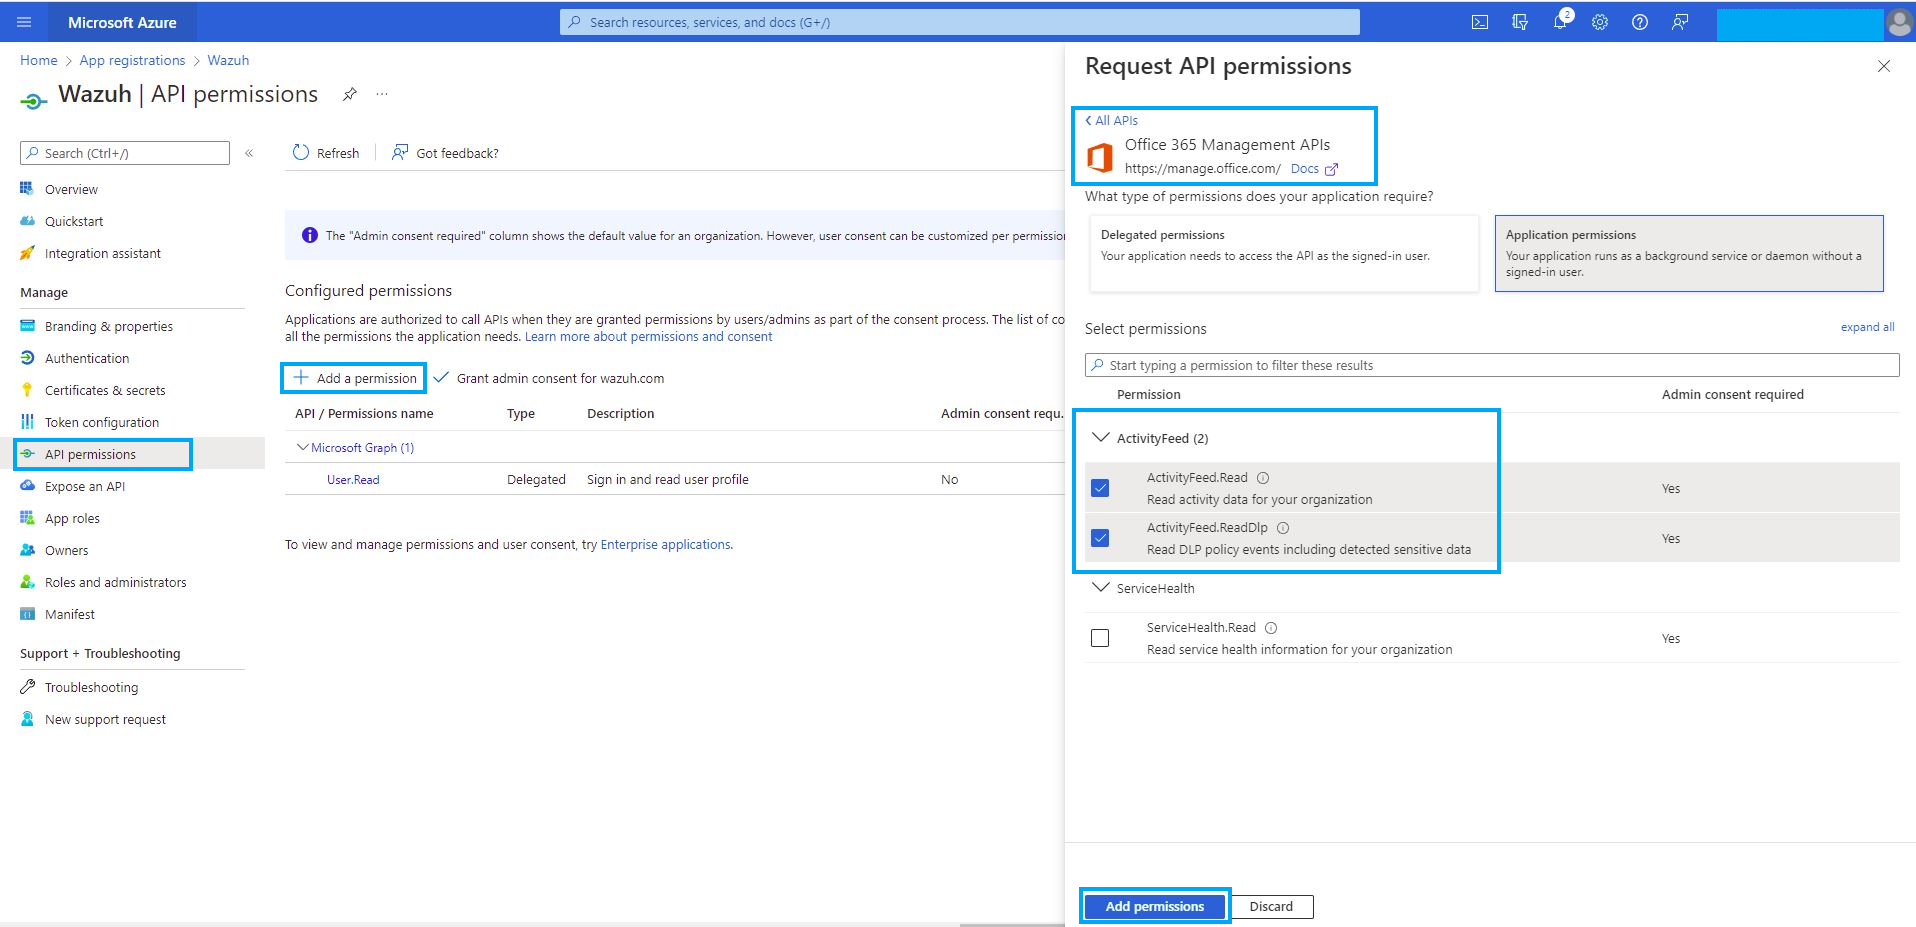
After doing this, you will then need to manually consent to the permissions changes.

Edit Ossec.conf master file on Wazuh Host to configure Wazuh to talk to the Microsoft API.
This is located in the /var/ossec/etc folder by default.

There are 3 parts to this block of code you will be inserting into the Ossec.conf file. The first is the general settings, second section is each of your tenant configurations back to back, and lastly the subscriptions you want to "subscribe to" or read from the API.
My example is in the screenshot below.
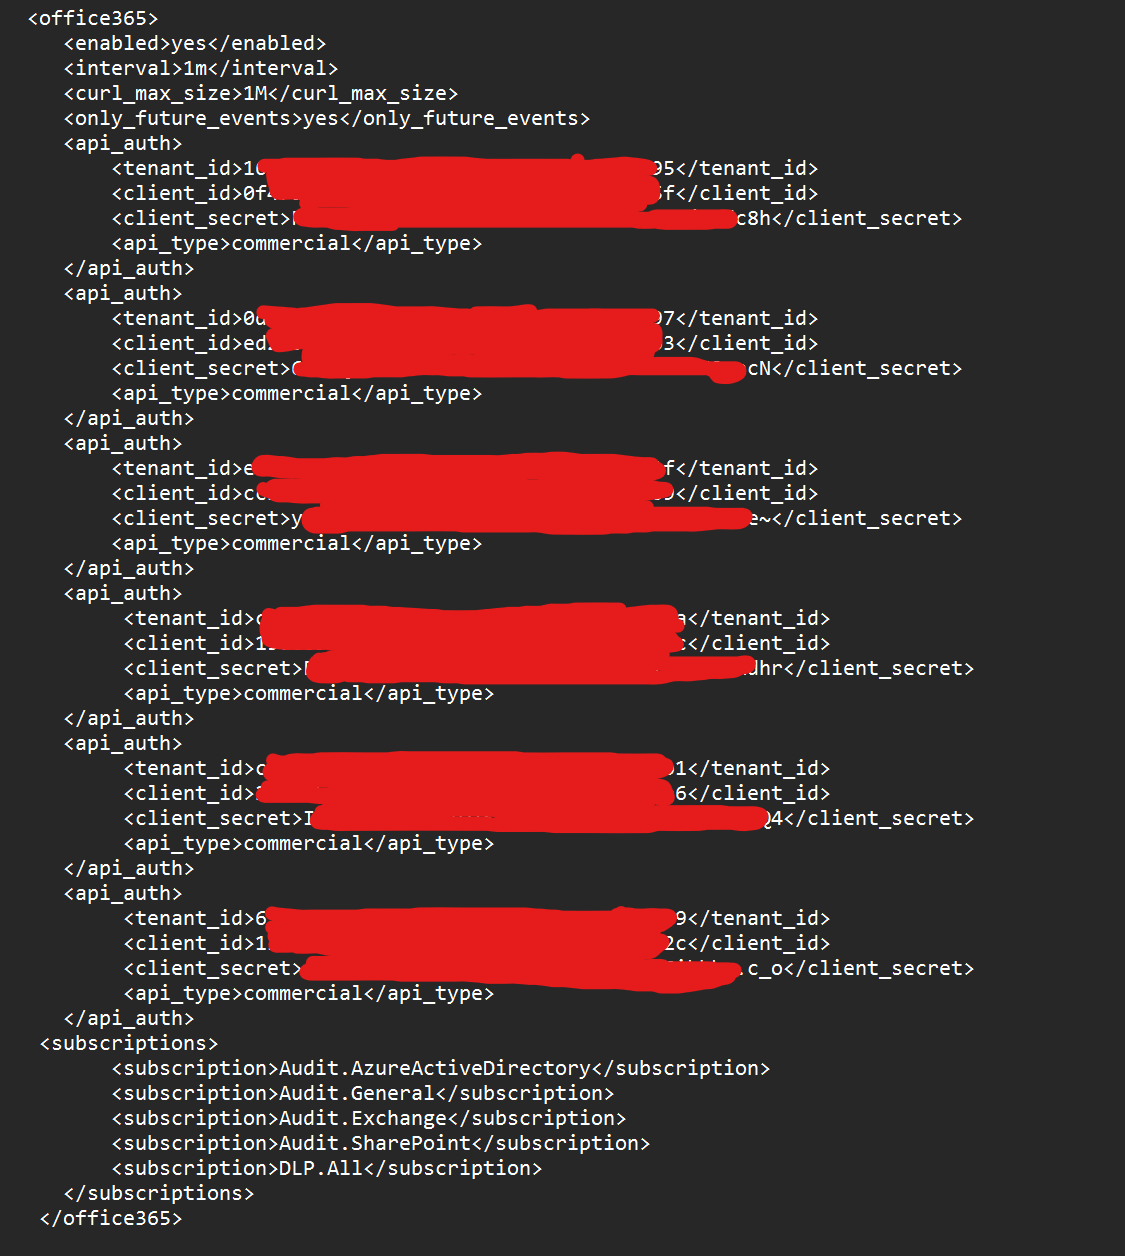
In actuality I have a lot more tenants configured, but I trimmed them out to simply show you the syntax/pattern you must use.
Below is the actual template code text you can copy and paste to get started.
<office365>
    <enabled>yes</enabled>
    <interval>1m</interval>
    <curl_max_size>1M</curl_max_size>
    <only_future_events>yes</only_future_events>
    <api_auth>
        <tenant_id>your_tenant_id</tenant_id>
        <client_id>your_client_id</client_id>
        <client_secret>your_client_secret</client_secret>
        <api_type>commercial</api_type>
    </api_auth>
    <subscriptions>
        <subscription>Audit.SharePoint</subscription>
    </subscriptions>
</office365>
Note the last section: "Subscriptions", there are 5 general channels or types of events you can monitor, in my case I chose all 5 of them. These 5 category names are : "Audit.AzureActiveDirectory", "Audit.General", "Audit.Exchange", "Audit.SharePoint" and "DLP.All". For more information, you can reference the Modules help section from the Official Wazuh Documentation below.
Once you make the Ossec.conf changes, you need to issue a "systemctl restart wazuh-manager" command for changes to take effect.
Enabling Wazuh 365 Kibana Dashboard
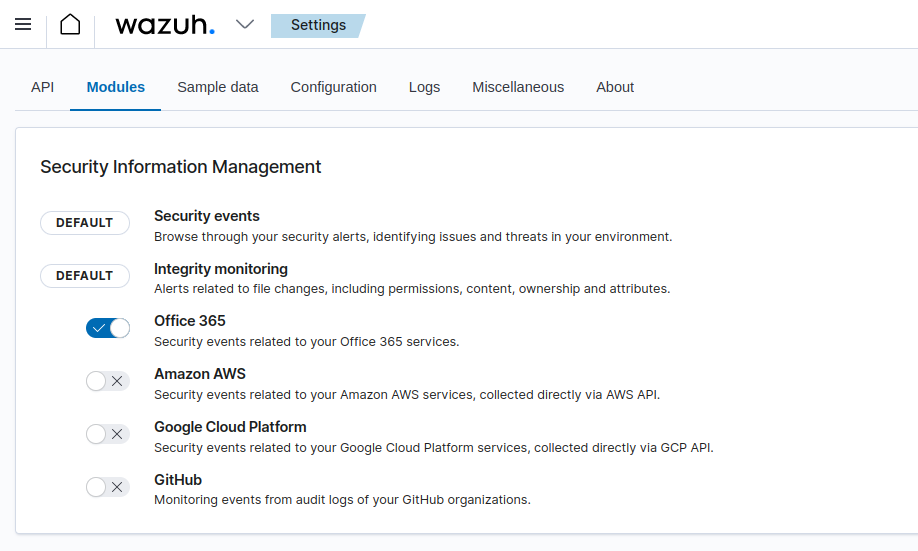
Activate the Office 365 module by going to Wazuh, Settings, Modules. Then in the Security Information Management section, check the Office 365 toggle.
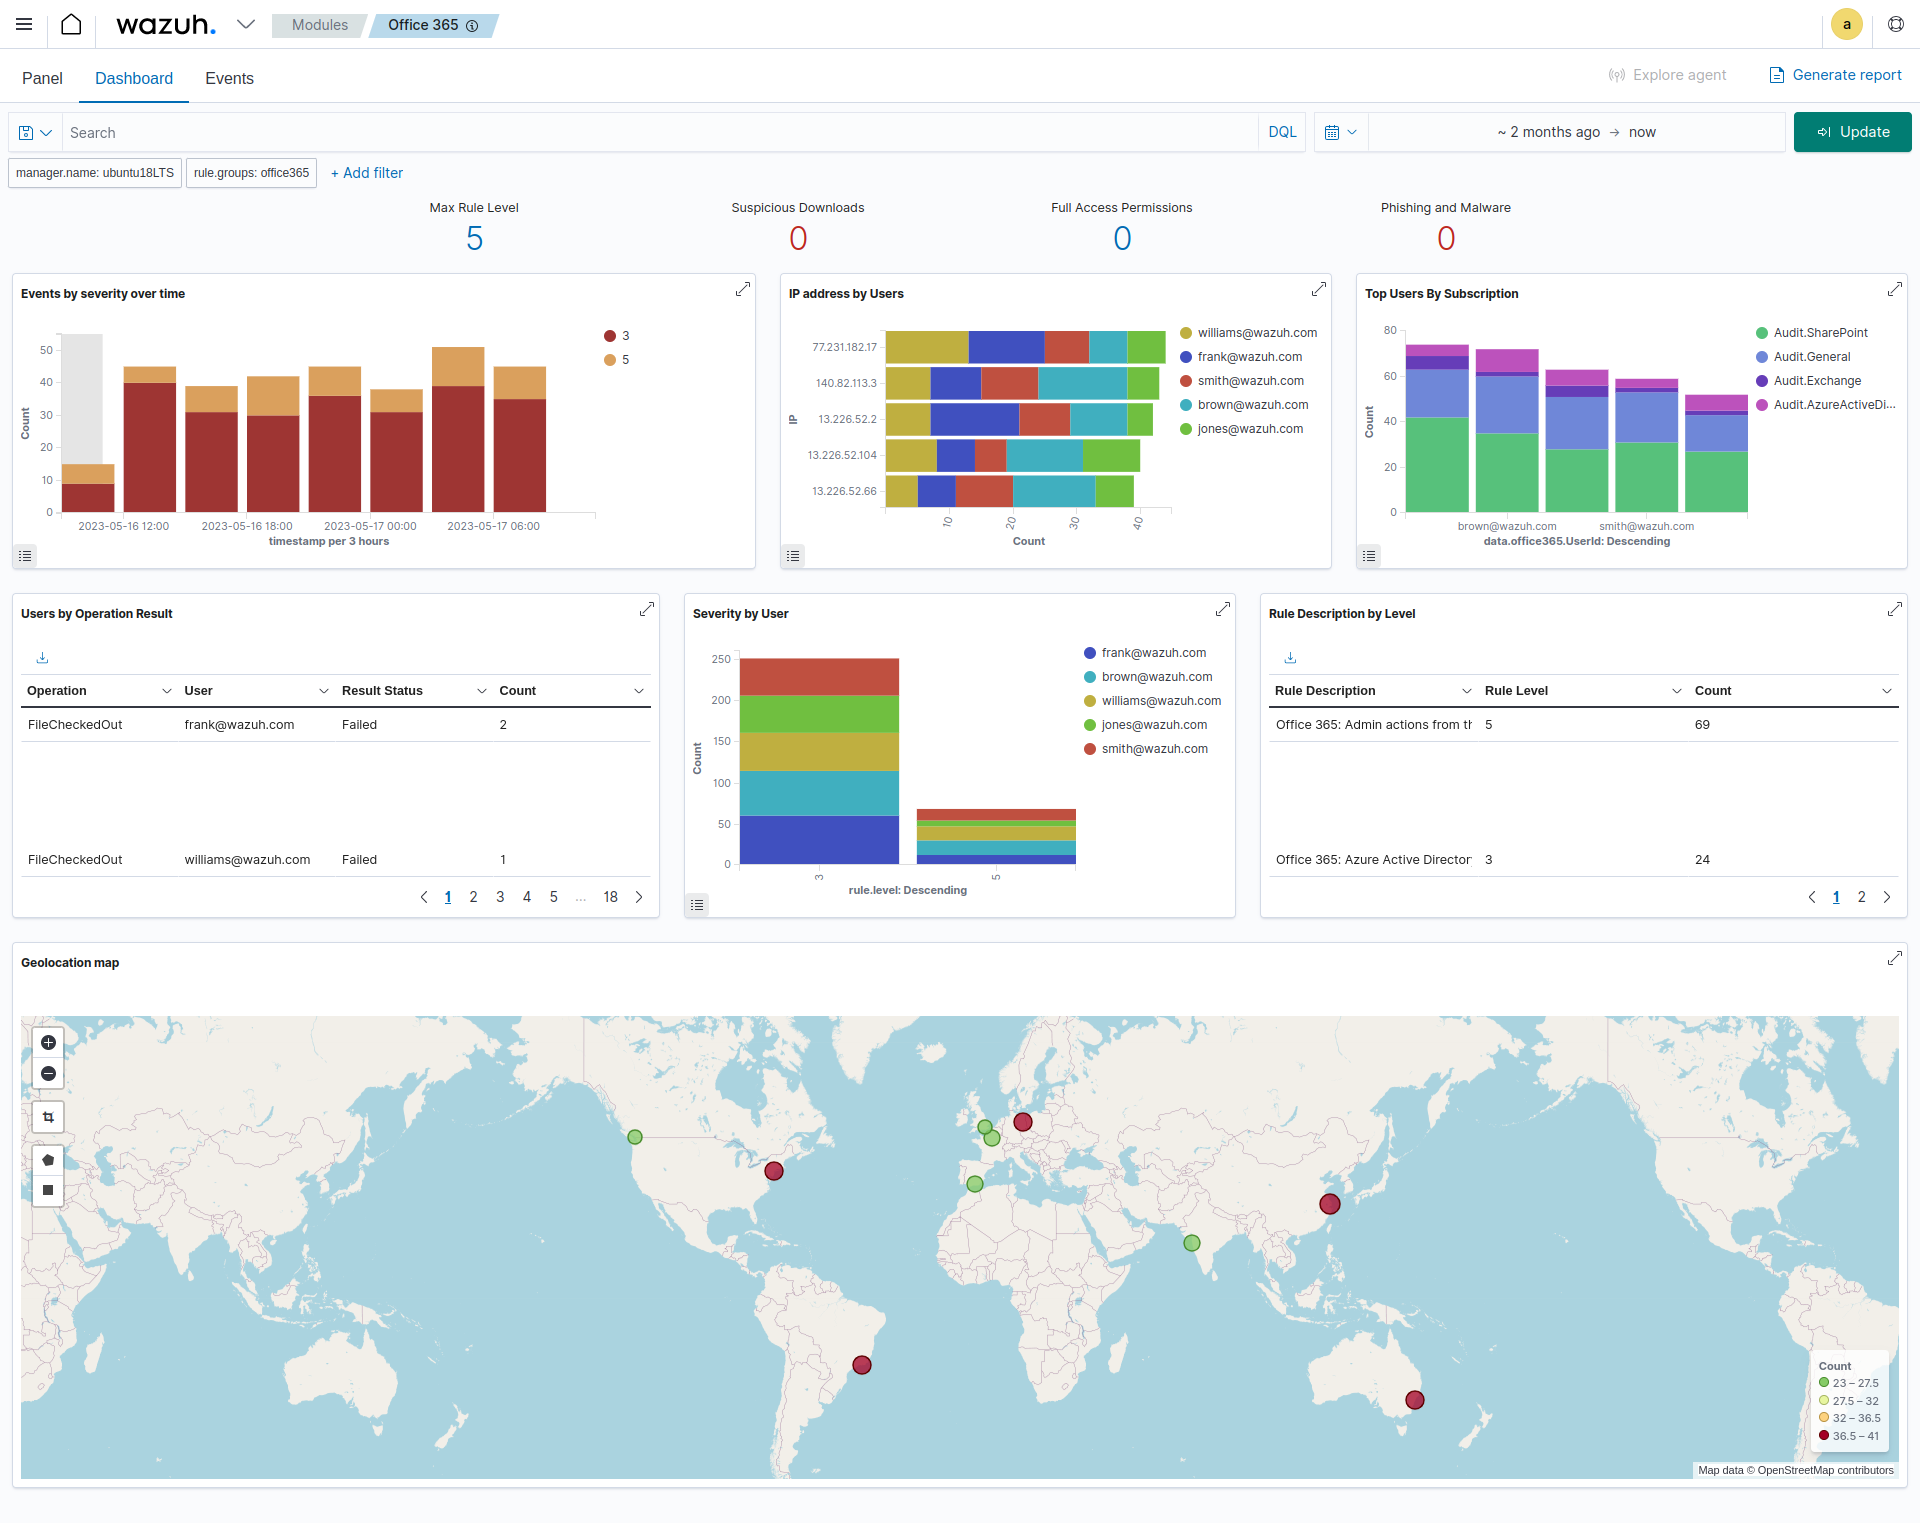
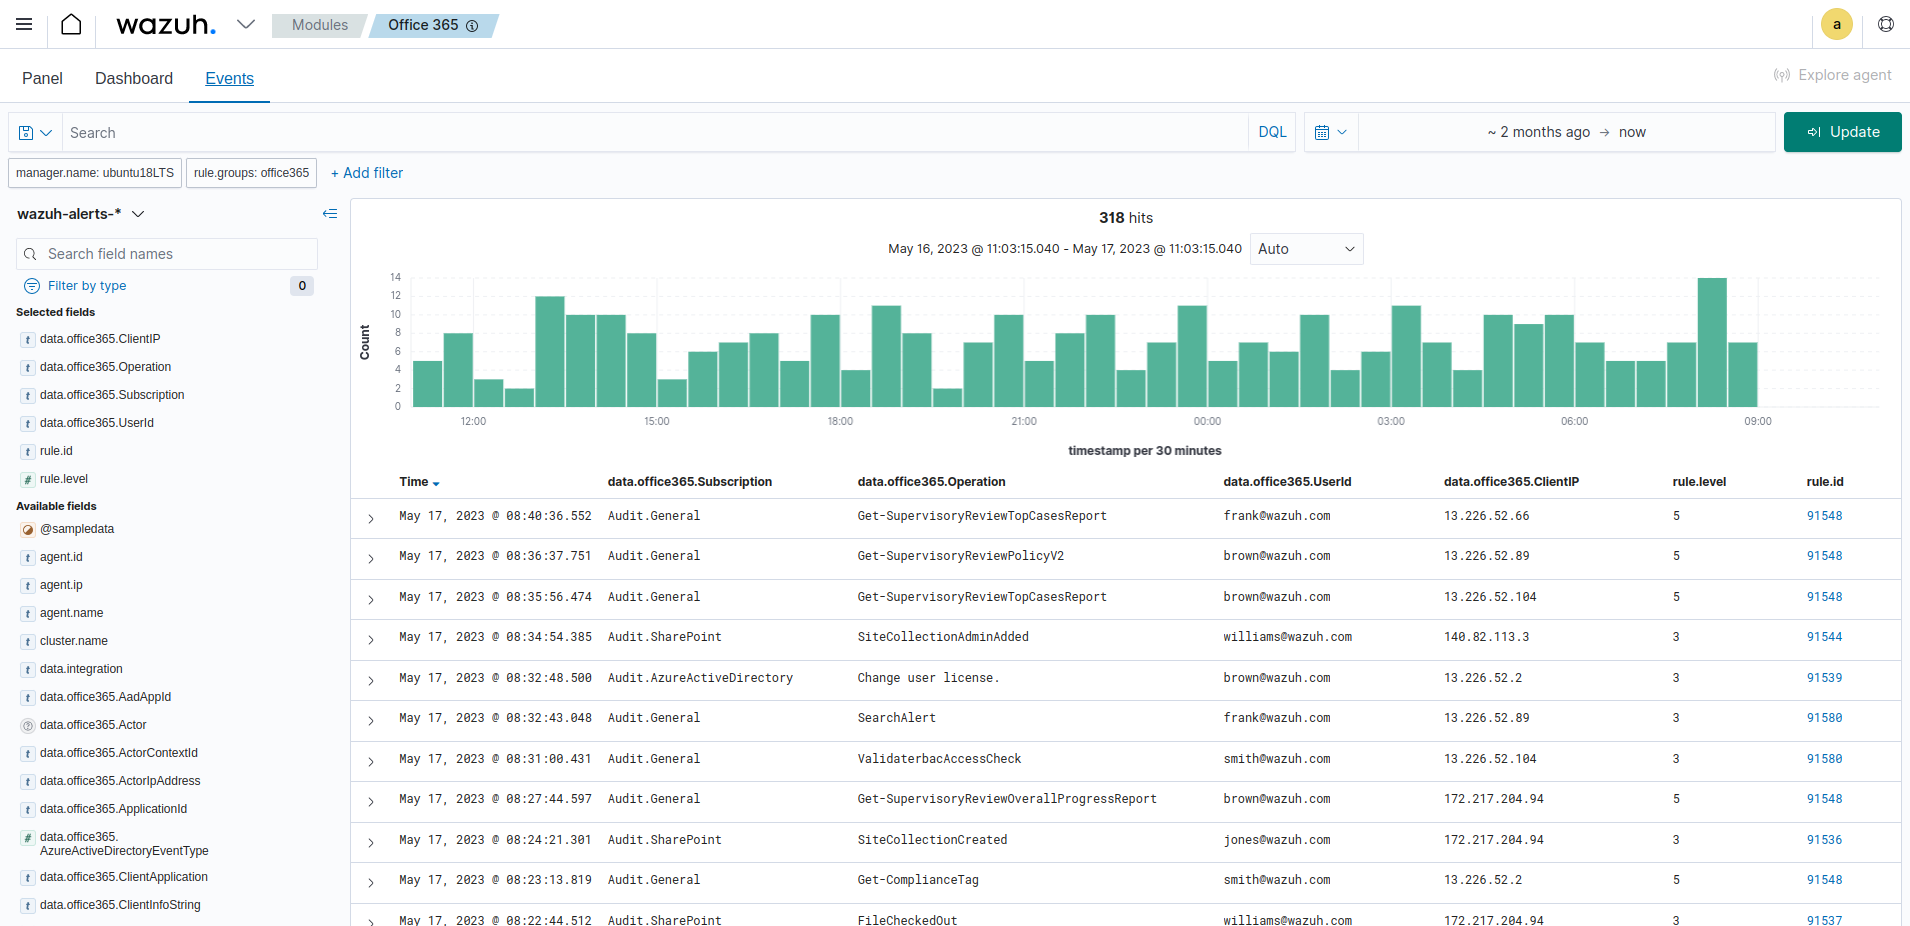
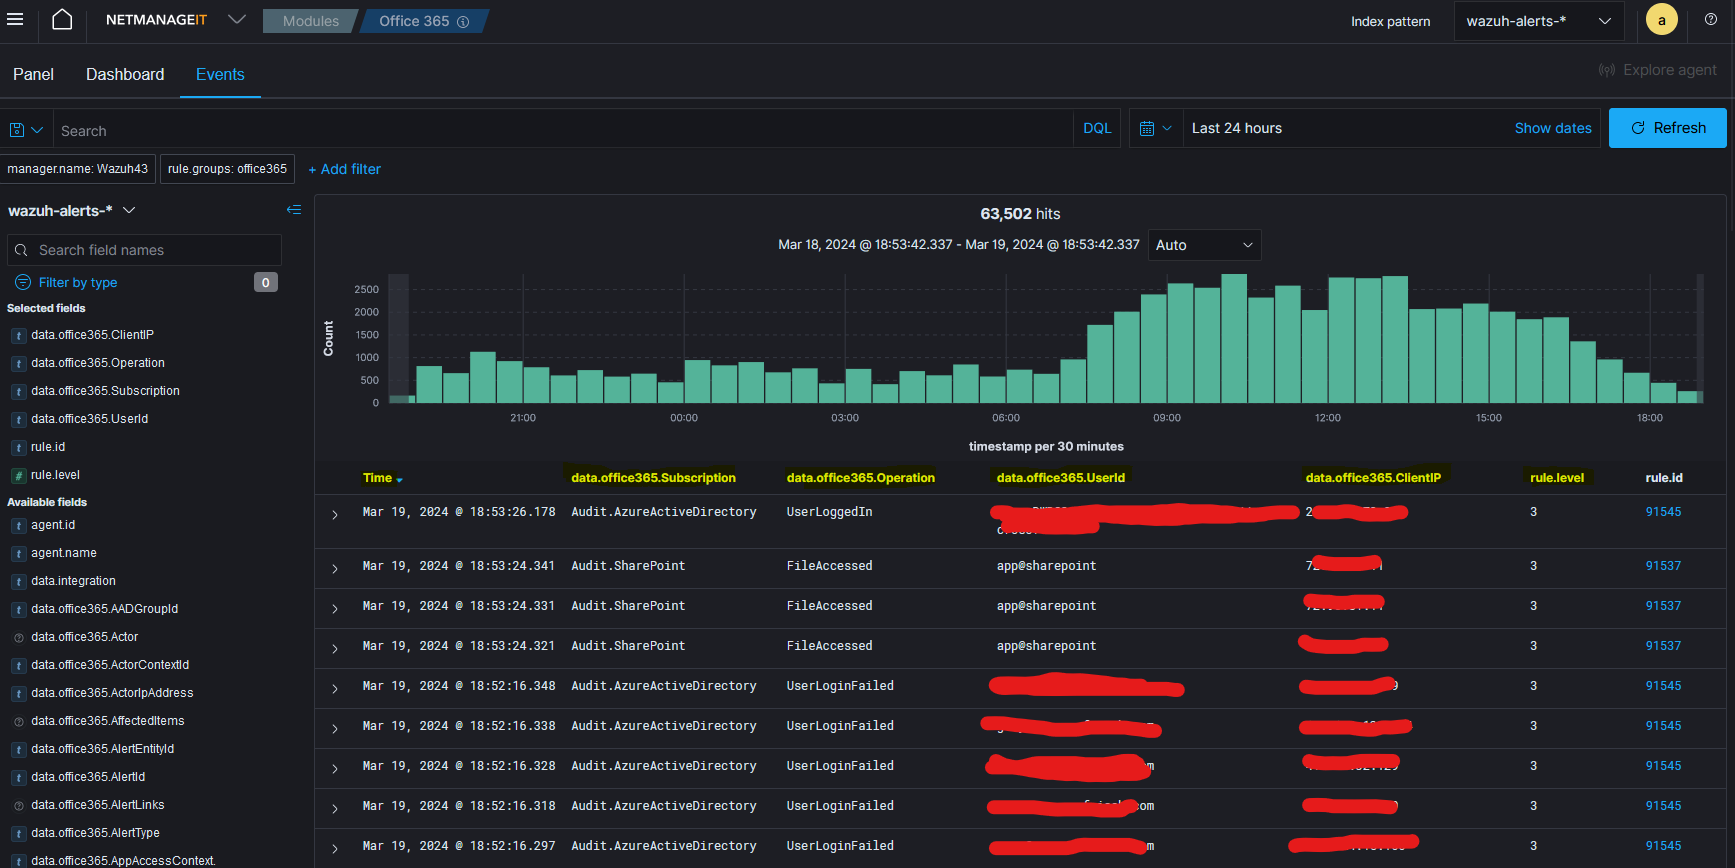
At this point, you should start to see events being digested in the events dashboard.

GEO/IP Functionality, Setup and Troubleshooting
If you do not see events being plotted on the world map in a heat map format shown above. You will need to check and install the Maxmind GeoIP Update Client and configure the conf file. Once you do this, and then restart the Wazuh Manager, Wazuh should start plotting the events on the map.
Steps to install and properly configure MaxMind client on the Wazuh Host
- Check to see if you already have the client installed with command "geoipupdate -V". If you get a response, its installed and likely just needs to be configured with your free MaxMind account, which you can sign up for using button below.
- Once you signup or login to your account, Go to "My Account" and then Managed License keys to create a key you can use and configure the /etc/GeoIP.conf file.
- If the first step did not return any info, go to their download page to get the newest GEOIP Update client and install it.
You can download the newest linux_amd64.deb using wget command for example, and then run the Dpkg -i command to install it.
- Once installed, you will need to edit the /etc/GeoIP.conf file as shown below and save it.

Note: There is a single space after "AccountID" and "LicenseKey" using no quotes etc. for proper syntax. Also do not forget the "EditionIDs" line as well!
- Update the DB with the command "geoipupdate -v"
- Restart Wazuh-Manager "systemctl restart wazuh-manager"
Optionally, you can schedule a crontab to run the above update command at an interval you desire.
This is what I use, "crontab -e" and then paste the line "25 17 * * 0,4 ./usr/bin/geoipupdate -v", save and exit.
At this point, the events should start to be plotted by SourceIP on the world Map!
Closing thoughts
All the events are pooled together from all configured 365 tenants on the Wazuh Host, and the built in dashboard shows you the most important activities to look at by Level, IP address, Top users by subscription, Users by Operation Result, Severity by User, and top Rule Description by Level.
I find this completely fine, as it gives a nice 30,000ft view across all tenants, and shows you which events should be drilled down and looked at further. Since the fields clearly show and can be searched by Email Address, Source/Client IP, subscription channel and Operation Type. It is easy to see what event is from which 365 tenant!
Wazuh comes already configured with a base 365 rules file which are great, you do not have to modify them unless you want to. That being said, if you want to change a particular rule level to trigger an alert above a certain level, or to create your own custom rule. Then you should copy the rule you want to change, paste / edit the "local_rules.xml" file either via Wazuh UI, or command line at the following location. "/var/ossec/etc/rules/local_rules.xml". You modify the copy and pasted default rule code by adding an overwrite="yes" and or change in level number.
This is done by editing the top line of the rule and editing the level="xx" and then adding overwrite="yes" on the end of the line before the closing ">"
Example - <rule id-"65524" level="12" overwrite="yes">
Hope this helps, and if anybody has any further questions or suggestions to make parts of this howto article clearer. Please hit me up on LinkedIN!
God Bless
Dan