
MIST CE. Easy Multi-Cloud Management HowTo.

What is Mist? Mist simplifies Multi Cloud Management. It offers a unified interface from where you can manage public clouds, private clouds, hypervisors, containers and bare metal servers.
With Mist you can perform common management tasks like provisioning, orchestration, monitoring, automation and cost analysis.
It comes with a RESTful API and a CLI, so you can easily integrate it into your existing workflows.
Mist users include organizations like Juniper Networks, SevOne, Windstream, National Bank of Greece, Shoprite and more. They all report faster roll-outs while reducing their bills and management overheads by 40%-60%.
What are some of the features of Mist?
- Support for more than 20 infrastructure technologies.
- Instant visibility of all the available resources across clouds, grouped by tags.
- Instant reporting/estimation of the current infrastructure costs.
- Compare current & past costs, correlate with usage, provide right-sizing recommendations (EE & HS only).
- Provision new resources on any cloud including machines, clusters, volumes, networks, zones and DNS records.
- Deploy and scale Kubernetes clusters on any supported cloud.
- Perform lifecycle actions on existing resources, e.g. stop, start, reboot, resize, destroy, etc.
- Upload scripts and run them on any machine while enforcing audit logging and centralized control of SSH keys.
- SSH command shell on any machine within the browser or through the CLI, enforcing audit logging and centralized control of SSH keys.
- Instant audit logging for all actions performed through Mist or detected through continuous polling.
- Monitor machines, display real time system & custom metrics and store them for long term access.
- Set rules on metrics or logs that trigger notifications, webhooks, scripts or lifecycle actions.
- Set schedules that trigger scripts or machine lifecycle actions.
- Set fine-grained access control policies per team, tag, resource and/or action (EE & HS only).
- Set governance constraints: e.g. quotas on cost per user/team, required expiration dates (EE & HS only).
- Upload infrastructure templates that may describe complex deployments and workflows (EE & HS only).
Installation and Use:
Requirements: Docker and Docker-compose installed on a Linux VM using Debian or Ubuntu, 4vcpu and 8GB RAM. It does not use much disk space, so 40-50GB will be good if you enabled monitoring.
Mist is easy to install using docker. You can either Git Clone the repository on Github, or simply grab the most up to date Docker-Compose file here.
You can then just "cd" into the directory and run "docker-compose up -d"
Once everything comes up, you then need to make an admin user to sign in with.
"docker-compose exec api sh"
"./bin/adduser --admin admin@example.com"
At this point you can visit the IP/localhost of the web interface.
In my case, I setup SSL certs and placed them in the same root folder of the docker-compose file. This is where the Nginx docker container is looking for custom SSL certs.
You then would need to create a "docker-compose.override.yml" file and enter in the following information.
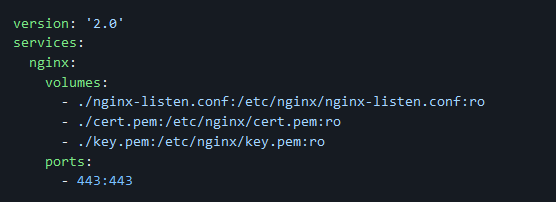
Then create another file called "nginx-listen.conf" in the same directory as docker-compose as well. Change port for custom port, and other custom info.

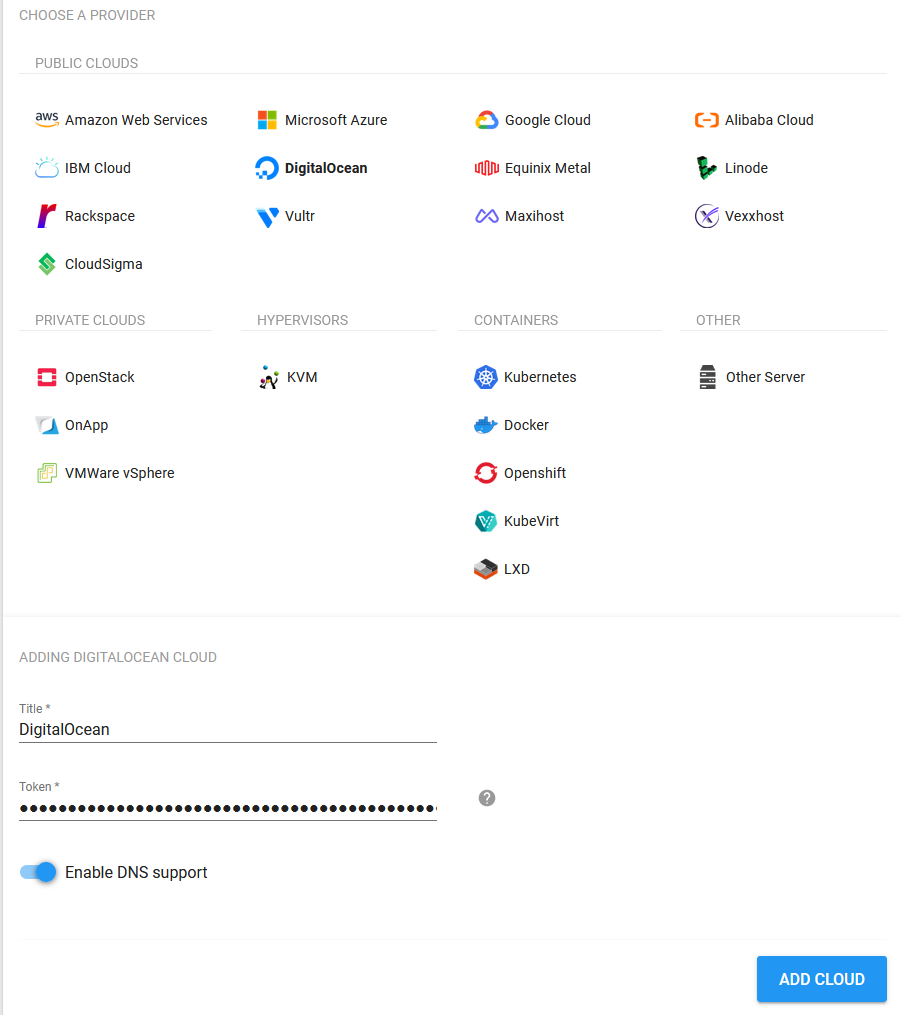
Now we will login to the main screen and setup in this case a Digital Ocean Key for demonstration purposes. While I use this for Azure and AWS, I will not be listing or showing that, but the concepts are all the same and easy to setup your credentials to authenticate to the Cloud providers API.
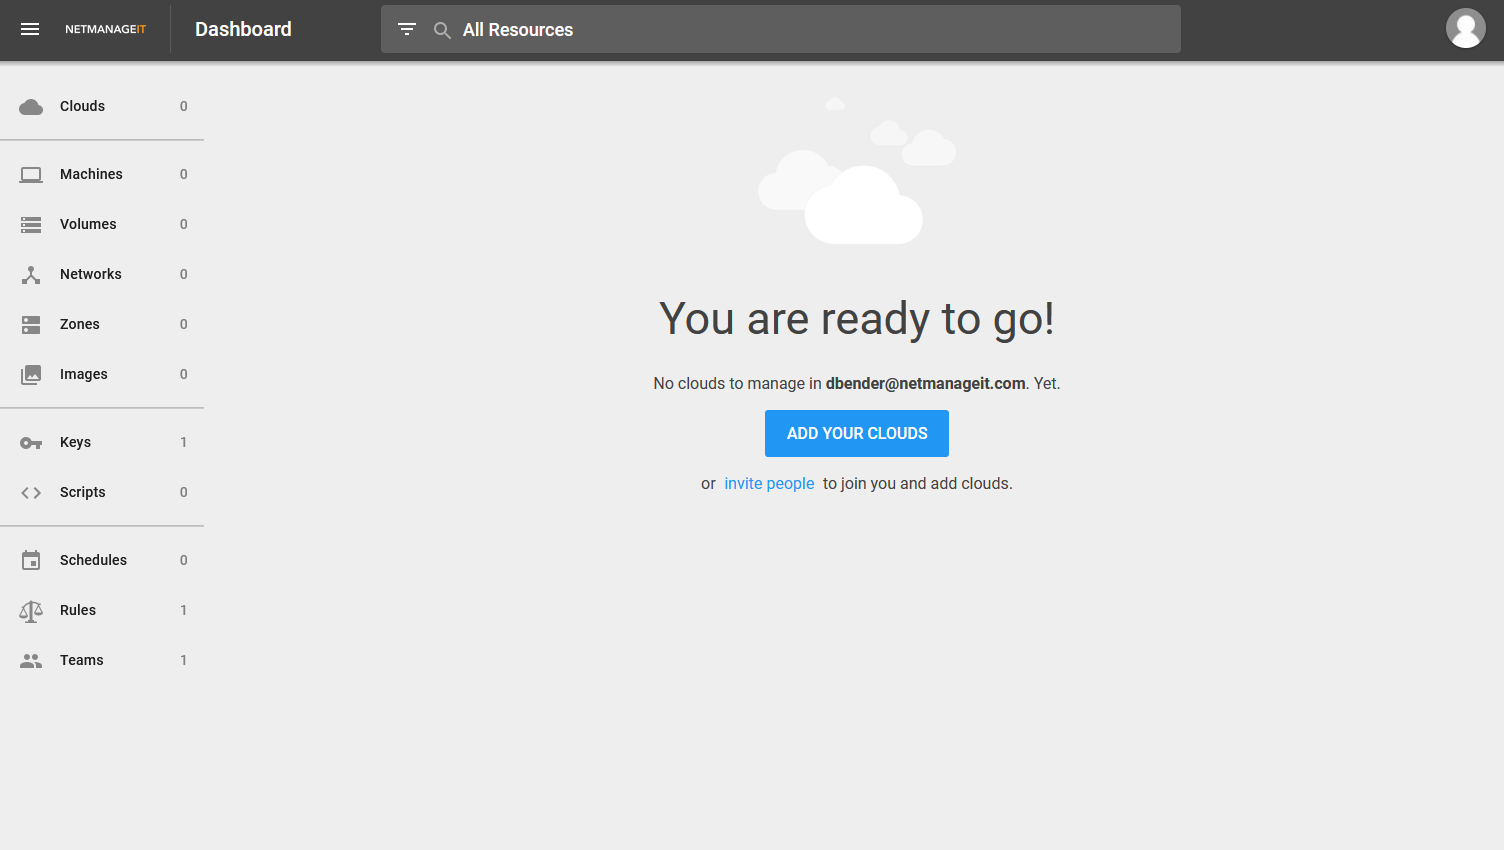
Here we are greeted with a Fresh instance
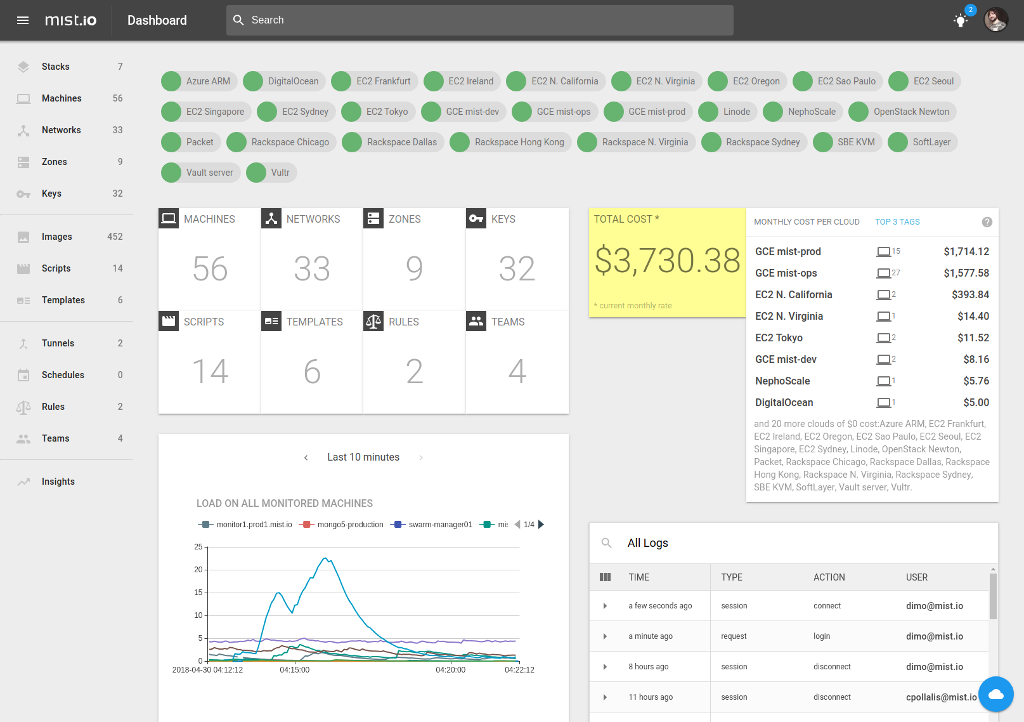
You can see in the screenshot below, how nice it is to be able to integrate with all these different providers and even your local server infrastructure as well! This is nice when you do a lot with multiple providers and different platforms.
Once setup, you can see all VMs, and control them through the API. Start, Stop, Resize and create a new VMs with resource allocation of your choice. Just the same as you would from the Cloud Vendors main admin dashboard all under one single pane of glass.
The other nice thing is, it gives you COST views and tracking, so it can help alert and manage the cost when your dealing with a lot of Cloud resources. Especially important with AWS and Azure, costs can certainly get out of hand if not careful!
Show Below is the types of systems Mist supports.

How cool is that? Mist has covered just about everything you could want!
Configuring Cloud Provider
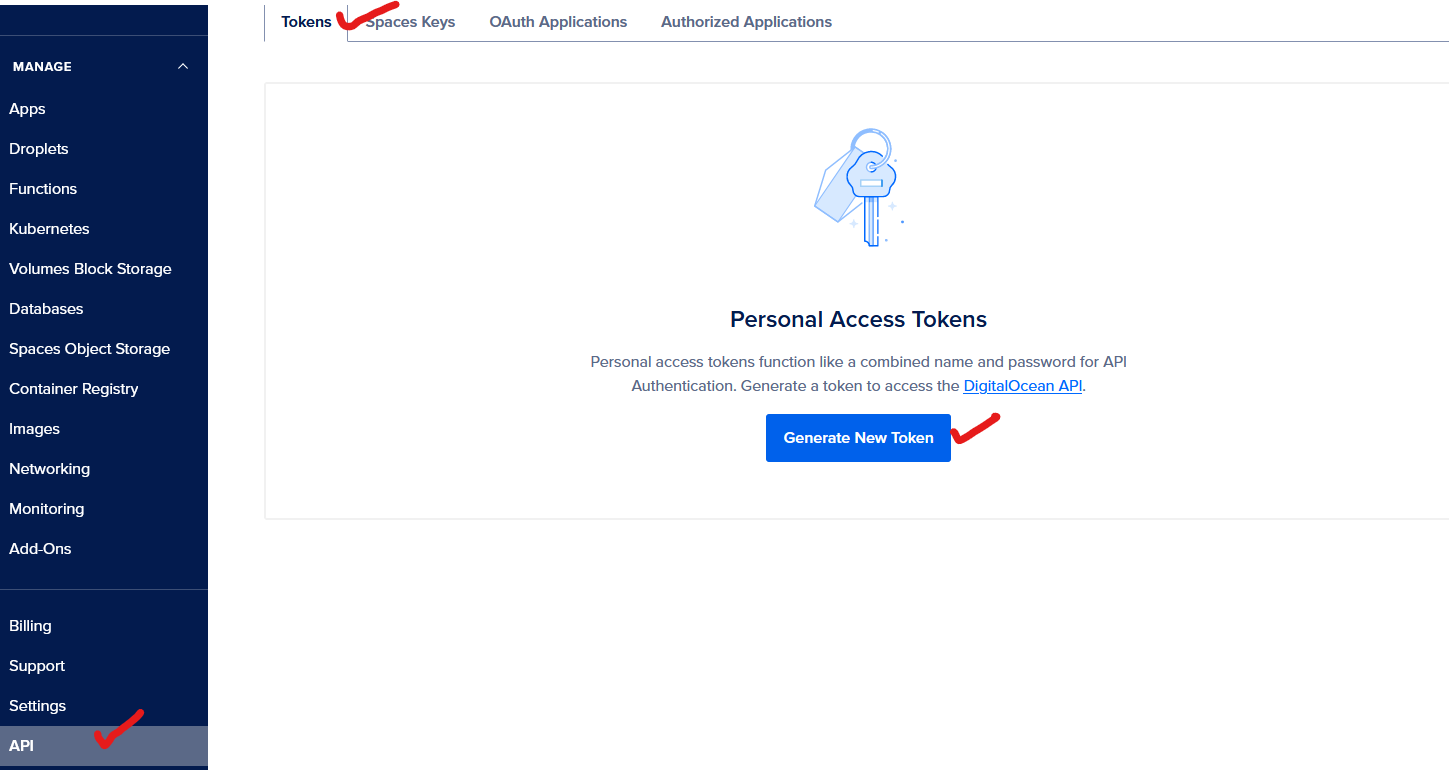
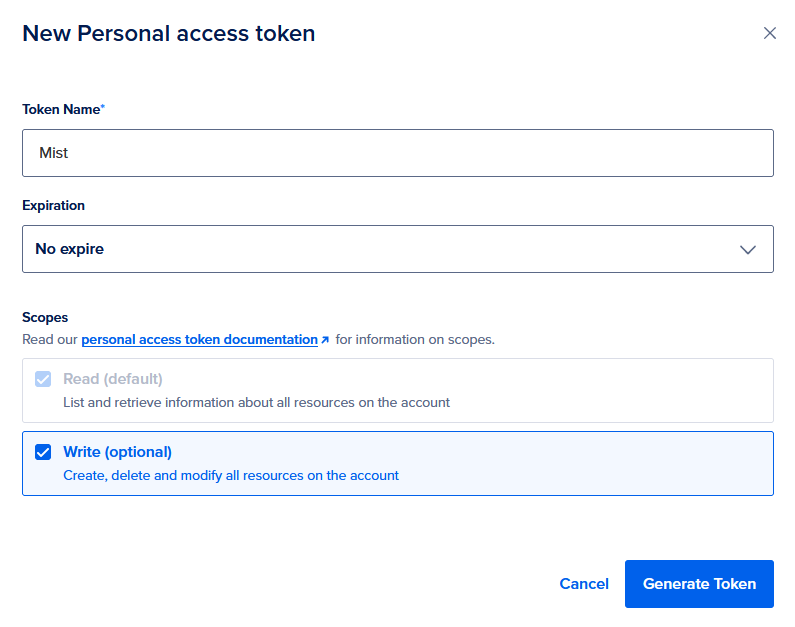
In my demo case I will be using one of the Cloud providers I use for my sub sites and development use. DigitalOcean. So first we need to go create an API key that Mist will use. On the business side we do a lot with Azure and AWS as well, but this is a DigitalOcean demo only.
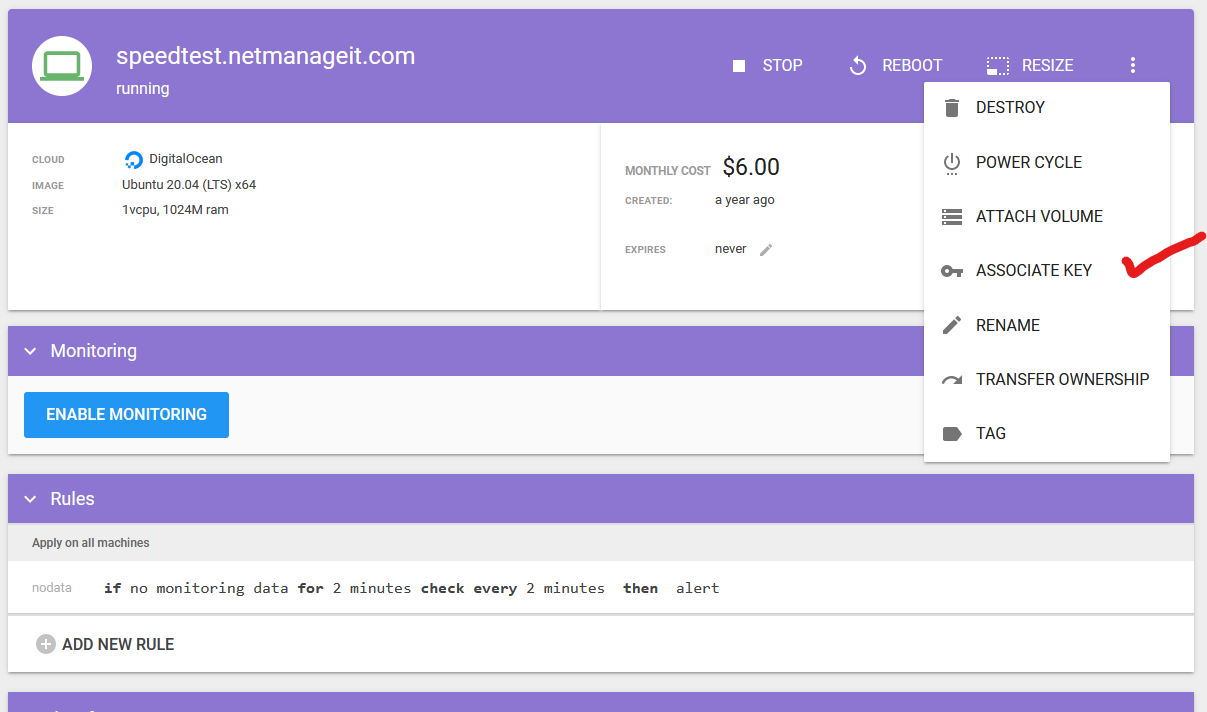
Now we can see existing machines (VM's) on our account, and click down and control them, and assign an SSH access certificate/key for console access right from the Mist Console. As well as enabling the ability to install a Telegraf monitoring agent to ingest live metrics on each VM/VPS instance.
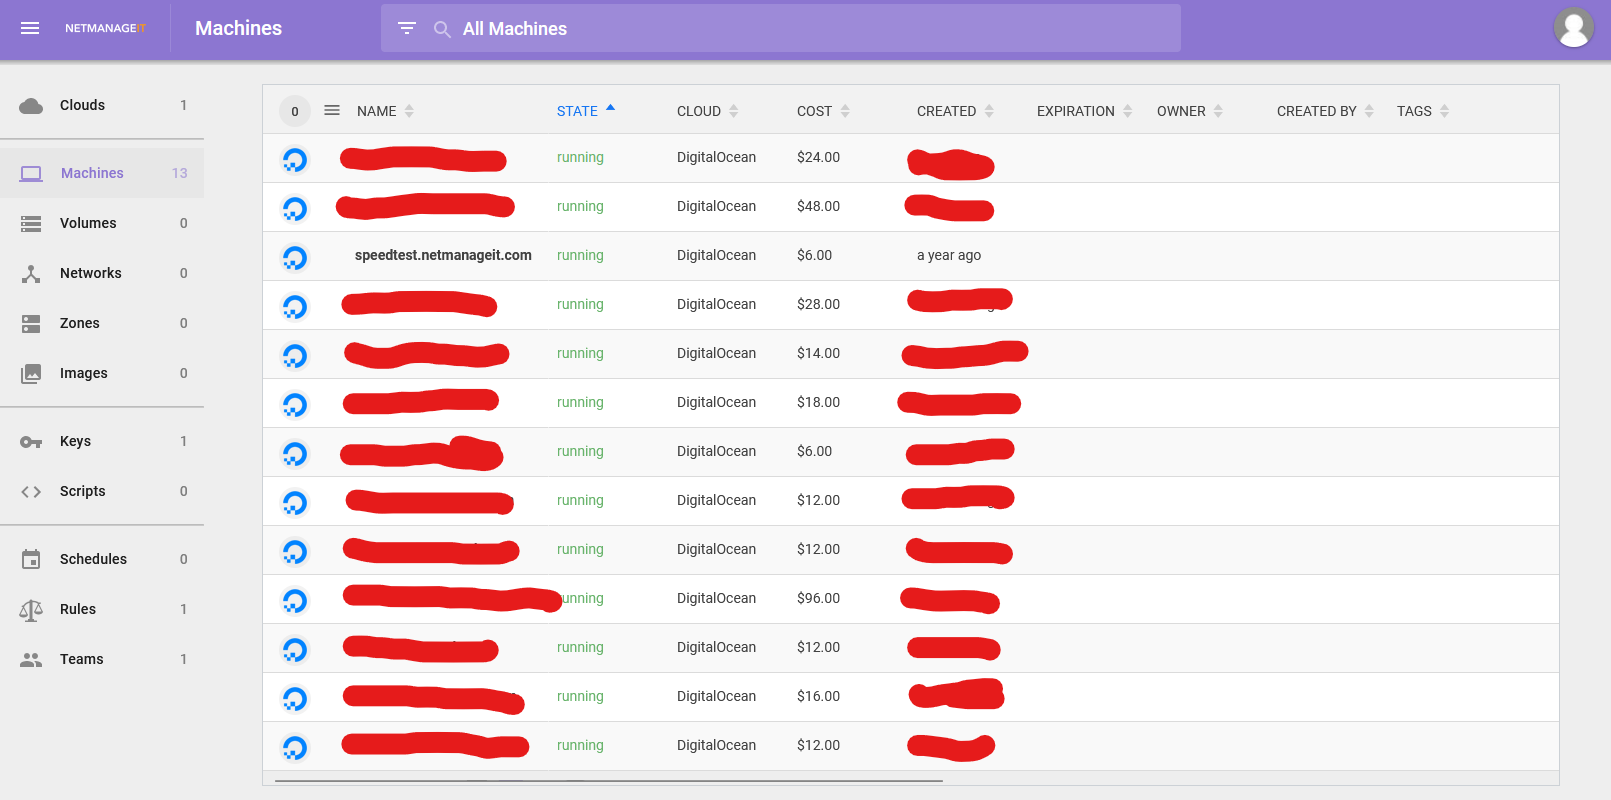
For security sake, I redacted all the other VM's in use, except our example VPS. So I will click on the Speedtest VPS.
Now to get FULL access to each VM, you need to create a Public Cert Key, shown on the left side menu. It will give you a public cert/key you need to copy and paste into your authorized_keys file on your VM's. This typically is in the /root/.ssh folder. You will need to SSH into the VM your traditional way to accomplish this.
For those of you using DigitalOcean and already have VM's you want to add MIST's ssh access key to, you need to do a few extra steps for it to work. Once you add the cert into the authorized_keys file. Run the following, or it will not have the correct permissions to authorize correctly.
chmod 700 ~/.ssh
chmod 600 ~/.ssh/authorized_keys
chmod -R go= ~/.ssh
chown -R $USER:$USER ~/.ssh
Now you can add/associate your SSH key in Mist to the VM(s) you want.
At this point, you can now Enable Monitoring. Which through this VPS/VM access key will automatically provision a Telegraf agent for monitoring for you. It does give you a manual command if that fails.
Note: You need ports open on your firewall for Mist to ingest monitoring data from the VM's directly. In some cases, you might want to use a proxy, see here for more information.
Also if you need to change the Telegraf config manually to force it to work with a custom Mist UI port in some cases. ie. custom port on SSL domain name. You will need to do the following.
Go into /opt/mistio/mist-telegraf/service directory after enabling monitoring and nano/edit "mist-telegraf-env" and change the port to match what you are using on the front end.
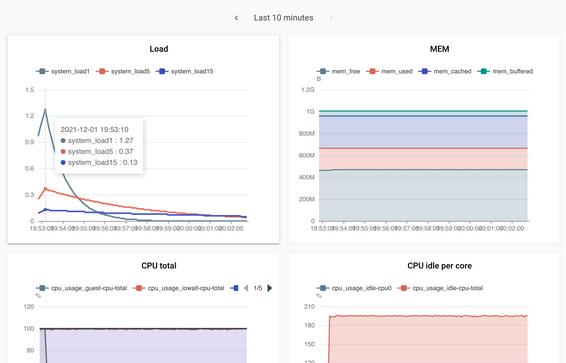
Next I will click on "ENABLE MONITORING" and it will auto install the telegraf agent and we should start seeing metrics come in momentarily.
There is more Mist can do, I just wanted to give a basic overview of Mist. It is a handy platform for those who manage multiple cloud vendor resources in bulk. Where you can manage, create and monitor all cloud resources from one single interface/platform.
For more information, visit Mist CE Github page.
Dan